Camera Gear for Yellowstone National Park A Primer for your First Trip
You could easily spend a lifetime shooting in and around Yellowstone National park, and still not have everything completely figured out. However, mastering any path requires starting down it first, and that’s what this article is about; a start.
What can you expect in this guide?
There’s plenty of people out there with a lot more experience shooting in Yellowstone than I have. However, even with all the reading I did before I went on my first trip there, there were still many things I wasn’t really prepared for or had a real good understanding of. That’s the kind of thing that I’m going to try and cover in this article.
Specifically, my goal is to cover the some of the bigger picture topics around shooting in Yellowstone National Park for the first time. This is things like overall lens requirements and selection, and tips on navigating and planning your days. What I won’t be doing is going into details on locations and specific subjects.
With that said, I always take a moment to point out my focuses and biases, as they will definitely color how and what I’ll be talking about. In the case of shooting in Yellowstone, my primary focus was on wildlife. This means that the majority of my thinking in this article is going to be from that perspective.
Secondly, as with any photographic location, there are always exceptions to the rules and unique occurrences that can’t readily be foreseen. Moreover, as with anything photographic, your own vision and interests as a photographer are going to drive some of your gear choices.
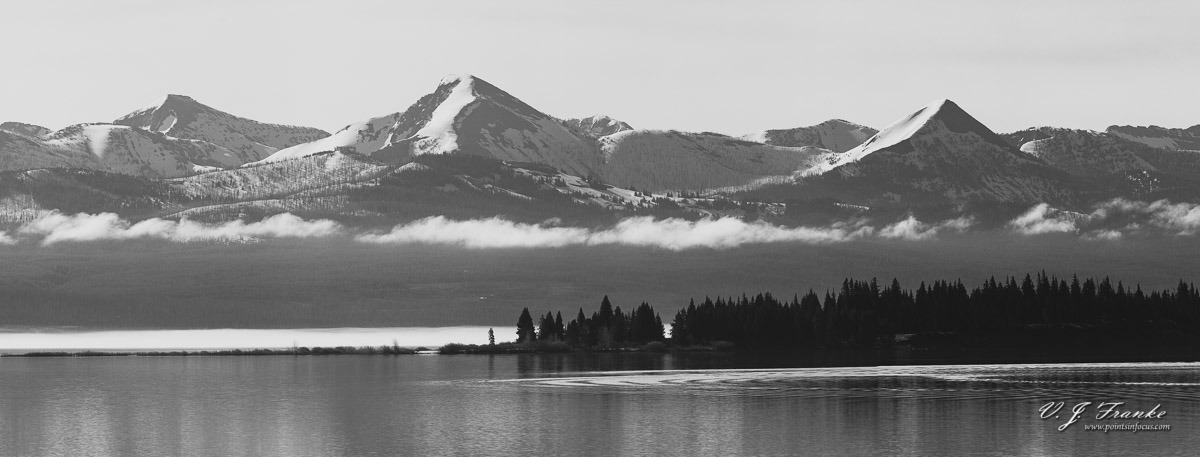
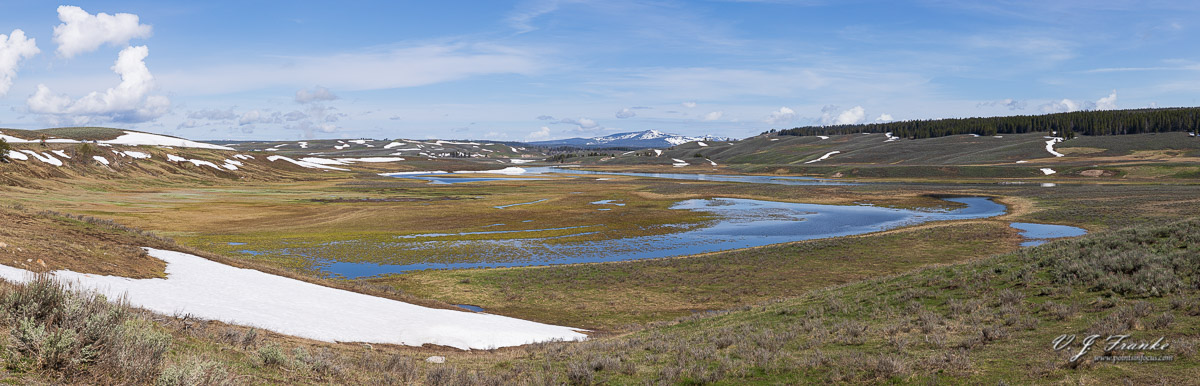
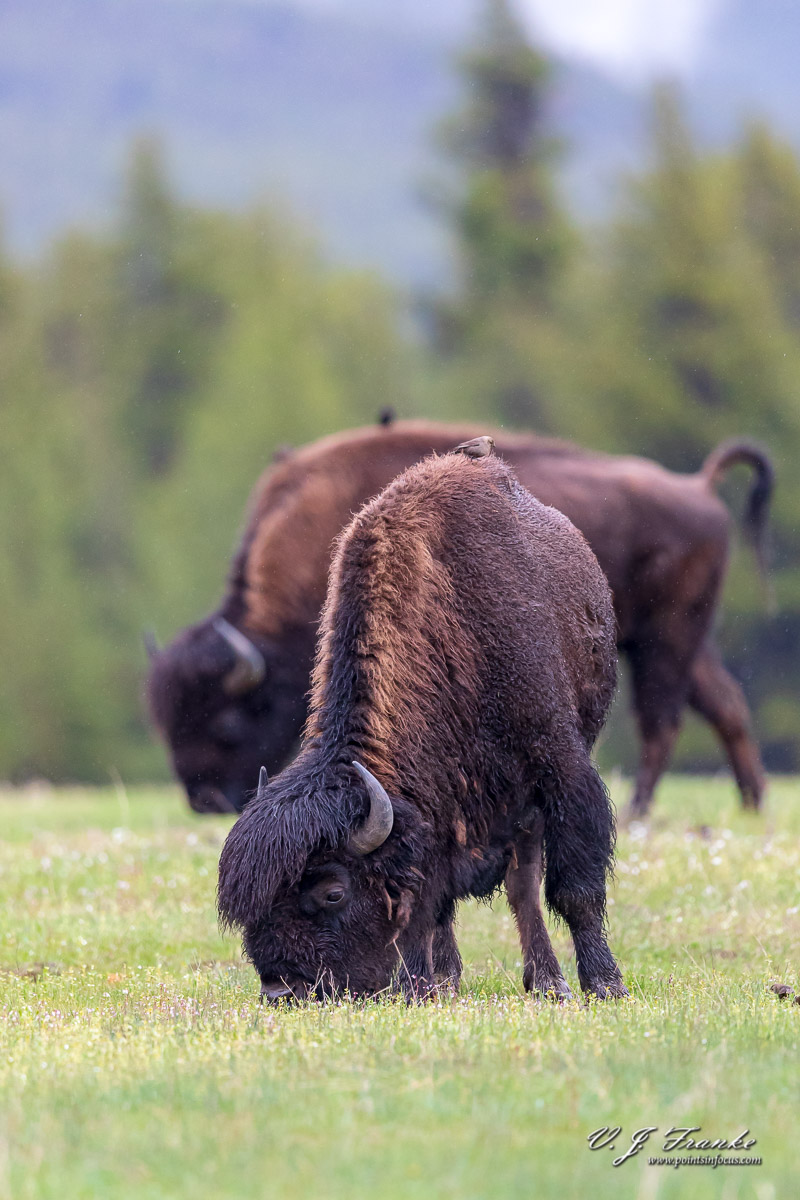
EF 600mm f/4L IS II USM, EOS 5D mark IV
Stitched Pano @ 600 mm, 1/1250, f/5.6, ISO 100
Yellowstone National Park Overview
Yellowstone National Park was protected in 1872. It’s the oldest National Park in the US. In big picture terms, the park is roughly a rectangle around 100 miles along the north-south axis and 85 miles along the east-west axis. It covers land in the states of Montana, Idaho, and Wyoming; with the vast majority of the land being in Wyoming.
Elevations range from 5,282 feet (1,609 meters) along Reese Creek all the way to 11,372 feet (3,466 meters) at the summit of Eagle Peak.
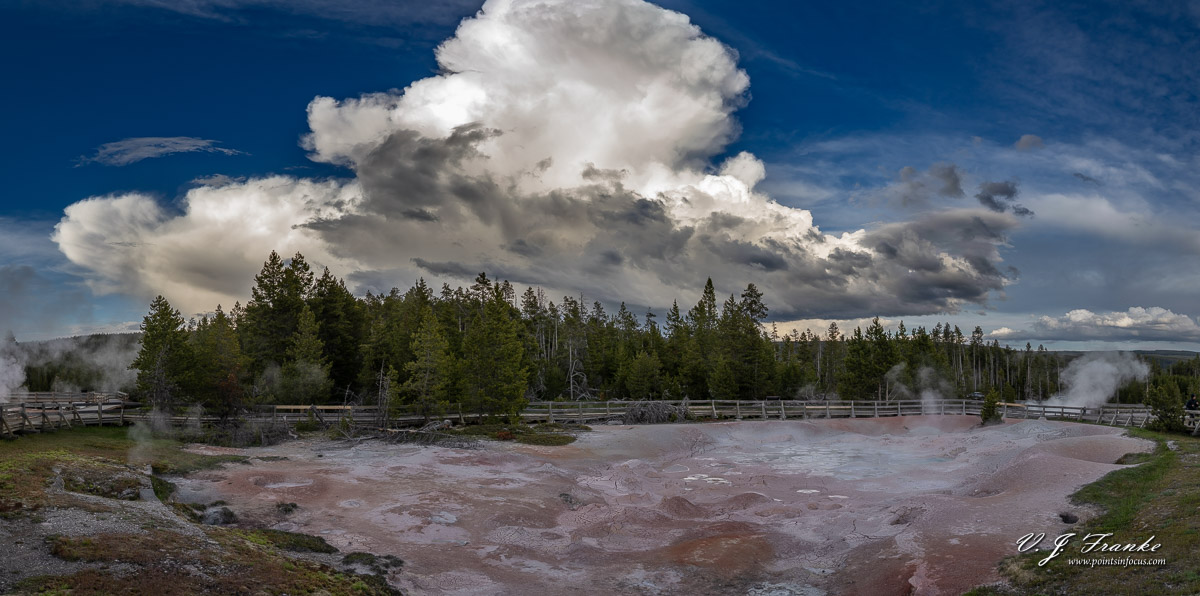
Geologically, Yellowstone National Park sits above the caldera of the Yellowstone Super Volcano. Because of this, the park is dotted with numerous geothermal features. These include geysers, hot springs, and thermal pools. These features are one of the major draws for many visitors, and by far the busiest places in the park.
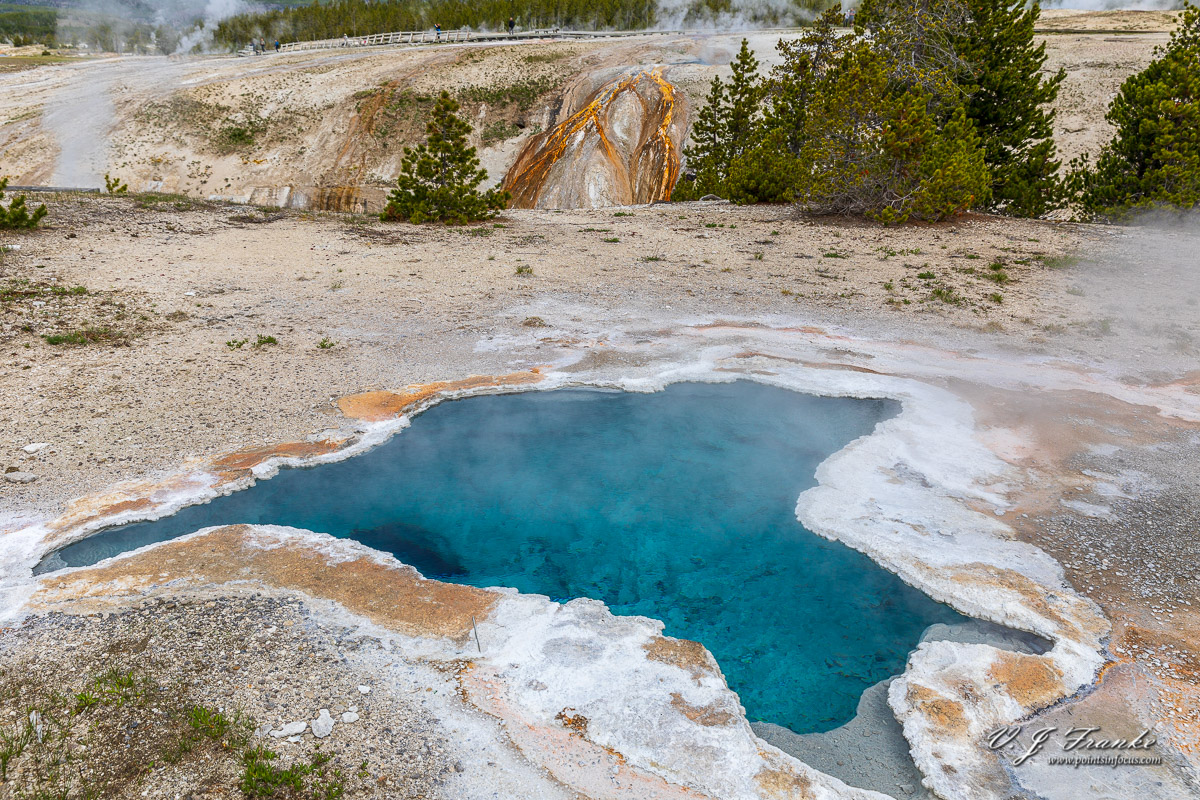
EF 24-70mm f/2.8L II USM, EOS 5D mark IV
30 mm, 1/640, f/5.6, ISO 100
Geysers and hot springs can be found in many places within and beyond the perimeter of the caldera. However, most of the most active and significant features are found grouped in one of the many geyser basins.
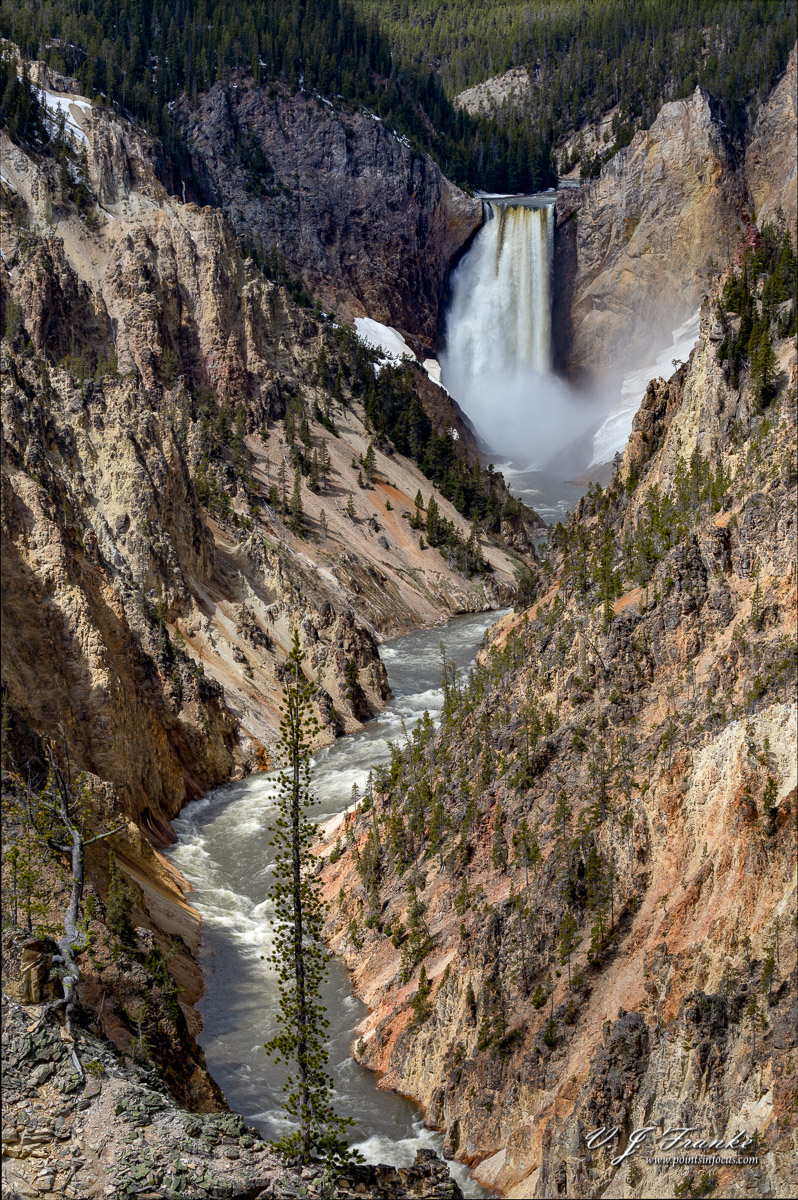
Additionally there are other geological features in the park, such as the Grand Canyon of the Yellowstone, and various reasonably large waterfalls.
The other big draw to Yellowstone is the wildlife. Yellowstone is home to large populations of elk, bison, black and brown bears, and wolves, among countless other species. For me, at least, it’s the wildlife that poses the biggest photographic interest; far more so than the landscapes or the geothermal features.
General Things to Know
The following bits of advice aren’t specifically related to photography, rather they’re bits of information that I learned while I was in the park. None of this stuff is truly critical, but it’s all things I wish I had better understood before I was trying to navigate the park.
Getting Around the Park by Car
Yellowstone is a big place to try to cover, even by car. However, one thing that I found extremely useful, was wrapping my head around the structure of the park’s road system.
The main road in the park is the Grand Loop Road. This is bisected by the Norris Canyon Road, between Norris and Canyon, and has 5 feeders that run to the park boarders/entrance stations.
That said, I found a better way to visualize the parks roads is as if the were the number 8 on a 7-segment LED display, with each place a segment meets being a “settlement” of some sort.
The largest of these towns is Mammoth, in the northwest corner, which is the administrative headquarters of the park and the oldest settlement, as well as the location of the Mammoth Hot Springs Hotel. Going around the Grand Loop Road clockwise from Mammoth are:
- Tower Junction (top right)
- Canyon Village (middle right)
- Lake (bottom right)
- West Thumb (bottom right)
- Old Faithful (bottom left)
- Madison (middle left)
- Norris (middle left)
- Mammoth (top left)
What I found useful for planning my movements around the park was to assume that each of the segments took me about 45 minutes to drive. This isn’t quite true, as the actual drive dimes vary from 20 to 60 minutes. However, it worked out well enough for planning purposes especially if you’re driving along multiple of the segments.
Additionally, based on my experiences, it would strongly behoove you keep a sharp eye on the road when driving. There the potential for very large animals to run across the road, especially at twilight. Keep in mind, that moose and bison can easily weigh as much as some small cars, and elk aren’t that far behind.
Moreover, there are numerous places where rocks can fall on to the road especially after prolonged rains and during the spring melt season. On at least one occasion, the road between Madison and Norris was temporarily closed near Gibbon Falls while the park service cleaned up rocks that had fallen on the road.
Finally, many of the other drivers aren’t paying nearly as much attention as they should be. I was almost the victim of a head-on collision where the driver of a camper came flying around a blind corner going the wrong way in my lane. Additionally, I noticed numerous instances of people speeding excessively for not only the speed limit but the road conditions as well (e.g., going 65+ in a 45 MPH zone on a wet, slippery, steep, windy road with blind curves).
Dinner Considerations
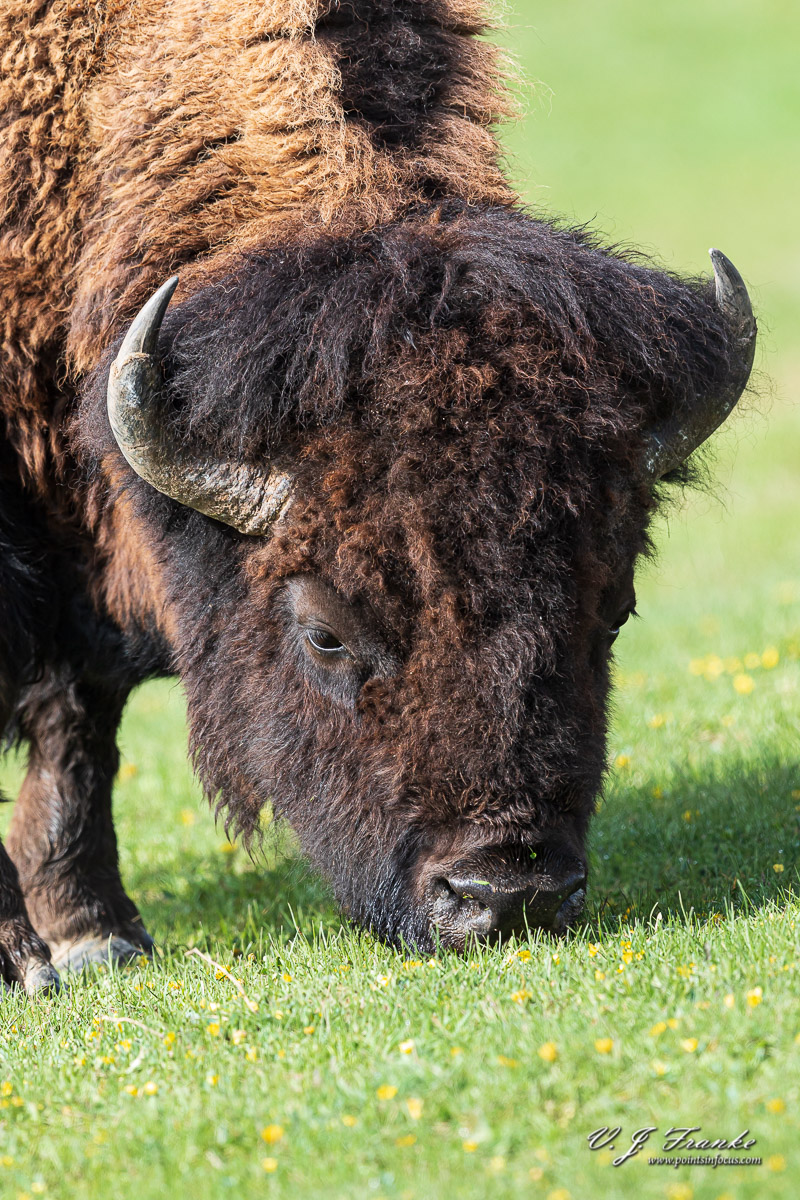
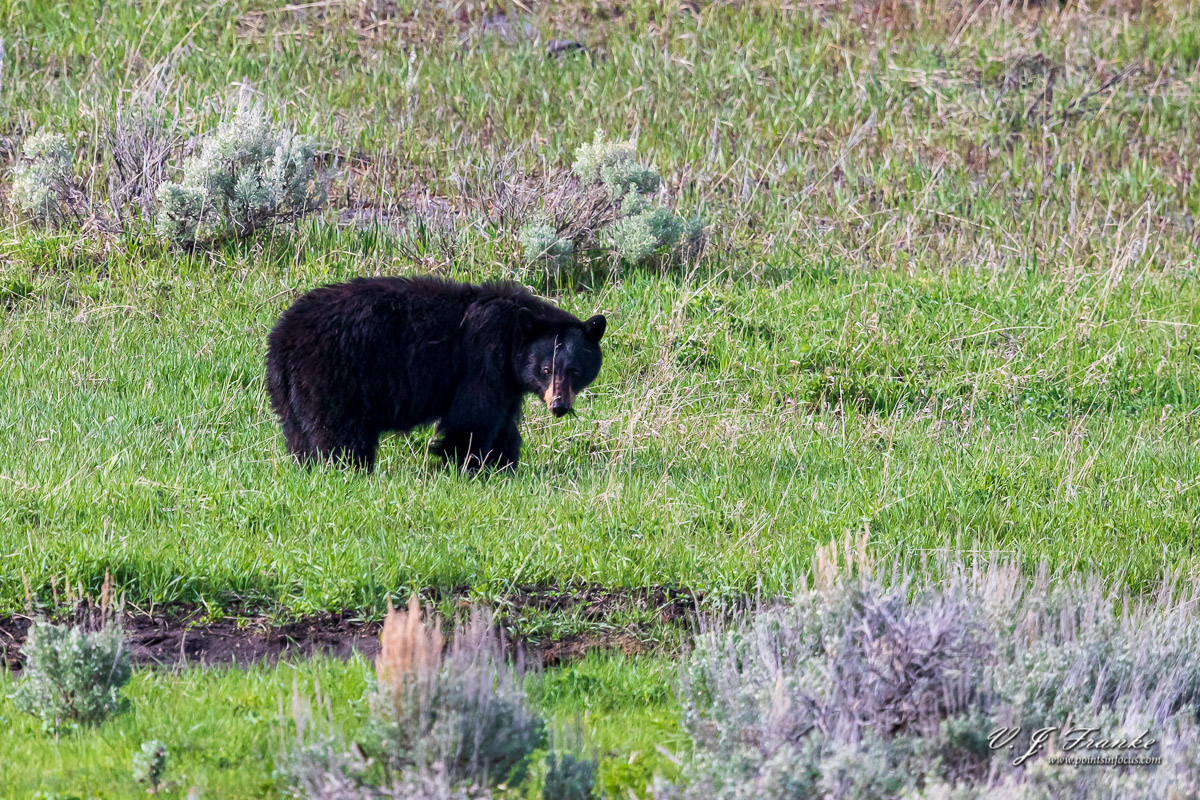
EF 600mm f/4L IS II USM, EOS 5D mark IV
600 mm, 1/1000, f/5.6, ISO 1000
Inside Yellowstone there’s a myriad of dining options. Each of the hotel’s have at least one restaurant option associated with them, and many also have a snack-bar or carry-out type option available as well. In addition, most of the villages have general stores that both sell food, and many have sit down dining options as well.
For example, at the Old Faithful visitor center there are 3 separate hotels: the Old Faithful Inn, the Old Faithful Snow Lodge, and the Old Faithful Lodge, each of which have 2 dining options. In the Inn, there’s the main dining room, and the Bear Paw Deli; in the Lodge, there’s a cafeteria and bakeshop; and in the Snow Lodge, there’s the Geyser Grill and Obsidian Dining Room. Plus the Old Faithful general store also has a small restaurant/grill inside as well.
However, the caveat for all of this is that these restaurants and snack shops close around 9 PM — or earlier, depending on the time of the year. This can pose some practical challenges if you’re a photographer and are off in some far corner of the park during sunset and haven’t thought about what you’re going to do for dinner in advance.
For example, when I was there in mid-May, sunset was around 8:45 PM (though the mountains did tend to limit you usable light, at least for wildlife photograph, well before that). With most dining options closing at 9 PM, you will want to make sure you have some kind of plan for dinner figured out ahead of time; such as stopping and eating earlier, or buying something from one of the general stores.
Responsibility and Safety
Before I go any further, I want to briefly make a comment about being a responsible photographer when shooting in Yellowstone, or really anywhere. I don’t usually like harping on things like this, but I’ve seen some pretty poor, and potentially dangerous, behavior by people in Yellowstone trying to get photographs.
As wildlife photographers, our primary duties are to in sure that our behavior isn’t disturbing the wildlife, and, more importantly, isn’t laying the groundwork for dangerous future animal-human interactions. Unfortunately, this also seems to be something that many people, and occasionally photographers, don’t think or care about.
The regulations that stand in Yellowstone National Park are quoted directly below.
(16) Willfully approaching, remaining, viewing, or engaging in any activity within 100 yards of bears or wolves, or within 25 yards of any other wildlife including nesting birds, or within any distance that disturbs, displaces, or otherwise interferes with the free unimpeded movement of wildlife, or creates or contributes to a potentially hazardous condition or situation. 36 CFR § 1.5 (a)(2)
(17) Failure to remove one’s self to prescribed distances during inadvertent, accidental, casual or surprise encounters with wildlife. 36 CFR § 1.5 (a)(2)
Of course there aren’t park rangers everywhere, nor is the park covered in CCTV surveillance. If you’re going in to the back country, or even if you’re the first to stumble on something along the roads, it’s up to you to behave responsibly.
Subjects and Shooting Them
For me the primary photographic focus in Yellowstone is wildlife. That’s not to say that there aren’t great opportunities for landscapes, but they are, at least for me, a bit more challenging.
As for the wildlife, like always your mileage will vary with the season, time of day, and the specific location in the park. Moreover, many animals migrate both inside the park and across its boundaries.
For example, when I was there in mid-May, there were a lot of bison around the midway geyser basin. However, as the snow melts over the passes to Hayden and Lamar valleys, the bison migrate down into those areas.
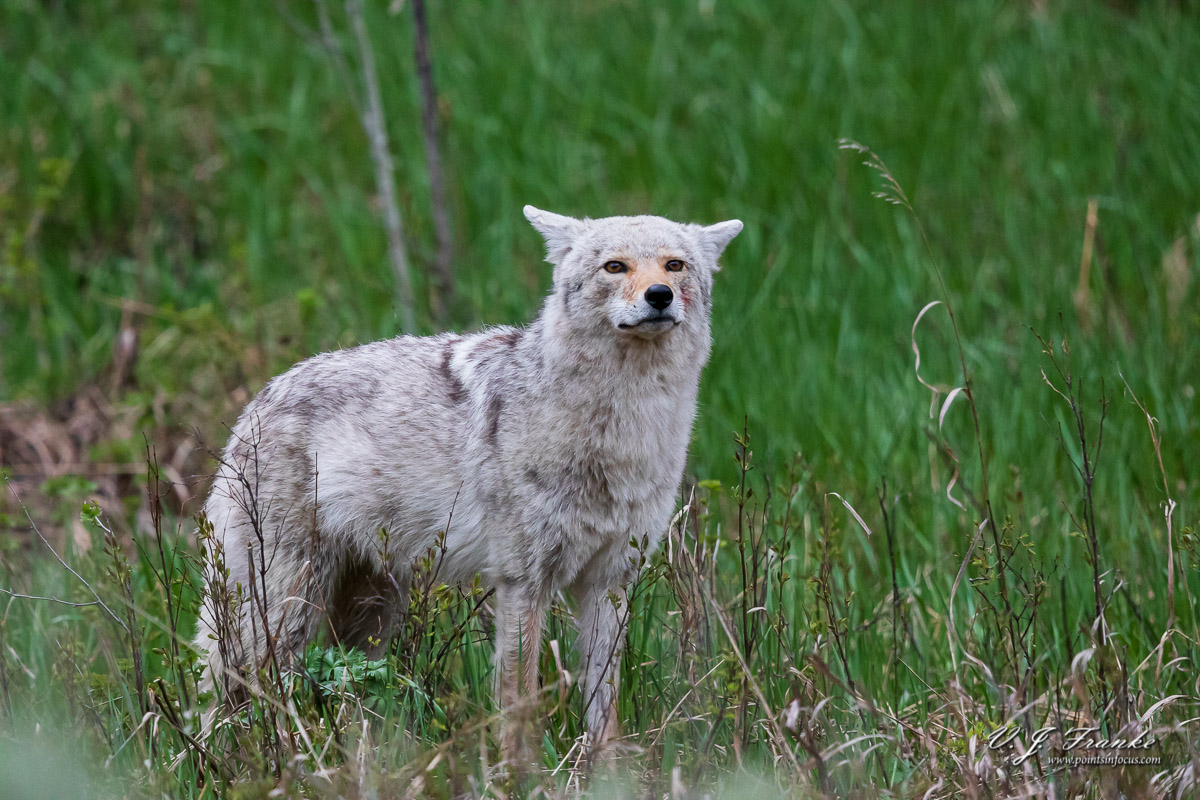
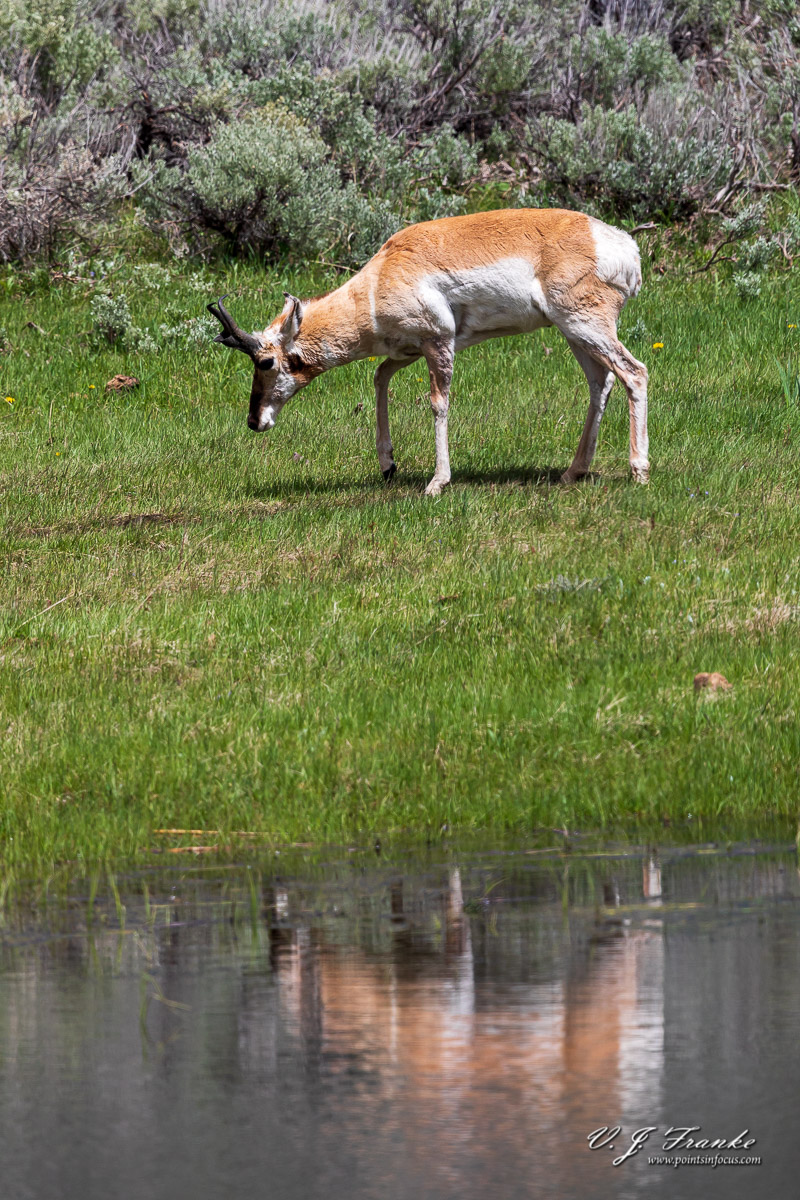
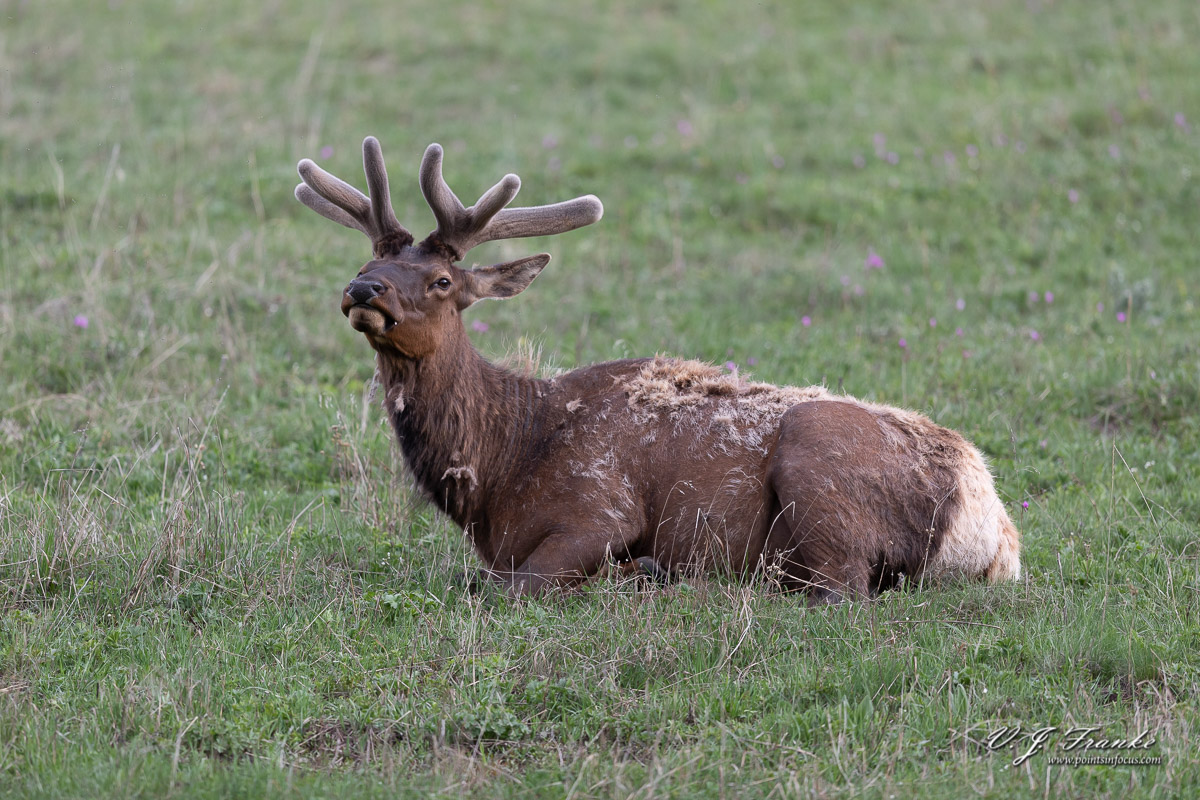
EF 600mm f/4L IS II USM, Extender EF 2x III, EOS 5D mark IV
1200 mm, 1/1000, f/8, ISO 6400
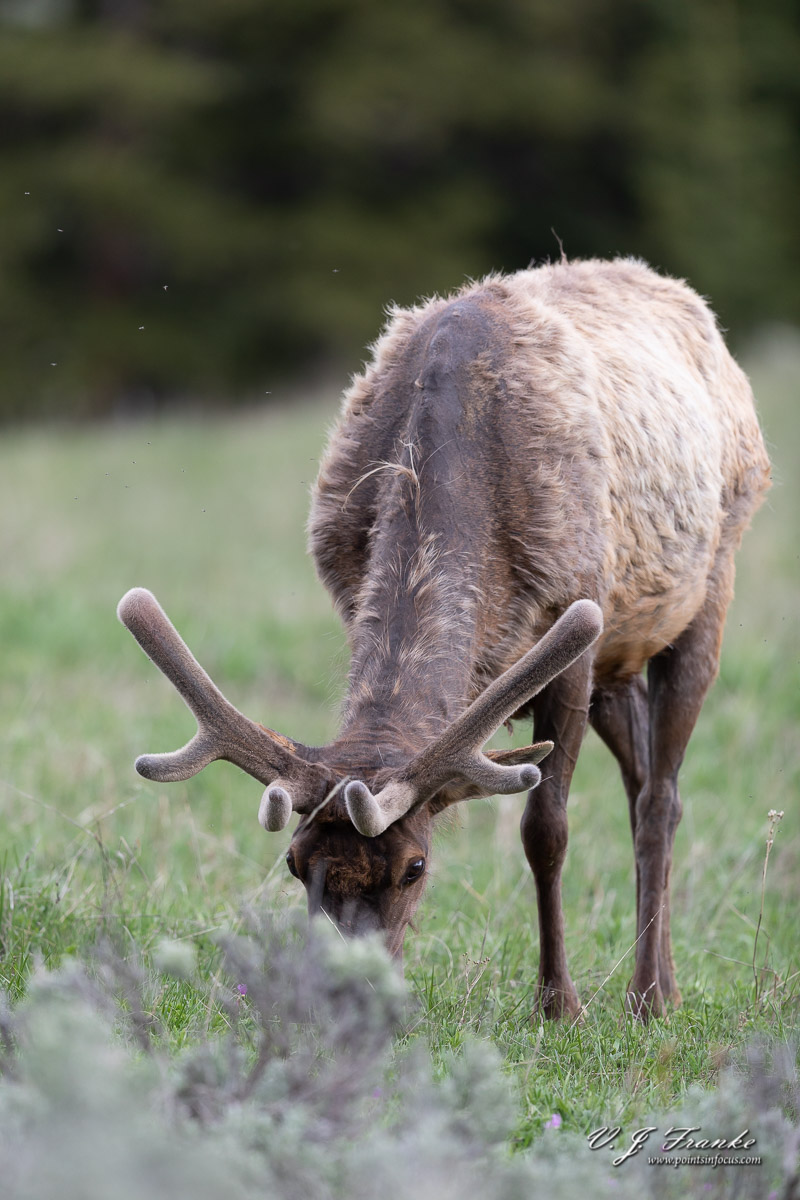
Likewise, large Elk herds migrate into the park from the surrounding areas in the summer months, but wont be there in the early spring yet. While I was there, we saw a few small groups of elk, but nothing real spectacular.
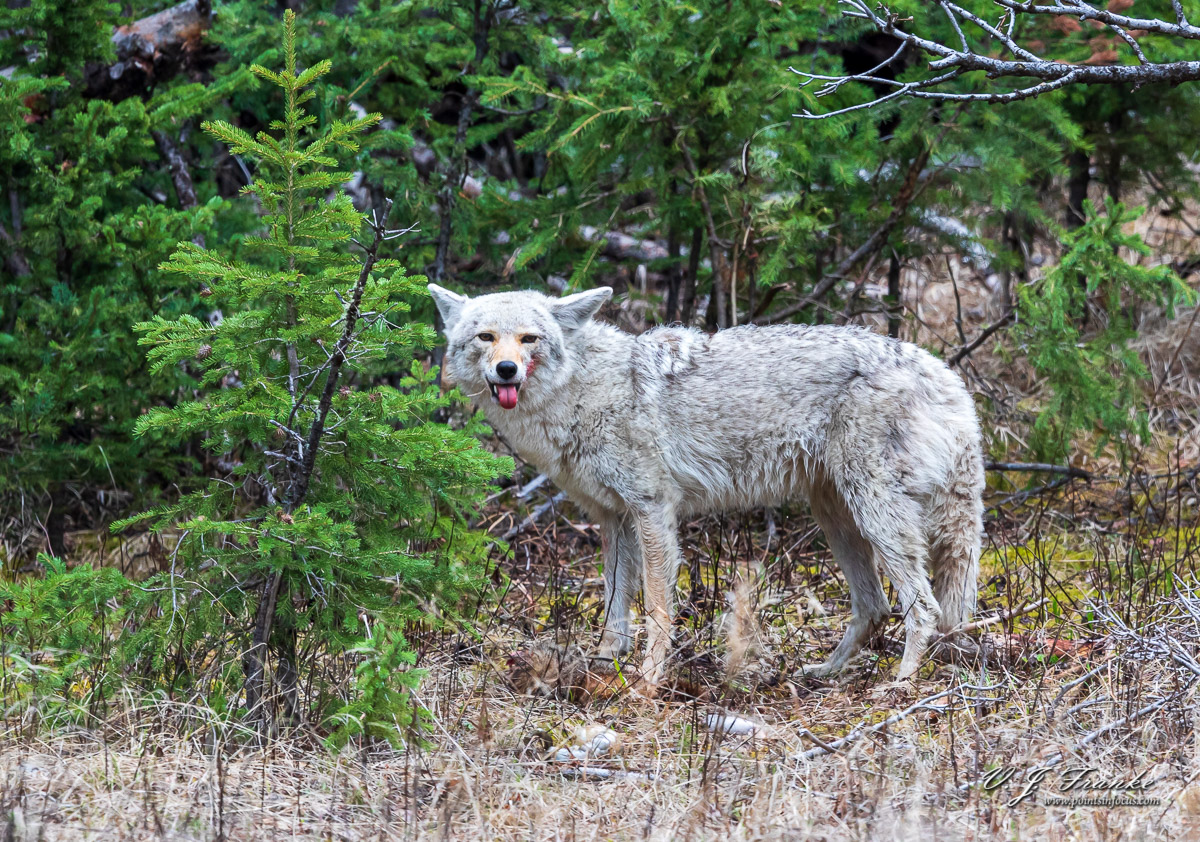
Finally, there are the predators; coyotes, wolves, and bears. Without hiking into the back-country, it’s fairly unlikely that you’ll see wolves, especially close enough to photograph; though it’s not impossible. For canines, you’re far more likely to spot coyotes.
The last, of course, are the bears. Both black and grizzly bears are found in Yellowstone. What you’ll see is going to depend on where you are and what’s active at the time. While I was there in mid-May, I only saw black bears from the roads, and no grizzles at all.
Finally, Yellowstone is home to many species of birds. Tough like most things, many of the bird species found in Yellowstone are migratory, and so the species you’ll be able to view when you’re there will depend on the time of the year. In mid-May, I didn’t find there to be either a tremendous volume or verity of species on hand. I suspect, that it was still too early in the season.
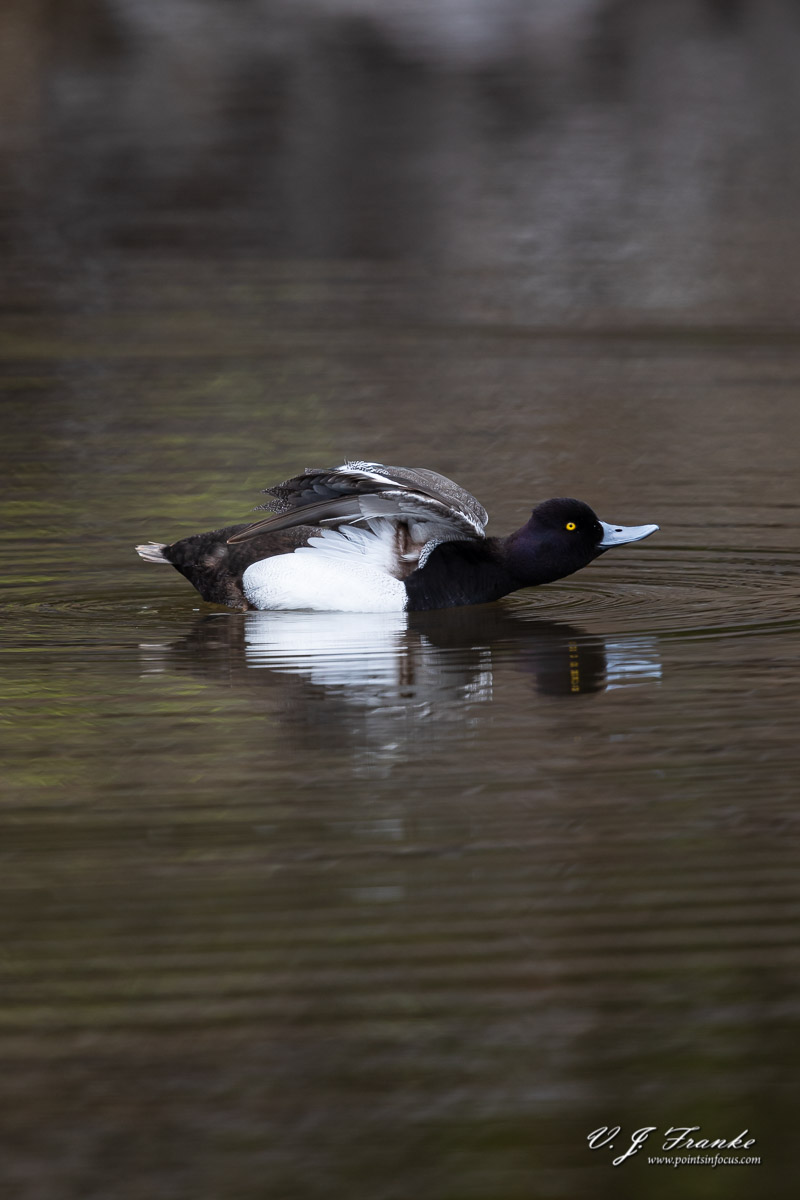
The largest birds I saw in my travels were an Osprey and ravens. Most of the birds were smaller birds that I’ve yet to properly identify. I only saw two species of ducks, a Mallard, and a Lesser Scaup.

EF 600mm f/4L IS II USM, EOS 5D mark IV
600 mm, 1/1000, f/4, ISO 500
With the stage set, I think it’s time to start digging into the meat of this article; the gear.
Weight and Packing
Fundamentally the first question you have to ask yourself is how you intend to experience Yellowstone. Will you be doing all your traveling by car, or do you plan to hike in to the back country on foot.
The answer to this question is critical in determining the compromises that you’ll need to make in your gear selection.
In most of my previous travel related photography articles, I’ve spent a good amount of time arguing for the benefits of minimizing the weight of the gear you’ll be taking. Yellowstone poses a much broader dichotomy in this respect.
If you’re plan in Yellowstone is to spend most of your time shooting from a car, then weight becomes much less of an issue. However, if your plan is to hike the trails and especially overnight in the back country, then weight is obviously going to be a huge concern.
EF 100-400mm f/4.5-5.6L IS II USM, EOS 5D mark IV
100 mm, 1/100, f/16, ISO 100
The challenge is that Yellowstone is an environment that in many ways demands heavy gear, especially if your aim is to photograph the apex predators. As noted previously regulations require you to remain 100 yards away from bears and wolves, and 25 yards away from everything else.
At these distances, it’s very hard to capture compelling images without big glass. On a full frame camera a 600 mm lens is arguably a necessity, and that’s a lot of weight. APS-C and 4/3rds users can gain potentially significant benefits from those platforms due to the smaller sensor’s narrower angle of view.
To put some perspective on this, a typical black bear stands between 28″ and 41″ (70–105 cm) at the shoulder. To get a frame filling composition with a 600 mm lens on a full frame camera, you’d need around 100 feet (30 m) away from it, well within the 100 yards (92 m) requirements.
| Subject | Focal Length | % of frame filled | Subject Distance |
|---|---|---|---|
| Black Bear | 600 mm | 80% | 100 ft. |
| Black Bear | 600 mm | 50% | 167 ft. |
| Brown Bear | 600 mm | 80% | 120 ft. |
| Brown Bear | 600 mm | 50% | 214 ft. |
The table above provides some examples of subject distances to an “average” sized subject, where the subject composes either 50% or 80% of the frame using a 600 mm lens on a full frame camera.
Camera Choices
I’m going to start this out with the same advice I always give when it comes to cameras. The best camera is the one you already know how to use. This is even more applicable when it comes to wildlife photography, where the situation can evolve rapidly. Being able to manipulate your camera to keep up with the dynamics in front and around you, is far more important than fumbling with the controls of a camera that is theoretically better in some respect.
With that said, I’m primarily talking about wildlife photography here, and at relatively long distances at that. Fortunately, most of the mid- and higher-end cameras these days are capable of this kind of task. It’s really only the entry level cameras that will pose serious problems.
In my experience, the dominant attributes in these circumstances are as follows:
- AF System Capabilities
- Frame Rate
- High ISO capabilities
For wildlife photography, I’ve found the most useful aspect of a camera’s AF system has been the ability to focus with small apertures (e.g., f/8 or f/11).
Because of the distances involved, I often need to use a teleconverter on already large telephoto lenses. For example, many of the images I shot were shot with a 2x converter on a 600mm f/4 lens. This nets an aperture of f/8, which many lower tier SLRs won’t be able to focus with. This is especially useful when you start talking about using the smaller more portable telephoto lenses like the 100-400 class zooms with a teleconverter.
EF 600mm f/4L IS II USM, EF 2x III, EOS 5D mark IV
1200 mm, 1/2000, f/8, ISO 640
This is one area where mirrorless cameras would seem to have an advantage, at least on paper. For example, Canon’s DPAF based EOS R cameras can focus with a lens and converter combination as slow as f/11. They should, in theory at least, be able to focus with combinations even slower than that; however, f/11 is the slowest lens and converter combination that can be configured in Canon’s system.
However, in practice the performance of mirrorless AF systems has been far more variable for me. In some circumstances, I’ve seen near dedicated PDAF performance from my 5D mark IV’s DPAF with a 600mm f/4L IS II USM. However, in other circumstances, with other lenses, I’ve seen much worse performance. In short, your mileage will vary depending on the camera and lens your using, and the conditions you’re working in.
The second aspect I noted was frame rate. I see a lot of discussions online about how wildlife photographers supposedly need huge frame rates. In my experience, 10 FPS and higher frame rates can help in some specific situations but in general, lower frame rates in the 6-7 FPS range are adequate for most situations.
My point here, isn’t that more FPS isn’t useful. It’s that you don’t have to stress too much about frame rates as long as your camera can do 5-6 FPS or faster.
Finally, there is the high ISO capability. While Yellowstone has large open meadows, there are a lot of places where you’ll be shooting in under the canopy of tress and in the shadow of mountains. This can be compounded by overcast skies, storm clouds, and morning and afternoon light being on the wrong side of the mountains. Finally, this is further compounded by the subject distances involved, and the frequent need to use a teleconverter for the added reach.
Put simply, it’s very easy to get stuck on the wrong side of the exposure triangle. You need fast shutter speeds to freeze action, and even faster shutter speeds due to the extreme telephoto magnification. However, working against that, is the smaller apertures and limited light. The combination of those two factors tends to push the ISOs up much more than one might expect.
I’ve shot a substantial number of frames in Yellowstone between ISO 6400 and ISO 12,800 while photographing bears, coyotes, and even bison due to the above reasons. While I would have loved to shoot at lower ISOs to get better quality images, the conditions simply didn’t allow for that.
EF 600mm f/4L IS II USM, EF 1.4x III, EOS 5D mark IV
840 mm, 1/125, f/8, ISO 1600
While I’m talking about ISOs, apertures, and exposures, it’s also worth pointing out that the depth of field with a big super telephoto lens can be shockingly shallow, even at long working distances. In many cases, you may find that you’ll want, or need, to stop down to get more of the subject in focus.
This is also a good point for me to reiterate the value of spending the time to understand your camera if you haven’t already done so. I outlined my technique for doing this in my article Testing and Acclimating to a new Camera. By knowing your camera’s limits, you’re much less likely to approach a situation, shoot it, and end up disappointed after the fact because the images are too noisy and unusable.
Mirrorless or DSLR?
Mirrorless cameras are definitely the new hotness, and something that an increasing number of photographers are switching to. These cameras do present some advantages in many situations. For example, they can provide a WYSIWYG preview. This can of course, save a round trip through taking the image and reviewing it, which can be important in dynamic situations.
However, one huge disadvantage of a mirrorless camera is that the camera constantly has to consume battery power to display an image. Most of the time this isn’t a big deal, since you don’t spend a lot of time looking through the viewfinder observing. However, when it comes to wildlife photography, at least for the way I’ve found it best to work, this becomes a real problem.
Ultimately, what it comes down to is that I use my camera and big telephoto lens as a spotting scope to observe the animals while I’m waiting for the moments that I want to capture. I find this preferable to using an actual spotting scope or binoculars, even though the magnification may be compromised, because there’s no delay between seeing the animal do something and taking a picture of it.
With a DSLR, the spotting scope time is free from a battery perspective. Though the camera is asleep, you can still see through the optical viewfinder. Moreover, you can still manually focus most Canon, Nikon, Sigma, and Tamron lenses with the asleep.
However, with a mirrorless camera, because the camera needs to use the sensor and a display to show you what the lens is seeing, it has to continuously consume battery power to do that.
EF 600mm f/4L IS II USM, EOS 5D mark IV
600 mm, 1/1250, f/4, ISO 640
When push comes to shove, this is one type of photography where I find that a mirrorless camera is inferior to an SLR. And ultimately it simply comes down to the power situation and being able to use the camera to observer what you’re shooting for extended time frames.
With all that said, you can do wildlife photography with a mirrorless camera. However, you need to be cognizant of the increased power consumption of viewing through the lens and plan accordingly. This could by bringing extra batteries, investing in a 12V car charger (such as the Canon CBC-E6(Affiliate Link) or a small 12 V inverter(Affiliate Link) , using a battery grip, or even using a much larger battery pack and a DC coupler.
Full Frame or Crop?
For the last few years, it’s been my position that sensor format doesn’t really matter when it comes to making great images. However, when it comes to balancing weight and size, the sensor format can have a huge impact.
Smaller sensors, like APS-C and 4/3rds, have the advantage when it comes being able to use smaller lenses. When compared to full frame, the smaller format sensors will produce a narrower angle of view. Moreover, the smaller sensor doesn’t require the lens to produce as large of an image circle, which can allow elements in the lens to be smaller as well. These factors combined mean that these lenses can be smaller and lighter than what is necessary for a full frame camera.
Ultimately this goes back to that first question, are you working from a car or are you hiking.
Given the conditions in Yellowstone, I found that with a full frame camera a 600 mm lens was almost a necessity. Moreover, I was often adding a 1.4 or 2x teleconverter to that lens just to deal with the distances involved.
Any way you cut it, a 600mm lens is heavy. The Canon EF 600mm f/4L IS III USM, which is incurably light for a 600mm f/4 prime lens, is still a 6.7 pound (3 kg) lens. Even the the 150-600mm zooms are between 4.25 and 6.25 lbs (1.9-2.8 kg), and that’s with substantially slower f/6.3 max apertures.
However, on a APS-C camera you can get the same field of view with a 400 mm lens, and something like a 100-400mm zoom weighs in at around 3.6 lbs (1.5 kg). With 4/3rds cameras, the glass can potentially be even smaller, with a 300mm lens covering the the same angle of view.
All that said, the question always comes up as to what I recommend?
In the general case, I don’t see a real preference here, at least not on the technical side of things. I think the point I’m trying to make is that in most cases, the frame size isn’t going to matter.
However, this comes with one huge but…
If you’re planning on backpacking extensively or camping to reach the locations off the beaten path, you’re going to seriously need to consider weight and that really pushes the scales towards the smaller formats.
One Camera or Two?
The final question I think bears some discussion is whether you should consider having more than one camera with you. In my article Picking the Best Camera Gear for an Alaskan Cruise, I talked about the idea of taking two cameras with you either as a backup or as a secondary body so you could quickly switch between two lenses setups.
To my mind, the principal difference between a backup camera and a secondary body is whether the camera will be used frequently or not. With a backup body, I’m taking the camera simply as insurance in case my primary camera fails. With a secondary body, I want something that’s as capable as or complements my primary camera since I’ll be switching between them frequently.
In the case of shooting Yellowstone, the question largely hinges on what kind of glass you’ll be using for your primary camera. If you’re using a 600mm prime, like I have, then you’ll want a secondary body with something wider angle on it (I used a 100-400mm zoom) to make it easier to adapt when the 600mm isn’t working.
On the other hand, if you’re shooting with a much more flexible lens, such as a 100-400 or a 150-600 zoom, then a secondary body isn’t going to be as important.
That said, if you’re traveling for the photography, and especially if this is a rare or once-in-a-lifetime trip, I would strongly suggest always having a backup body in your bag somewhere.
To sum up the discussion on cameras:
- Format (crop or full frame) matters more if you’re hiking than if you’re working from a car.
- Reasonable frame rates are useful, 6-8 FPS is adequate, 10 is good, more than 10 FPS is well into diminishing returns territory.
- A good AF system capable of operating at f/8, or f/11, is useful to have given the long subject distances and frequent the need for using teleconverters.
- Mirrorless cameras can be a liability if you’re not prepared with sufficient battery capacity to support using them as a spotting scope for extended periods.
- Two bodes can be very useful if you’re shooting with a full frame camera and a large prime lens.
EF 24-70mm f/2.8L II USM, EOS 5D mark IV
Stitched pano 65 mm, 1/250, f/8, ISO 100
Lenses
In some respects I’ve already touched on some of the major points when it comes to lenses. If you’re shooting wildlife in Yellowstone, you’re going to need some significant glass.
For the entire time I was in Yellowstone, an EF 600mm f/4L IS II USM lived on my main camera. In fact, more often than not, either a 1.4x or 2x teleconverter lived in between the lens and camera.
Of course the real question here is what do you really need? Do you really need a $12,000 600mm f/4, or can you do well with something else?
EF 600mm f/4L IS II USM, EF 2x III, EOS 5D mark IV
1200 mm (cropped), 1/2500, f/8, ISO 3200
The answer to this is going to depend on whether you’re shooting with a full frame or crop camera. On a full fame camera, I feel like you really do want a 600. Though, I don’t think it has to be a $12,000 f/4 prime. Some of the modern 150-600mm zooms are definitely good options.
The biggest disadvantage of the 600 mm zooms is the narrow aperture (f/6.3 @ 600mm) coupled with the frequently need use a teleconverter. With a 600 mm f/4 prime, the image quality is high enough to start with, that you still get extremely good images even with an 2x TC. Moreover, the f/4 aperture is fast enough that while you take a pretty substantial hit, at 2-stops, in max aperture you started fast enough that you’ve still got a bit of breathing room when it comes to keeping a fast shutter speed.
On the other hand, the 150-600s are f/6.3 lenses at 600 mm, with a 1.4x TC they’re already at f/9 and a 2x puts them at f/12. While this may not be a problem for some AF systems, such as those in mirrorless cameras, the even smaller aperture poses problems with maintaining high shutter speeds without having to crank the ISO up even further.
If you’re shooting with a crop camera, then you have more flexibility. With a smaller APS-C size sensor, a 400 mm lens gives you the same angle of view as a 600 mm on full frame. I’d still want a teleconverter, though. However, using a 150-600mm zoom on an APS-C format camera would almost completely negate the need for teleconverters.
Nikon crop users may be in the best place of everyone right now. Nikon’s very good 200-500mm f/5.6 zoom gives them great reach and the D500 providing both good IQ and high frame rates. Plus it’s AF system covers a lot of the frame and will work with the 200-500mm f/5.6 even with 1.4x TC (though at f/8 the coverage is quite limited). Honestly, the same could be said for the 500mm f/5.6 PF too.
EF 600mm f/4L IS II USM, EF 2x III, EOS 5D mark IV
1200 mm, 1/400, f/8, ISO 400
The next question might simply be what about shorter glass? For example, a 400 mm lens on full frame or even mid-rage zooms.
Stating with the latter, I would definitely want to have a general purpose zoom with me. There’s a lot of landscape opportunities around Yellowstone, and you’re probably not going to shoot them with a 600.
Additionally depending on the time of year, there are also plenty of opportunities for shots with wildflowers, and other macro scale things. If this kind of photography is of interest to you, then you’re probably already going to carry a macro lens. However, if you’re not a huge macro photographer, and you want to have that option, there are some potential options.
If you’re a Canon shooter, and own the EF 100-400mm f/4.5-5.6L IS II USM you can get nearly 0.5x magnification with a 1.4x TC, and 0.64x magnification with a 2X TC. In my experience, even though it’s not 1:1 magnification, it’s more than adequate for flowers, insects, and the like.
If you’re not a Canon 100-400 mark II owner, then you have some other options. Most 24-70 mm zooms will work well with a 12 or 25 mm extension tube. Moreover, you don’t need to spend top dollar for a first party tube, as there’s no optics in them, so inexpensive ones are more than adequate.
As for using a 100-400 class zoom as a primary lens. I would argue that this will be dependant on the format you’re using, and how tight of a composition you want with your images. On an APS-C or 4/3rds camera, this would be adequate for a primary lens. Especially with a 1.4x TC for when you need to reach out more. On a full frame body I feel like being limited to only 400mm would be too limiting.
- A big telephoto lens, around 600 mm or the equivalent, is almost a necessity.
- There are landscape opportunities, so something in the wide-to-normal range is also good to have
Camera Support (Tripods, Monopods, Beanbags, etc.)
The simple answer to the question of taking a camera support to Yellowstone is: yes.
That said, the question of which kind of camera support is right, is at least a more interesting discussion. Of course, as with anything, the answer to this is going to vary depending on the kind of gear you’re carrying. Big lenses require a different support than smaller ones, and hiking into the back country is going to demand different solutions than working from a car.
Supporting Big Glass
When I was last in Yellowstone, I was carrying at 600mm f/4L IS II USM. This lens weighs in at more than 8.6 pounds. While I found that I could handhold the lens, at least briefly and with concerted effort in doing so, it wasn’t especially practical to do so. Fortunately, I had both a tripod and a monopod with me at the time.
I’m not a huge fan of monopods. More often than not, I find that they get in my way more than they help me, and I’ve never found a really good way to hold them to keep them from rotating and generally being unstable. However, when the alternative was to try and hold more than 10 pounds of camera and lens, a monopod was great to have. While I would definitely favor a tripod, the monopod let me get shots on more than one occasion.
EF 600mm f/4L IS II USM, EOS 5D mark IV
600 mm, 1/1250, f/4, ISO 500
Topping my monopod is an old-school Manfrotto Monopod Tilt head(Affiliate Link) with a Really Right Stuff lever-action quick release clamp mounted to it. In my experience, when shooting on a monopod having this kind of single axis tilt head is extremely useful.
One thing I would note, is that the Manfrotto head has issues keeping a 600mm f/4 from tilting if you’re carrying the whole kit over your shoulder. Something beefier, like the Really Right Stuff MH-01 or MH-02 is vastly better suited to keeping this kind of weight from smacking you in the head when you pick it up.
On mine, I have the RRS clamp oriented so a lens plate will tilt, and a camera plate would roll. To avoid having to readjust the plate constantly, I carry a RRS B2-FABN or an equivalent clamp with me. Clamping the B2-FABN in the jaws of the clamp on the monopod has the effect of rotating the clamping axis by 90° so a camera will tilt instead of roll.
My preferred camera support, however, is a tripod. Mine is a Gitzo GT-3530LS. I’ve used both aluminum and carbon fiber tripods, and my experience is that carbon fiber is vastly superior being lighter, stiffer, and more importantly not nearly as cold to the touch when its cold out.
When it comes to tripod heads, I haven’t invested in really big glass enough to also invest in the more specialized gimbal heads that are best used with them. My go to tripod head right now is a Really Right Stuff BH-55, and it works really well, even when you have a 600mm f/4 on it.
That said, a ballhead is not ideal when it comes to big heavy lenses. The ball will have a strong tendency to want to roll side to side while you’re adjusting tilt, and a heavy lens exaggerates the effect. Since large lenses, can roll in their tripod rings, it’s not necessary for the head to support that axis of motion.
Ideally you’d use a gimbal head, such as the RRS Pano-Gimbal head or a Wimberly Head, or something similar. Barring that, a 2-axis video style head would be a good choice as well, and would be preferable if you shoot any amount of video in general.
Supporting Smaller Glass
If you’re only working with smaller lenses, like 100-400 class zooms, or even 150-600 zooms, then the choice of camera supports is a little simpler. If I’ll be working from a car, I would take both a tripod and a monopod. Moreover, I’d go with the most sturdy ones I owned.

EF 24-70mm f/2.8L II USM, EOS 5D mark IV
47 mm, 1/6, f/22, ISO 50
If you’re going to be hiking a lot, I’d still want a tripod. While you might not need, or use it, for wildlife photography if you’re using a hand-holdable in the 100-400 class, it’s still useful when shooting at the edges of the day. In the hiking case though, I’d go for something that’s light and portable rather than the most sturdy thing I could use. Moreover, many of the modern travel tripods, have a detachable leg that you can use as a monopod, giving you both supports for the cost of one.
When it comes to heads, I would still want a tilt head like the ones listed in the previous section on the monopod. I don’t recommend “monopod” ballheads. I’ve used small ballheads on a monopod before, and I’ve always found them to be more of a hassle than an aid. I find that there’s already so much freedom of movement with the monopod, that you just don’t need the head to be a floppy mess too.
That said, if you’re compromising with a 2-in-1 tripod, especially for weight savings, then a ballhead will be your best all around option.
As for a tripod, with a 100-400 class lens, a ballhead will work just fine and the more expensive 2-axis and gimbal heads aren’t needed. I’ve been shooting this way for years, first with an AcraSwiss Z1 and currently with a Really Right Stuff BH-55. However, smaller, and lighter, ballheads would almost certainly work just as well.
Alternative Supports
One final consideration would be alternative supports, such as beanbags and “window pods”. Given that there are plenty of situations where you might find yourself working from within your car, it’s worth a least a brief comment on these approaches.
Personally, I’ve always had a hard enough time shooting from a car window to not be overly enthusiastic about adding more stuff in the way. While I’m not the smallest guy in the world, with a 600mm f/4 having out driver side window I found I had very little room to comfortably get behind it. Moreover, with anything putting remotely any height under the lens, it would be nearly impossible for me to aim it downwards.
EF 600mm f/4L II USM, EF 1.4x III, EOS 5D mark IV
840 mm, 1/1000, f/5.6, ISO 4000
In some ways, I think it’s maybe telling that all the pictures of Vertex Photography’s site (creators of the “Molar” bean bag), don’t have people in them using it. Or maybe I’m just projecting my own experiences with having a big lens in a car window.
The second consideration with a beanbag is what do you do about the beans?
Unless you’re a local, in which case I doubt you’d be reading this guide anyway, you’re going to have to travel to get to Yellowstone to start with. And this is ultimately where I end up running into problems.
Generally the most viable way to do this kind of thing is to empty your beanbag so it packs flat, and buy cheap dried beans in a store at your destination. When you’re done, you can simply dump the beans, or give them to someone who might want to eat them.
Keep in mind, however, that this is bear country, and dried beans, rice, or seeds, are food sources that the bears can potentially smell and try to get at.
As I said, I’m not a fan of beanbags. However if you are, then one might be worth having. All of the bison images in this article, were shot out the windows of our car, so it’s not like the use case is rare either.
Caring for your Gear
Truth be told, most places you’ll travel there’s not a lot that you have to worry about when it comes to caring for your camera gear. If the place is really dusty, you’ll want to avoid changing lenses without protection (like say doing it in a vehicle or enclosed building) so that you don’t get dust on your sensor, and potentially you’ll want to wipe down your gear at the end of the day to clean off the dust.
Yellowstone poses an additional potential hazard to your gear in the form of volcanically altered water chemistries. Virtually all of the water in the thermal features are either highly acidic or alkaline. While I’m not aware of any real risks to a person for being expose to the dispersed steam from these features, it’s also something you’ll want to be cognizant of with respect to your gear. Even seemingly harmless things can potentially lead to degradation of the coatings on modern lenses, and with the cost of this gear you probably don’t want to risk it.
That said, I don’t want to sound like you ought to be terrified for your gear either.
When I was shooting in active volcanic areas I just followed some simple common sense points.
First, I didn’t change lenses when I was out in the clouds of volcanic steam. This kept anything from potentially getting inside my camera or lens where it would be much harder to clean it out.
Secondly, I tried to avoid walking through huge clouds of steam. I don’t know if this makes much of a difference or not, but they usually smelt like sulfur anyway, and pausing for just a moment would usually be enough to let the cloud blow by.
Finally, at the end of the day, I thoroughly wiped down my gear with a soft cloth that was dampened with clean fresh water. This should have removed any minimal residue that might have gotten on the lens during the day. In fact, wiping down you gear with a slightly damp cloth at the end of the day is a good general maintenance practice regardless of the environment.
Miscellaneous Gear
This brings me to the final point of this discussion, the miscellaneous gear you might want to have in addition to what I’ve already written about.
I’ll start with a rain cover. Yellowstone isn’t known for rain, not like the Pacific Northwest, Southeast Alaska, or Florida are. That said, when it comes to expensive camera gear, regardless of how “weather proof” it’s marketed, I find I want to have a rain cover of some sort. For heavy duty rain protection, I’ve relied on ThinkTank Photo’s Hydrophobia 70-200. It’s durable, heavy duty, and well designed. However, the biggest drawback of the Hydrophobia is that it doesn’t pack down that compactly.
While I still use my Hydrophobia when I expect to be working in the rain for extended periods of time. Over the past year or two, I’ve started carrying a Ruggard RC-FC500B as a “just in case” cover, as it packs down smaller than the Hydrophobia. Looking at Amazon for DLSR rain covers(Affiliate Link) , more and more inexpensive options have come to market in the years since I bought my Hydrophobia. While I can only speak to the two specific products noted above, most of these would probably work fine.
EF 24-70mm f/2.8L II USM, EOS 5D mark IV
24 mm stitched pano, 1/400, f/5, ISO 100
Final Thoughts
One point I want to underscore is that you’re not going to get the National Geographicesque images of bears, wolves, bison and the like in one trip to Yellowstone. For that part, you’re not going to get those images without some serious gear.
However, that doesn’t mean you can’t good images under much more modest conditions.
Yellowstone is a pretty awesome place, and there’s no good reason why you shouldn’t go shoot it even if you aren’t the best equipped photographer in the world. That said, even shooting from the roads, with a moderate telephoto lens, there’s plenty of opportunities to get solid images.
Comments
“I stumbled upon this article while planning my upcoming trip to Yellowstone National Park, and I must say, it’s an absolute gem! The comprehensive guide to camera gear for capturing the breathtaking beauty of Yellowstone is incredibly helpful. The suggestions provided are not only informative but also take into consideration the unique challenges and opportunities the park presents. Thank you for sharing this valuable resource, it has definitely made my gear selection process a whole lot easier. Can’t wait to put my photography skills to the test and capture some amazing moments in Yellowstone! Cheers, Martin Williamson.”