Lightroom 5 Review
I’ve given up on beta testing Lightroom, it’s just not worth the hassle, I’ve also given up trying to get a review out the door on something like Lightroom in anything approaching a timely manner, there’s just too much to cover and too much to sink in and make sense of things. It’s not that it’s hard to figure out how to put the new tools to use, it’s that it’s hard to figure out whether the new tools are really all they’re cracked up to be in the long haul.
Adobe has made a number of improvements to Lightroom 5 over Lightroom 4, but no nearly so many or as impressive as they have been in the past, especially the Lightroom 2 to Lightroom 3 transition. Comparatively speaking Lightroom 5 feels like more of the same with some refinements and a couple of new tools that really feel like they should have been there from the start, or at least from Lightroom 3.
Unfortunately with the good, comes the not so good. I won’t say bad, as I’ve yet to find any really bad things about Lightroom 5, only things that could have been executed much better. There are several places where Adobe has created an inconsistent user experience either by adding a new keyboard shortcuts to one tool that aren’t consistent with others, or be taking over existing keyboard shortcuts for less usable “new” alternatives.
Full Screen Useless Preview
I’ve seen a number of articles talking about the new full screen mode, accessed by pressing F. Pressing F use to rotate you though the 3 full screen modes, the same way pressing F in Photoshop does—hide the title bar, hide the menu bar and task bar, show everything. On a standard Windows desktop, full screen mode freed up a couple of tens of pixels, which could certainly be handy on a small display. On a large display, the difference was largely one of focus.

Lightroom 5 has sadly taken the Full Screen keyboard shortcut and co-opted it into a “Full Screen Preview” mode that, quite honestly, is utterly useless. It’s little more than a full screen Loupe view. Where in previous versions if you were in the develop module and hit F, you had a larger, if only slightly, workspace to use. Now hitting F effectively takes you out of being able to make corrections and into nothing more than a picture viewer.
That’s not to say there’s anything especially wrong with the new Full Screen Preview, except that it took over the old Full Screen mode keyboard shortcuts. Meaning users who are used to hitting F to go full screen and still continue to be able to work on their images now need to unlearn that muscle memory and relearn it with SHIFT+F.
Of course, this wouldn’t be nearly as much of an issue in my opinion if Adobe would allow you to remap keyboard shortcuts to those of your choice. Of course, that is yet another feature that’s missing in action.
Upright
Okay color me impressed. I was entirely skeptical about having an “upright” button that just magically makes me a level shooting photographer. Upright performs a combination of leveling (rotation), and perspective correction (both vertical and horizontal) automatically on an image to render something approaching what someone taking their time and leveling things would get out of just about anything you can throw at it.
On top of that, it does a wonderful job finding a decent balance to images that would be horribly mutilated if corrected to their extremes.
 |
 |
 |
At a minimum Upright promises to be a decent time saver if not a slightly better job. In the following sequence of images, the I spent the better part of 30 minutes trying to get the manually adjusted image adjusted the way I wanted it, and in the end the opening still isn’t quite square. The 3rd image shows what Upright can do in less than a second with one click. I still prefer my symmetry on the rope details on the panels, but that’s something that can certainly be tweaked in manually after the upright tool was used.
 |
 |
 |
All told, what I thought would be at best a minimally useful feature is solidly a handy tool.
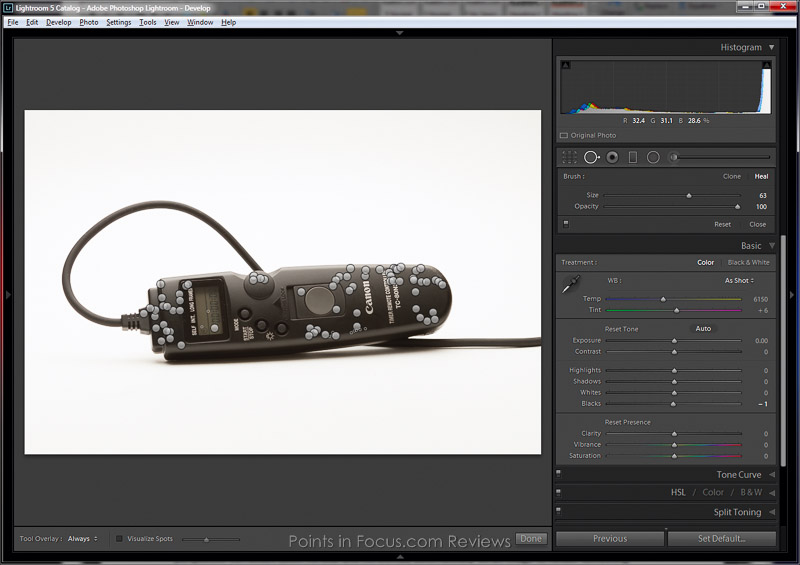
Spot Removal Brush
A spot removal brush that wasn’t constrained to circular spots has long been the wish of Lightroom users, and Lightroom 5 answers that wish. The spot removal tool supports arbitrarily shaped spots with a similar mechanic to the old spot removal tool; draw over the area to be removed and Lightroom will pick a new area to clone or heal in. You can then adjust the positioning of either the source or destination by dragging the respective areas around.
The good news is that for small adjustments the tools feels quite a bit snappier than the old tool did in Lightroom 4. The bad news is that as you paint larger areas that performance seems to fall down. I’ve been playing with it to remove dust and scratches and other arbitrary but cleanly isolated spots that are oddly shaped. It does a good job at that.
The new sport removal brush also introduces a new visualize spots option that looks very similar to the ALT mode for the masking tool in sharpen; the image is reduced to B&W with high contrast edges highlighted as white against the otherwise black image. The visualize spots mode can be activated by hitting the ‘A’ key.
Of course, the change in keyboard controls with ALT and A, is due in part to the new point deletion mechanic. As with previous versions, you can click a pin and hit delete to remove the edit, however, now you can hold ALT, click the pin, and accomplish the same thing. Unfortunately, Adobe didn’t see fit to carry this mechanic to any of the other pin/area editing tools, so you’re still forced to use the old click-and-delete mechanic for the gradient and local adjustment brushes.
Much like its predecessor the performance of the new spot removal brush varies considerably with the pin/area count. With few pins on the image, the tool flies, seemingly much faster than its predecessor did. However, like its predecessor as the pin/area count increases the performance tails off appreciably.
In my worst-case test, by the time I had 100 pins/areas in the image the mouse cursor has begun lagging considerably and adding new pins is tedious and difficult due to the performance. Unfortunately it also seems the spot removal tool is single threaded, as at no time during its operation did Lightroom ever exceed 25% CPU utilization indicating it was only using 1 of my 4 CPU cores.
I can’t say the performance isn’t to be expected though. There’s a considerable difference between what Photoshop is doing editing at the pixel level and what Lightroom is doing editing at the RAW level. The short of it is, while the new spot removal tool is great at removing spots and scratches, it’s still not a substitute for Photoshop when it comes to heavy lifting touching up complex images.
Smart Previews
Smart previews are a new preview type that allows a Lightroom 5 user to work on images without having the source files with them. The intent being that a photographer can work on part of their catalog without having the actual images taking up space on their computer.
A classic use case for this would be a photographer on the road with a laptop and limited space. Using smart previews, they can copy their cards to an external USB disk, then unplug it and continue to make edits to the images even though the source files aren’t available.
On the other hand, if you’re sitting on a desktop, I’m not sure smart previews are going to be especially useful. I’m honestly having a hard time coming up with a good use case for this feature on the desktop—and especially in my workflow—that wouldn’t be done better some other way.
Smart previews can be rendered on import by checking the “Render smart previews” checkbox in “File Handling Pallet”; in the grid via the Library, Render Previews menu; or in develop by clicking the small Original Photo text under the histogram. Smart Previews can be discarded either though the Render Previews menu, or by clicking the Origional Photo + Smart Preview text under the histogram in develop.
New and Updated Features, and Random Changes
Adobe added and updated a number of features that in and of themselves don’t warrant a lot of discussion or are in areas that I don’t use sufficiently enough to provide any significant commentary. Most are certainly nice to have, some are
Radial Gradient Tool
Honestly, there’s not much to be said about this “headline” feature. It’s a radial version of the normal split gradient tool. You can use it to mimic the vignetting tool only with considerably more options for the effect it creates—such as a blur or a color other than black or white.
PNG Support
Lightroom 5 finally supports importing file formats that aren’t traditionally associated with photography, the big one being the Portable Network Graphics format, or PNG. It’s not complete support, as you still can’t export a PNG unless it was imported as one, but it’s a start.
Personally, this is something of a big deal for me, as I use the digital asset management capabilities of Lightroom to manage a lot of the graphical content I’ve created for this site. Unfortunately, many of those graphics have been PNGs to maintain text fidelity and I would be forced to keep them organized outside of the rest of the imagery that went with the article. With the new Lightroom, I can dump them in the library and catalog them with the rest of the images I produced for any given article.
Video Slide Shows
Slideshows in Lightroom 5 now support the inclusion of video clips along with still images. Yep, that’s honestly about all I have to say on that one.
Well not quite, I guess if you were really a glutton for punishment, you could now actually cut together a video in a limited way using nothing but Lightroom’s ability to crop the head and tail of videos and stack them together in the slide show and export the whole thing as a video. Not my idea of a good time though.
Improved Photobook Creation
Lightroom 5 continues to improve the Book module, now with editable templates. This has always been something I’ve wanted to spend some time working with but never have had the opportunity to really put it to use.
The biggest feature Lightroom 5 adds to photo books is the ability to create and customize your own page templates. Adobe/Lightroom is still partnered with blurb for the printing, though you can also generate a PDF or JPEG set for your photobook to send off to another service.
Keyword Entry Using < and >
Adobe was clearly on a kick with Lightroom 5 changing the UI in seemingly random and inconsistent and not always obvious ways. One interesting one I ran into is that they’ve changed the use of the greater-than (>) symbol in keyword entry. In previous versions it pointed towards the parent keyword for a child keyword, now the angle brackets point towards the child.
For example, “Lion > cat” either made two new keywords such that Lion was a child of cat and/or applied the Lion keyword that was a child of cat instead of something else. In Lightroom 5, they’ve reversed the order of the parent and child, such that “Lion > cat” now makes a cat keyword as a child of Lion.
The old behavior still exists, but now you have to use the less-than symbol (<) to start with the child and go to the parent.
To be honest, this is another change that simply befuddles me. I can kind of understand the logic, I think, at least if I squint real hard, but I think they should have kept the old point to parent mechanic and simply added the new direction using the less-than symbol.
Video Support
Adobe made a big deal, relatively speaking, about video support in Lightroom 3, and added their own player in 4. Lightroom 5 adds the ability to slot videos into slide shows but doesn’t really extend the video support in any meaningful way.
Sadly, Adobe hasn’t really done much in the way of making what I consider meaningful improvements to the video system. At a minimum, there’s no way to send a video to an open Premiere Pro project and I think there should be. I’m shooting more and more of what I could best describe as stock video, where it’s not associated with a project or movie and Lightroom makes a great tool to organize and store that kind of video. Unfortunately getting from there to an actual Premiere Project is far more cumbersome than it needs to be.
The issue is compounded, as there’s still no easy way to filter and organize the video and still footage in the import dialog. I can’t specify that video files should be sent to one place and stills to another, or simply get Lightroom to ignore the video files all together and just import the stills. Yes, you can do so manually by changing the sort options and selecting images, but that’s far more cumbersome than it needs or should be.
Bugs
Jeffery Friedl is reporting that there’s a bug in the Library grid in conjunction with the publish module where the grid improperly shows selected images resulting in the potential to delete or alter images that you aren’t intending to affect.
I haven’t seen this one yet, at least not in my limited testing.
Additionally Lightroom 4 introduced a bug where it decremented image RGB values by 1 if a watermark was applied. I reported this back in August of 2012 under Lightroom 4.1, and again in Lightroom 4.2RC. You can find the bug report here and my article on the issue detailing the issue with examples here.
Sadly, while Adobe acknowledged the issue with my bug report they apparently don’t think 100% accurate rendering of colors is worth fixing, as the issue still exists in Lightroom 5. We’ve gone through 4 or 5 iterations of bug fixes and something as fundamental as properly rendering colors still isn’t worth working into fixing. Even more amusing is that it worked in Lightroom 3 so they actually had to break something along the way that was working.
The new Upright tools is certainly nice, but I’ve run into a bug with it where running upright on an image will not adhere to the “Constrain Crop” checkbox, placing a white border around the image that you have to manually crop out. I have no idea what the trigger is, as it only occurs occasionally and in some cases can even revert to proper operation by cropping then enabling the setting.
Performance & Stability
One of the key features Adobe is touting with Lightroom 5 is performance, and they’ve delivered. Lightroom 5 is considerably snappier, or at least it feels that way. The program seems to load faster, and generally be more responsive. Not everything, mind you, making whole image adjustments in develop with the sliders feels just about the same as it did in Lightroom 4. However, there are certainly places where it feels much more responsive than it did previously, for example, the new spot removal brush.
Unfortunately, stability doesn’t seem to be improved all that much, if at all. In my limited use, stability has been on par with Lightroom 4.4, which is to say Lightroom has crashed on me a couple of times and for no apparent reason. I’ve also had hang at least a couple of times while working on an image in develop, again with no obvious reason or explanation. Fortunately, it’s not been any worse than it was in Lightroom 4, but it still crashes and hangs far more than I think it should.
Conclusions
There are a number of places in Lightroom 5 where I simply am left scratching my head at what Adobe is doing. They’ve repeatedly moved keyboard shortcuts around and introduced new keyboard shortcuts that don’t seem mesh well with existing methodologies. The full screen preview, which is, at least for me, largely useless, has taken over what use to be the hot key that used to do full screen that you could work in.
I would say the same about the Visualize spots and spot/pin deletion in the spot removal tool. Most Lightroom tools that have an alternative view, like sharpen and masking, allow you to access it by holding the alt/option key and the view changes. In the sport removal tool, holding alt allows you to delete points, and you have to hit A to toggle the visualization mode. I think it would have been more in line with the rest of the UI to expose the visualization mode though both holding alt/option or pressing A and make the deletion of points happen when holding control/command.
All told, I find I’m more ambivalent to Lightroom 5 than any previous release. The performance improvements are nice, as are the upright and radial gradient tools. The new spot healing brush is also nice, but it’s no substitute for Photoshop on anything approaching heavy or complex touch ups. The other new features I’m largely ambivalent too; I’m glad Adobe has improved them, but I haven’t used any of them enough, now or in the past, to be able to effectively comment on them.
So perhaps the question is should you upgrade to Lightroom 5 from Lightroom 4?
This is something I’m having a hard time answering. There are enough improvements that it’s definitely “better” than Lightroom 4. On the other hand, there isn’t so much in terms of improvements that I think it’s necessary to run out and buy it as a must have right now day one upgrade. Sadly, I think this kind of thing is going to be par for the course from now on.