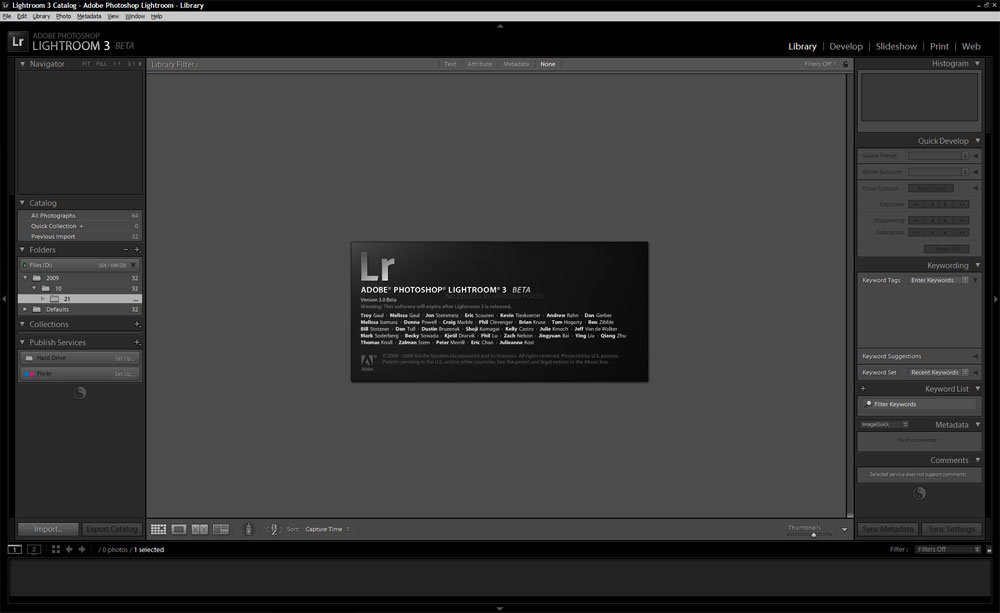
Lightroom 3 Beta
I finally have Lightroom 3 installed and I’ve made a cursory run though the software. So this is the first look at what’s new, what works, and what’s broken right now. Some things look quite good, other are broken.
The biggest problem I’ve seen so far is that importing appears to be majorly broken. Imports though the Import dialog, especially those that require copying files from a media card, choke immediately. In fact the only way I’ve been able to get files into Lightroom 3 is though the folder synchronization and Import -> Add methods. Neither of which are always successful.
Update 2009/11/14: The Import bug that breaks imports has to do specifically with renaming files. If you import and do not rename Lightroom 3 beta has no problem Importing images from cards.
Lightroom 3 Beta is beta software, this means it’s intended for testing and not complete. This release is very rough around the edges, far more so than Lightroom 2 felt when it was released as a public beta. I would not try and use this for anything but testing, in fact some issues in the beta make even that difficult.
Installation, Preferences and First Look
First, Lightroom 3 beta installs along side of Lightroom 2, so you don’t have to worry about Lightroom 3 replacing your production software. In fact, that would be very bad, since LR3 isn’t nearly as feature complete as I seem to remember LR2 being when it was first released to public beta.
LR3 is, however, smart enough to pick up your preferences from your existing install, if you have one. This mean that the first time in LR3 had picked up my metadata and development presets. My development defaults may also have been picked up, but I can’t tell for sure since the importing seems to be flaky at best and partially broken at worst.
Speaking of importing, the Import dialog is one of the largest and most obvious changes in Lightroom 3 Beta. I’m not sure yet, if it’s a positive change or not, but it does expose a lot more options in terms of naming imported files and directing them to where you want them.
The New Import Dialog
Like Lightroom 2, the Import dialog has 2 modes a compact mode and an expanded mode that shows previews. The compact mode also simplifies many of the naming and sub-folder organizational options and presents things in a slightly more clean interface.
Touring The Compact Import Dialog

Starting in the upper left corner is the import source. In this case it’s showing my compact flash card reader and it defaults there if there is a card in it. If a media reader isn’t available, the default source appears to be pointed to a local hard drive instead. Mousing over the import source will highlight it and rotate the arrow to point down. Clicking brings up a menu allowing you to select another source from a favorites list and recently used sources.
Moving to the right following the arrow, we have the “action” area. This is where you tell Lightroom what it should do with the files it finds in the import source. In Lightroom 2 this was the drop down menu at the top of the import dialog. The options are:
- Copy as DNG – copy the file from the source and convert it to Adobe’s open RAW format DNG
- Copy – copy the file from the source and leave it in the camera makers proprietary RAW format
- Move – moves the files from the source to the destination, deleting them from the source location
- Add – adds the files to the catalog while leaving them right where they are on the disk.
The import dialog only presents you with the options that make the most sense with one apparent caveat. In the case of flash media, the move and add options are disabled to prevent you from adding files to the catalog that persist on your computer. The odd one is moving from a media card, you can’t apparently do that and that would seem to offer a way to clear the card for it’s next use.
Finally the last part simply tells you where the files are headed. If you have Copy as DNG, Copy or Move selected you can click on the destination side and change where things will go. If you have Add selected, it will read My Catalog and nothing will happen as the files wont be moved anyway.
Across the bottom we have the some more options. The first two icons, on the left, toggle what the bottom half will display. The ‘i’ with the circle around it will show information about file handling, renaming and what metadata will be applied. The preference icon below it will let you change those settings. The metadata preset and keywords fields work the same as they did in the LR2 import dialog.
The dark area on the bottom that reads Preset and none is where you can select the develop preset that will be applied to the image after import.
The last area in the small dialog is the where you can control how the images will be placed on the target drive. As of yet, I’m still having problems getting an import form a flash card to work so I’m still at a bit of a loss as to what they do exactly. I assume that organize does what it did in Lightroom 2 offering “By Date”, “Original Folders” and “Into one Folder” options. Date Format, which is only visible when “Organize” is set to “By Date” appears to be the date options split out of the Organize field in LR2.
Expanding the Import Dialog
Clicking the square down arrow button in the lower left corner expands the small dialog into the large dialog shown above

The expanded form offers a lot more options. For starters the left column shows all possible sources on the current computer, including mapped network drives. They can be expanded in a tree style allowing the selection of one or more folders.
The center is obviously where the thumbnails are displayed. Some new eye-candy Lightroom 3 adds is to how it displays checked and unchecked files. Unlike in LR2 where you had to rely on the just a thin border around the selected images and the check box, Lightroom 3 now ads a vignette to the unselected images making it readily obvious that they aren’t selected with even a quick glance.
Lightroom 3 has apparently removed the the ability to check or un-check groups by date. However, the new dialog offers a loupe view mode and the ability to sort thumbnails by date, checked state and file name as a consolation prize.
Right clicking on a thumbnail gives you the option of Importing the file strait away or opening it in a Finder/Explorer window.
Along the right side, we have the advanced file handling options. Many of these were in LR 2, some are new. The top pallet gives control over preview sizes, duplicate exclusion and backing up files to a second drive.
The second pallet down controls how the files get renamed on import. New to LR3 is the ability to add a shoot name to your naming sequence. The Shoot name appears to behave just like a second custom text field.
The Apply During Import pallet,handles the attachment of keywords and metadata and a development preset. The final, Destination pallet allows you to select the destination for the files if they are being moved or copies.
The Library Module
The library module should be very familiar to Lightroom 2 users. Unlike the transition from LR1 to LR2, the changes this time are relatively minor, other than the new things added.
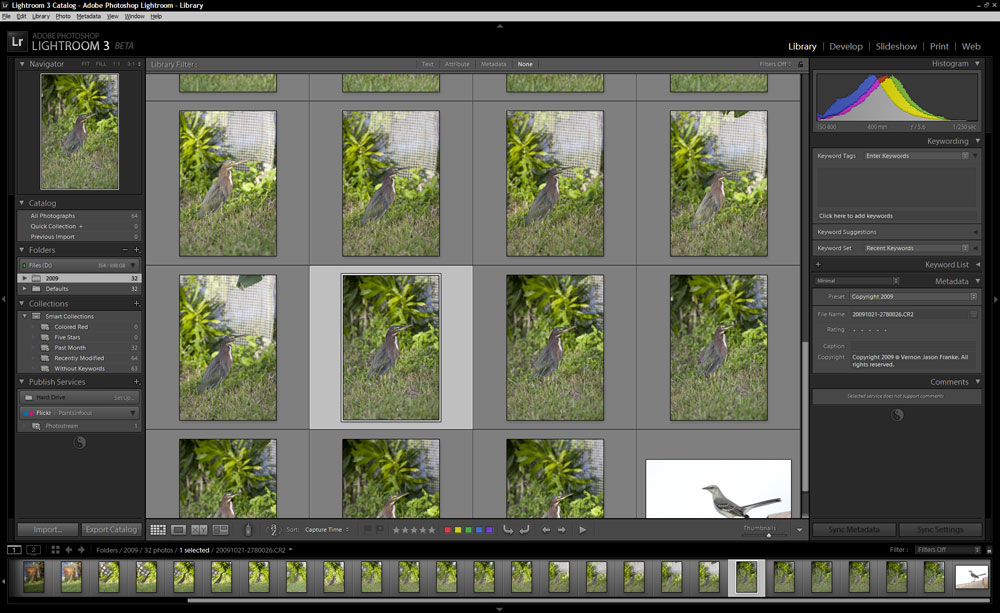
The left panel gets the new Publish Services pallet. I have to say, having only played with this for a few minutes, I’m already liking this over having to export and upload manually or with a plug-in. But more on this later.
Continuing around to the bottom panel, Adobe has removed the filter options from there, preferring to have you use the Library Filter bar across the top of the thumbnails to set those things. Speaking of the Library filter bar, and filtering LR3 changes things a bit. In LR2 filters were sticky to the folder or collection they were done in and Lightroom saved them if you navigated away from the folder. You couldn’t filter say all images that were shot with a specific camera, then navigate though a series of folders or collections and keep that filter active.
Filtering in Lightroom 3 acts in one of two ways. Either it stays how you set it or it resets to none any time you navigate to another folder, collection or publish service. This is achieved by way of the lock icon on the very right side of the Library Filter toolbar.
Personally I like this change, I always found it a bit odd in LR2 when I’d navigate to a folder I filtered some time ago and forgot about only to find that there were only 2 or 3 images showing out of what should have been many more. The new system makes a lot more sense to me.
Where the left panel pertains to where, the right panel still pertains to what. The only change here is the inclusion of a Comment panel which lets you post and follow discussions of images that are published to a service that supports that (for example Flickr).
A brief aside about the pallets in Lightroom 3. Like Lightroom 2, they can be expanded or collapsed down to just their title block, or you can right click on the title and hide the pallet completely. You can also run the sidebar in solo mode, collapsing all the pallets except the current one to just their title blocks. However, you still can’t reorder them. The left column is always Navigator, Catalog, Folders, Collections and Publish Services; the right; Histogram, Quick Develop, Keywording, Keyword List, Metadata and Comments in that order.

Adobe has made some minor changes to the toolbar most notably the removal of the rather redundant “info” box that only showed the file name. I doubt this will make much of a difference anyway, as the file name is typically available in the metadata pallet, in the thumbnail frame and as an image overlay anyway.
Publishing
 Publish services are new ways to push out files to a destination while keeping them in sync with Lightroom. The Lightroom 3 beta comes with two services “Hard Drive” and “Flickr”. Flicker ties in rather well to Yahoo’s Flickr service handling uploads and deletions.
Setting up a Service
Setting up services is obviously going to be slightly different depending on the service in question. In this case we’re going to look at setting up a Flickr service as that’s probably what’s going to be most used. At least I know it will be for me.
Clicking on the “Set Up…” text or right clicking on the title block and selecting “Create another … Connection” will bring up the Lightroom Publishing Manager dialog box.

One in the Publishing Manager, setup is much easier than I expected it to be. Give the service a name in the first box. Click “Log In” in the second, and that will take you to a browser window for Flickr that, if you’re logged in on your default browser, asks if you want to allow Lightroom to access the service. If you’re not logged in it will obviously prompt you to create an account or log in.
After you authorize Lightroom to be able to access flicker, you can configure the rest of the settings, which are identical to the export settings in either the new export dialog or Lightroom 2’s export dialog with the exception of the last section that’s Flickr specific. When you’re done there, click the Save button and you end up with a named section in the Publish Service Pallet.
All told, it took longer to read this description than it actually does to setup Lightroom 3 to publish to Flickr.
Publishing
This is where things get interesting. Once you have Lightroom setup to publish to Flickr you can seamlessly manage what’s on Flickr with out actually having to go to Flickr.
First photosets behave much the same way collections do. You can create both normal photosets that you have to add files to manually, as well as Smart Photosets that work like smart collections automatically selecting images to publish form your library. You can also set a photoset as the default target, in lieu of the Quick Collection or any other collection.
Placing an image in a Photoset queues it up to be sent to Flickr. If you’re viewing the queue in the library Lightroom will show you which images are published and which have yet to be published. You can then publish them individually though the context menu or publish them in bulk using the publish button.

In addition the Comments panel on the right side now becomes useful. Selecting a photo in one of the Flickr Photosets will show the associated discussion in the comments panel. In addition you can use the Comments panel to add comments to the image and they get published to Flickr automatically.

Publishing to Flickr Caveats
There are several caveats to the whole publishing process as it stands. Though this is still beta software so hopefully man will be cleared up before it goes gold.
The biggest issue is that Lightroom doesn’t seem to be able to retrieve information from Flickr. Specifically it doesn’t automatically get a list of existing sets. I can understand now importing and managing images that are already on Flickr but sets tend to be something frequently used. The apparent lack of bi-directional communication also hits in the comments box. In the screen shot above you can see that there is only one comment on Flickr but two show up in the Comments panel. This actually is the result of an interesting point of failure.
I had originally added the image of the Mockingbird to my photostream before I created the Lightroom 3 set in Lightroom. I then added the image to that set from Flickr’s site and not though light room. When the change didn’t propagate back to Lightroom, I moved the image there too. In doing that, and republishing it I ended up with 2 copies of the image on my Flickr stream, one I subsequently deleted. The end result is that Lightroom apparently got confused and since it seems to keep track of the comments locally is showing both the comment on the new image, and the comment on the image that was deleted.
The Develop Module
There have been a few changes to the new develop module, one major the rest relatively minor. The minor changes are mostly UI tweaks that give greater control over operations on the images, such as auto-synchronizing settings between images and access to the Collections panel.
The major change is a much improved rendering engine, and I mean improved. Lightroom 3’s new engine is more capable of extracting fine detail out of images and handles sharpening them much better with out making them blocky. In addition, there is now more refined control over post-crop vignettes and a new film grain effect.

UI Changes and New Features
The first change is the inclusion of the collections section on the left panel, in fact the. I’m not sure I see the utility in this, but at the same time since it can be minimized or completely hidden from the panel it’s not bad and certainly contributes to consistency–it’s available in every other module–as well as increased customization.

There’s not a lot of big differences in the develop panels. At least not until you get down towards the bottom. Adobe has recognized the Detail and Vignette panels into 3 new panels.
Details still handles sharpening and noise reduction. Lens Correction, now has the CA correction from the old Detail panel and the lens vignetting correction. Finally the post crop vignetting has been moved into the new Effects panel, along with a new film grain effect.
Speaking of vignetting, the new post crop vignetting provides two modes, color and highlight priority which control how the vignette affects the areas it covers. There is also a new contrast slider for black vignettes that can be used to preserve some of the brighter details that are being covered up.
Of the two effects I think the film grain effect might be even more useful for one of two reasons. First its a new creative effect, lending for well increased creativity, and that’s always good for creative people.
Secondly, I find that many very noise free digital captures, especially those with large areas of smooth color can almost look fake. Adding grain, which is essentially controllable noise, helps break that up and produce, to me a more pleasing image.
Rendering Engine
The big improvement is the new rendering engine. One of the problems pixel peepers and large image printers had with Lightroom 2 was some of the artifacts the rendering engine introduced. There have been several posts around the blog-o-sphere complaining about Lightroom producing odd artifacts and producing blockyness in images. This doesn’t tend to be an issue for people printing small (say 11×14 and smaller) images. However, for the people who print large (say 16×20 or better yet 20×30) the artifacts lead to a less than optimal print.
The most noticeable thing of the new rendering engine is the improvement in how it handles edges and details. Below are two 100% crops of an image rendered using exactly the same settings in the old and new rendering engines (mouse over the image to show the version from Lightroom 3).

While the effect is most noticeable in the eye, and light breast feathers, it’s also visible in the feathers in the lower left corner. (See another example, this time in small rock detail.)
Note: The images above are from the same image with identical settings, a virtual copy was created and rendered using the old engine instead of the new one. For those testing Lightroom 3, you can change rendering engines in the Develop Module by going to the Settings menu and changing the process version.
Stability and Speed so far
Again, this is beta software, and it likely hasn’t been optimized yet, but at the same time I want to comment about stability so far.
Over the past couple of days I’ve had Lightroom 3, and my pathetically small test catalog open and running for extended periods of time (several hours at a clip usually) and I haven’t seen a problem in terms of stability (it hasn’t crashed or otherwise behaved strangely, other than importing from a media card, yet) and has been very snappy. I’m also not seeing a drop in performance With that being the case, I’m currently in the process of bringing in the remained of my ~19,000 image catalog to see how it behaves with that.
In fact, one thing that I’ve been rather pleased with is LR3 seems to be a tad snappier when switching between module, though it’s certainly possible that it’s all in my head. However, going to develop from grid seems ever so slightly faster.
This time we delve into the side of Lightroom that I don’t use more than occasionally, Slideshows, Printing and Web gallery production.
Quite possibly the best new feature is support for proper water marking with out having to resort to tricky export plug-ins or Photoshop droplets. Neither of which were always foolproof or 100% reliable in my experience.
Slideshow
The Slideshow module remains relatively unchanged. The one new and well deserved feature is the ability to export a MP4 video of the final slideshow. The video can be produced at resolutions from 230px to 1080p high def, I’m not sure of the utility of the smallest sizes, but the larger ones are certainly welcome.

The file appears to be an H.264 encoded MP4 with the sounded encoded using the MP4a codec. What you do from there is up to you. You could use DVD burning software to covert it to standard def MPEG-2 video and burn it to a DVD-R for viewing on a DVD player. Of course if you go this route, there’s little reason to render the slideshow in anything other than the 480 preset. The same conversion process could be done to a bluray disk for the high-def formats to produce a Bluray player ready movie.
Of course there’s always the ability to upload the slideshow video to a website or e-mail it to a client.
The real problem, I see, is that without other software to convert the video into something playable natively on a TV, there’s little use in generating the video file especially since it isn’t nearly as controllable as either the PDF slideshow or running the slide show from Lightroom. To me, the feature would be a lot more useful if there was a native “burn a DVD/BD of this video” option that let you make something easily distributable and broadly viewable with out 3rd party software.
Web
There’s not a whole lot of difference in the web module.

To be honest, I’ve always wondered about the web gallery module a little. I think most people that are using Lightroom are also going to be using a service (Flickr, Smugmug, Photoshelter, etc.) or some form of automated gallery software (Zenphoto, Gallery2, etc.) for their web galleries. About the only real use I see for the web module is to create a quick HTML gallery that a client could browse through off a CD.
The new web module doesn’t appear to offer any radical new features. Other than the ability to watermark photographs, which is a globally supported new feature in Lightroom 3. The page layout, information and design options are all pretty much the same as what is available in Lightroom 2.
Print Module
The most obvious new feature is the custom package. The difference between the new custom package layout and the old picture package layout is that the new layout style appears to support overlapping pictures better.

What’s still missing is soft proofing. This, in my opinion, is far more important than more flexible picture layouts. Without soft proofing, color critical print work must still be exported to photoshop and printed from there. The need to shift to Photoshop to soft proof and make print adjustments to me renders many of the advantages of Lightroom’s non-destructive RAW workflow, especially the use of virtual copies to save disk space, more or less useless. I have no idea if Adobe is going to add softproofing to Lightroom 3 before it’s released, but I would really hope so.
Watermarking
This probably should have been in Lightroom 1, let alone having to wait for Lightroom 3. However, it’s here now, and with a few caveats works well enough to be useful.

First the positives. The new watermarks can be applied to just about anything produced, except slideshows, that means prints, exports and web galleries. They can be text or graphical with controllable transparency. Finally, they are automatically scaled to fit the image properly.
The only negative I’ve found so far is the inability to rotate the watermark in less than 90° increments. That is if you want “Sample” to be placed diagonally across the image you can’t do that using a text watermark yet. Of course since this is still a beta, there is always the possibility that the configuration options available so far aren’t fully representative of the final release.
Either way though, the new watermarking system is easy to setup and easy to apply to exported images, much more so than the old LR2 + morgify + configuration black magic (I never could get it to work successfully) was.
Conclusions
Bearing in mind that LR 3 is beta software I have to say this. The new import dialog is slow. Though I expect that will be fixed by release. The ability to easily preview potential imports, including enlarged loupe views, could come in handy. Though at the same time, I’m not sure exactly how useful it will be, at least for me, since I edit after I import not before.
On the other hand, I think I’m going to miss the ability to exclude or include images by date, since that is something I do use frequently. Also like LR2, you can select a group of images and check and un-check them all simultaneously but clicking the check box for any single image in that selection. However, you still have to find the starting and ending image for a given day to duplicate LR2’s ability to include or exclude images by date.
There is of course one other caveat in this, and again remember this is beta software. I have yet to suceede at getting LR3 to copy an image and import it from a memory card. I can add images already in place to the catalog, with the Add operation, but using the copy operation results in Lightroom doing nothing and ceasing to allow me to reopen the import dialog with out restarting the program.
So far, I’ve been very impressed with the features that Adobe has added to Lightroom 3. While I’m a bit disappointed that I can’t customize by moving panels around or redefining keystrokes yet, some of the new features are very nice.
The publishing system looks to hold a lot of promise, especially if the more commercial orientated sites (like Photoshelter or the micro stock sites) start offering modules that will let you publish directly to your catalog on their service.
The big changes to Lightroom 3, the new rendering engine and the professional level noise reduction are, in a word, awesome. Actually the new rendering engine, as slow and unoptimized and buggy as it is, is a big enough improvement over the one in Lightroom 2 that I find my self wishing Adobe was releasing Lightroom 3 sooner rather than later.
The various minor upgrades and tweaks, are for the most part nice. Watermarking looks like it works well and is much more usable since you don’t have to jump though hoops to use it. Publishing looks like it’s going to be a pretty powerful solution for exporting and being able to track what has been exported, the ability to integrate with online communities and comment directly from Lightroom is just a plus on top of that.
However, the lack of soft proofing in the print module is still troubling, though. Soft proofing is an absolutely critical step in the fine-art print production process and with out it Lightroom still forces you back to Photoshop and multiple copies of the same file for printing.
All told, if the beta is any indication, Lightroom 3 is going to be a very nice upgrade from Lightroom 2, especially in image quality. However, in it’s current state it’s very rough around the edges. It’s certainly less usable than I recall the beta of Lightroom 2 being.
My recommendation: If you’re interested in playing with bleeding edge features and don’t mind dealing with the performance issues, the beta is worth a try, at least to see what’s coming. Otherwise, most photographers should probably skip the beta entirely.