Photographing the Moon and Lunar Eclipses: The spit-and-duct-tape guide for non-astrophotographers
I’m not a hardcore astrophotographer, if I was, I wouldn’t be writing the spit-and-duct-tape guide to photographing the moon and lunar eclipses. There aren’t any 2000mm telescopes and fancy computer-guided tracking mounts here. Instead, I’ll be talking through this with a couple of normal cameras, a decent tripod, and a ballhead. You know the kind of things you’d have laying around if you’re a photographer.
Fortunately, the moon isn’t that hard to photograph. It’s literally bright enough that it can be shot handheld under normal circumstances, which kind of removes a lot of the difficulty right there. The only real challenges that come up are lunar eclipses.

Technical Challenges Presented by Lunar Eclipses
Photographing the normal sun-lit moon is straightforward. Put a long lens, 300mm or longer is best, on a camera point it at the moon, set the aperture to f/11 and the shutter speed to 1/ISO and shoot. If you can shoot at f/5.6 and ISO 400 you’ll have enough shutter speed to shoot handheld without even having to worry about camera shake.
Eclipses, at least once the Moon starts getting into the Earth’s shadow present a few more complications.
Transitional Phase and Dynamic Range
The simple reality is the dynamic range between the sun-lit moon and the eclipsed moon is massive, somewhere around 17 stops. This is far more than even a good Sony sensor can capture in a single frame, and this poses a 2-fold problem.
If you adjust the exposure for the bright side, you lose most of the shadows and end up with images that look a lot like a regular moon in a phase other than full.
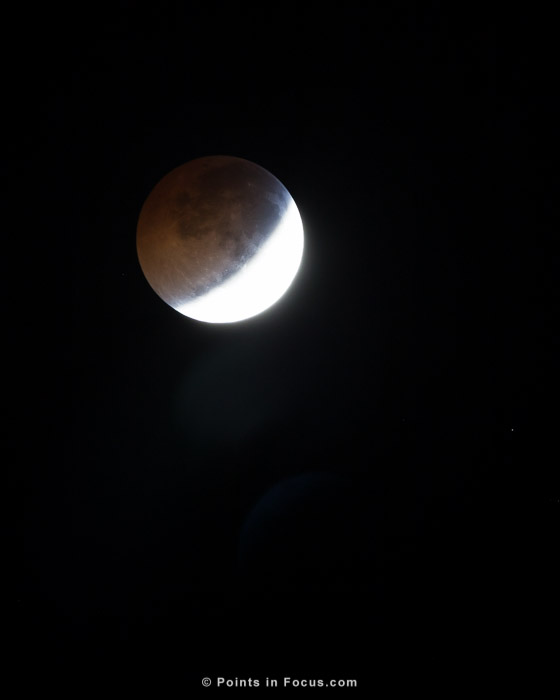
If you expose for the shadows, the highlights can be so massively overexposed that ghosting shows up in the images due to all the excess light bouncing around due to reflections in the air-glass boundaries in the lens.
Truthfully, I don’t have a great strategy to deal with this problem. You could try and find a middle exposure that doesn’t ghost horribly and still has some recoverable shadow detail. Maybe try a graduated ND filter carefully aligned to darken the brightest part of the moon. Or possibly shoot a bracketed burst and try to blend the results into an HDR image.
Totality and Motion Blur and Noise
After the moon has completely entered the earth’s umbra, the darkest part of the earth’s shadow, the exposure drops off dramatically. The last eclipse I shot, I was shooting 10-2/3rds to 11 stops brighter at totality than the nominal exposure for a sunny moon, and the moon was still dark in the frame. Getting to an exposure to see the eclipsed moon poses two problems, noise and motion blur.
Decreasing the shutter speed has the potential to create a problem with the relative motion of the moon blurring the image. If we were pros, this certainly wouldn’t be a problem for our tracking mounts to compensate for; but on the duct-tape budget, we have to rely purely on shutter speed to freeze the image.
Fortunately, there are ways to calculate this. I approximated it using the Astropix.com formula for calculating star trails at the celestial equator: E = (trail length/focal length) / 0.00007. Now this isn’t perfectly accurate, for the moon, but it’s close enough for the short exposures we can expect to shoot at totality.
In my case, with a focal length of 560mm, and a desired trail length of 0.0086 mm (2x the size of the pixels in the EOS M), I come up with a maximum exposure time of 220 milliseconds, or an about 1/5th of a second.
I’ve allowed for 2 pixels worth of drift, as that seemed safe and small enough that I expect other errors (diffraction, focus errors, camera shake) will be larger than that.
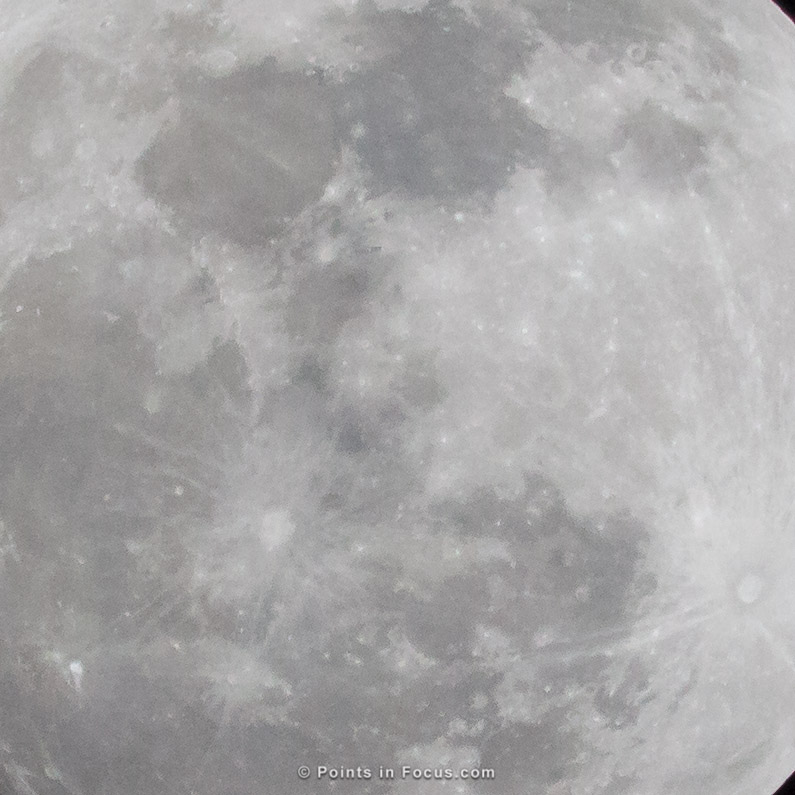
The other issue is noise levels at the extra-medium ISOs will be needed for the exposures at totality. Broadly speaking you want to do some noise reduction, and there are two ways to go about doing this. You can just rely on the noise reduction capabilities of your RAW processor or a 3rd party tool like Noise Ninja. Alternatively, you can use the time tested astrophotography technique of stacking images.
The first time I did an eclipse I just relied on the noise reduction in Lightroom, and while it’s generally good for most stuff, I think stacking will improve on that even more. Fortunately, the kind of stacking you need to do here doesn’t require going full on astrophotographer, and shooting dark frames and flats (bright frames) for fixed pattern noise and sensor dust removal. Even the size of the stack can be quite small, 4 or 5 frames is about all you need.
 |
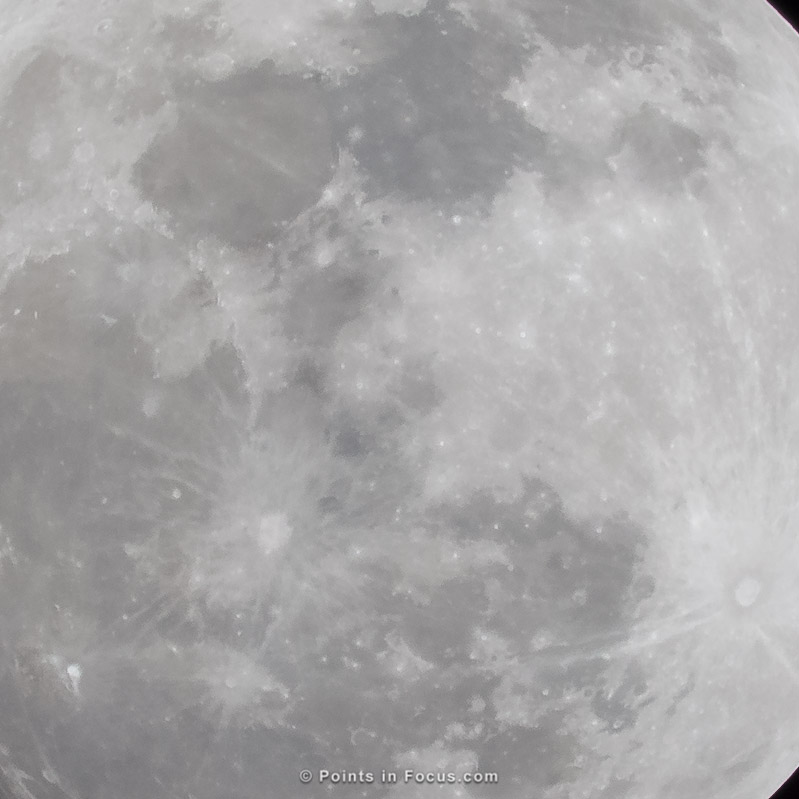 |
You can find my basic tutorial on stacking in Photoshop here.
Gearing up for Photographing the Moon
I keep saying this isn’t about being full on pro astrophotographer. If you have a camera, a tripod, and a telephoto lens in the 300-400mm range you’re good to go. If you have something better than a kit 70-300 zoom and a cheap tripod you’re even further ahead.
Lenses
The moon is about 1/2 a degree wide, which means if you want to fill the frame with it, you’re going to need a big lens or telescope. How big? How does 1500-2000mm for full frame, or 1000-1300mm for APS-C sound?
What, you don’t have something like that lying around? Ya, me neither.
I don’t have 1000mm+ lens, what then?
Largely this depends on what you’re hoping to get. 1000mm plus may be necessary for making big prints, but something in the 300-400mm range will turn out quite nice images at web resolutions. More is obviously better, but you can make ok images with somewhat less, especially on an APS-C camera.
The first serious attempts I made at photographing the moon was with a mid-range Canon 70-300 on a Rebel XTi. I’ve since upgraded to using my 100-400mm zoom and a teleconverter, but those early images are still reasonably decent.
What about using a cheap reflex lenses?
If you have one, then using it is a no brainer, especially if it’s your longest lens.
The way I see it, in the $200 or less category there’s basically 3 choices, the Samyang 500mm f/6.3(Affiliate Link) , the Samyang 800mm f/8(Affiliate Link) , or a Celestron C90 MAK(Affiliate Link) spotting scope.
I don’t feel that any are especially ideal. The Samyang lenses have a reputation for not being the sharpest or best corrected lenses, and the Celestron at 1250mm f/14 is probably too long and too slow for normal photographic applications.
While any of the 3 listed above would work for photographing an eclipse or the moon in general, none make great general purpose lenses, or great astrophotography lenses and it seems to me like the $200 would be better spent on something else.
What about teleconverters?
If your lens supports using one, a teleconverter can certainly help. The biggest question is how good your lens and teleconverter are. For example, a Canon 1.4x III on an EF 400mm f/5.6L USM would be a great combination, but a cheap $70 converter on an entry-level 70-300mm zoom will likely be worse than just cropping more in post processing.
If you do have a teleconverter, it can be quite enlightening to see whether you get better images from the lens and teleconverter, or from cropping more and enlarging the noise. I generally find that a good 1.4x TC will always look better than a 40% tighter crop, but at 2x it really depends on the quality of the lens and the teleconverter.
The Camera
This is an easy question if you only have one camera, that’s what you use. However, if you’ve got a couple of bodies, especially if they have different sized sensors, then there’s a bit more to consider.
The moon is generally bright (a nominally good exposure of the full moon can be had at 1/ISO f/11), so high ISO noise performance isn’t especially critical. It’s perfectly reasonable to shoot at ISO 100 with faster than 1/100th shutter speeds, especially if you can open up a stop or two from f/11. Even then, faster than 1/100th shutter speeds aren’t strictly necessary with 300-500mm focal lengths.
At totality during an eclipse, the moon gets quite a bit darker. A quick check of my historical images showed I ended up increasing the exposure by almost 11 stops; going from ISO 200 to ISO 2000, and lowering my shutter speeds from 1/200th to 1/2. In other words, while high ISO performance may not be necessary for just photographing the moon, it does help with an eclipse at its peak.
The other consideration is the amount of pixels you have actually recording data from the moon. Noise and pixel density are often related, the smaller the pixels the more noise they tend to exhibit. For normal moon images, this isn’t much of a concern, as you can already shoot at low ISOs. For the eclipse at its peak, noise is more of a concern, though there are ways to deal with it.
If you’re not filling the frame outright, then you really want as many pixels behind the sensor as possible.
In the past, I’ve used an EOS-1D mark III, I’m now using an 18MP EOS M. The difference in the resolved detail is certainly noticeable.
Camera Settings
Setup is relatively straightforward. If you’re using an SLR, you’ll want to use mirror lockup and either a cable release or the self-timer. If you’re using a mirrorless, mirror slap isn’t an issue, but you’ll want to use a cable release or the self-timer to insure that pushing the button doesn’t shake the camera.
I find setting the camera to manual everything works best. I’ll pre-focus the lens at infinity then turn off the AF system on the lens, and maybe even go so far as to tape down the focus ring so it doesn’t slip or get bumped.
I shoot my exposures in manual as well, using the moony-f/11 rule as the starting point while the moon is full before the eclipse starts, and tracking the changes to the histogram as the eclipse progresses. For those that aren’t familiar with it, rule of thumb works like the sunny-16 rule; that is a shutter speed of 1/ISO at f/11 for the moon. I’ve tried using auto-exposure, sometimes it works, and sometimes the extreme contrast between the bright small moon and black sky gives the camera fits.
One nice feature with the EOS M is that it offers a continuous-release timer drive mode, where it will count down then first the specified number of images. This certainly helps with capturing multiple images in rapid succession for stacking.
Tripod, and Tripod Head
While you don’t need to go hog wild on tracking hardware, a tripod and decent head are highly useful. You don’t need to go all out, but a flimsy aluminum tripod won’t really hack it.
Anything from the entry-level Manfrotto 055 or 190 series tripods an up, however will be adequate for the task. It’s also handy if the tripod’s legs can spread out much wider than the normal 22-24° angles.
Stability is important. If your tripod is towards the lower end, don’t extend it to its full height. If it has a hook, it might also be useful to bungee cord it to a weight on the ground to improve the stability.
As far as a tripod head goes the biggest requirement to have something solid enough to really hold the camera and lens in place without vibrating a lot.
Heads with fixed axes, that is 2-way and 3-way heads, can be slightly easier to deal with, especially if you can align one axis with the celestial pole. Then the only adjustments that need to be made are rotating around that axis.
Remember, because long focal lengths magnify vibration and movement, a sticky or rough head will be harder to work with than a smoothly rotating one.
Every time I’ve done this though, I’ve used a ball head. First a Arca Swiss Z1, now a Really Right Stuff BH-55. When it comes to ball heads, the biggest factor to me is having one that doesn’t droop or otherwise reorient when tightened. This was always a frustration with the Z1. I’d get the moon lined up just where I wanted it, and tighten the head down only for the moon to shift out of frame. The BH-55 does a much better job in this regard, though at these kinds of magnifications the flex in the teleconverter, mount adapter, lens itself (since it’s a zoom) and even the tripod collar, are obvious.
A Cheater Equatorial Mount
For photographing the moon, even during an eclipse, an equatorial mount isn’t necessary. I started trying to come up with a cheap and easy, or at least easy and using stuff I had, polar aligned mechanism for eclipses about 5 minutes in to the first one I shot.
The simple reality is that you’ll be constantly realigning the camera to keep the moon in the frame. With a ballhead, that alignment can be an annoyance as there’s nothing to constrain the ball in any any one axis. By polar aligning my whole ballhead, I would be able to rotate around the pan base to recenter the moon, without having to constantly readjust the ball.
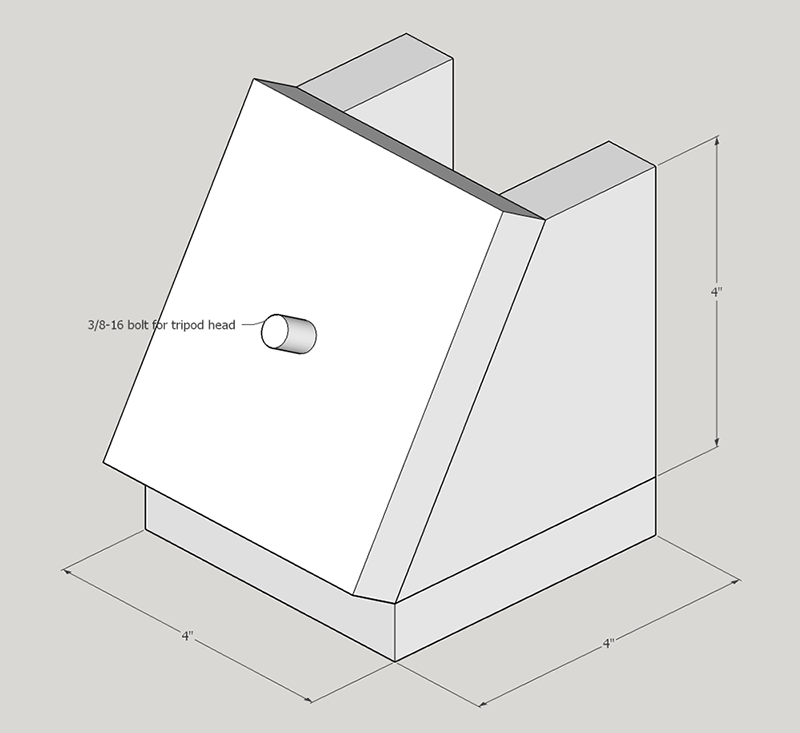
Equatorial Wedge
A purpose built equatorial wedge is one way to go. I wouldn’t suggest buying one, as if your serious about astrophotographer you’ll end up wanting a proper equatorial mount not just a wedge and a tripod head.
 |
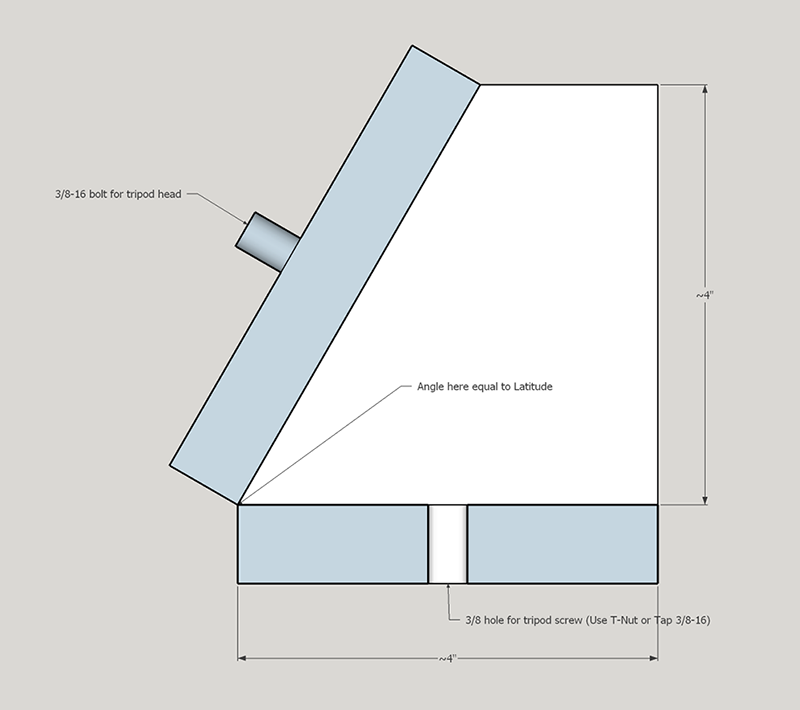 |
A very simple one can be built quickly with some 1-by stock a 3/8-16 bolt, some wood screws, and a miter saw carefully set to cut the appropriate angle. Something like the model shown above would work. Of the three options I’m presenting, this would be my first choice if you have the tools and materials lying around.
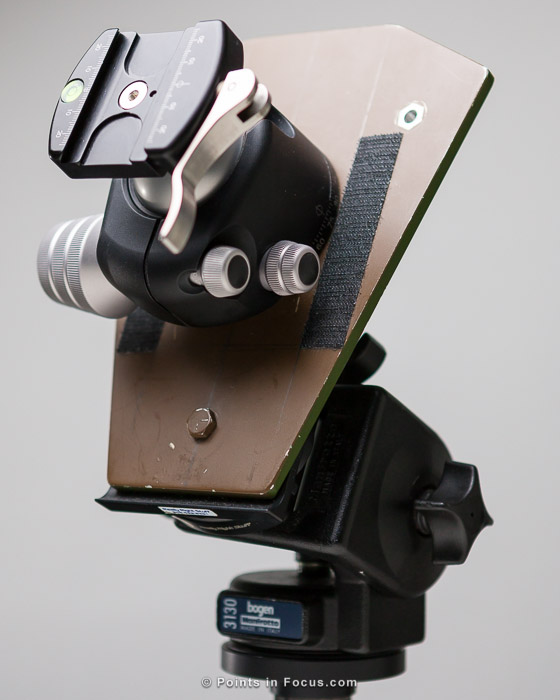
Multiple Tripod Heads
Honestly, I’m not sure if this is more spit-and-duct-tape than the wedge or less. Sure it probably looks more professional but at the costs of having a bunch of tripod heads and spare parts sitting around. I happened to have the random crap to do this, so I gave it a shot. The lower head, a cheap Manfrotto 2-axis head in this case, acts as the wedge, while the upper head, my good Really Right Stuff BH-55, is used to point the camera and track the moon.
 |
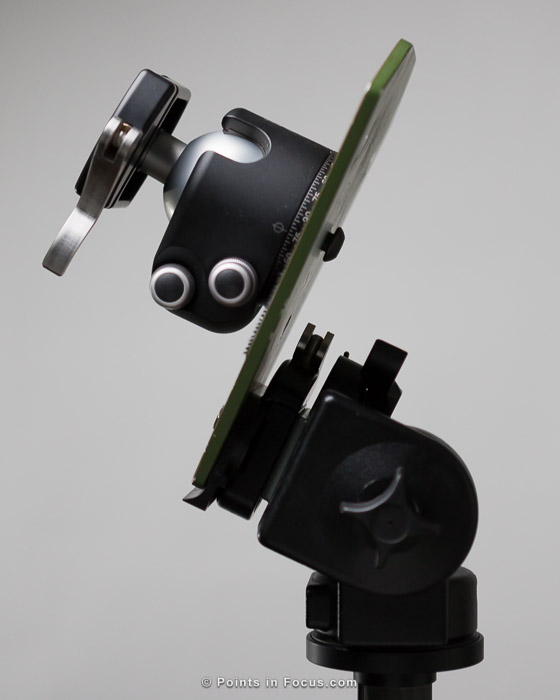 |
I certainly wouldn’t go out of my way to do this, but since I had the parts handy, I threw this contraption together. This wasn’t my first choice, that was actually the technique below, but after trying that out, I got tired of lying on my back on the ground to be able to see the screen on the back of my camera.
Cheating an Equatorial Mount with Nothing but a Tripod and an Smart Phone
This is the first idea I came up with when I stated trying to figure out an inexpensive way to get an polar aligned axis for my camera. It requires no special tools besides a tripod, your tripod head, and a smart phone with a GPS and compass app and a level app.
The exact adjustments are going to vary based on your latitude. People living at higher latitudes will be able to use a more upright tripod stance than people at lower latitudes.
The idea is fairly simple. The entire setup is aligned north/south by holding my smartphone against the side of the center column or the top leg.

Once it’s pointed north, I adjust the angle of the center column with my smartphone held against the top or bottom of the center column and the angle of the top leg. You can do this without a center column, but it’s a little trickier to find a flat surface to use to measure the angles.

The bad news is that none of these techniques are going to be as accurate as a proper equatorial telescope mount is. The good news is that they don’t have to be. The intent here is to simplify reaming, something that has to be done repeatedly over the 4 or so hours of a eclipse.
The big take away here, I hope, is that you don’t need to invest a small fortune into camera gear to get reasonably decent images of a lunar eclipse or to generally make images of the moon. Of course as far as subjects go, the moon does get old sooner rather than later, but planetary and deep sky astrophotography stuff is a subject for another time.
Comments
The vast majority of moon shots I have seen, including those I have taken, are monochromatic. How did you get the color to come out in these shots?
The color comes purely from a significant boost in saturation.
It may not be an accurate depiction of what your see, but I thought it made a pretty striking image as a result.