A Shot in the Dark: Pointing My Camera Skyward at Night
First off, let me say I’m not an astrophotographer, I don’t even play one on TV. Heck, I don’t even own a telescope. In fact if you’re a serious astrophotographer this is probably not for you.
On a lark I thought I’d point one of my faster lenses towards the heavens and see what I could get. Much to my surprise, I got more than I thought I would, even with only a meager 150mm lens.
Before I go any further, let me explain a little bit about the conditions here. I live in the middle of the South Florida tri-county urban sprawl, according to light pollution maps from Clear Dark Sky.com this is an 80 mile long by 18 mile wide swath of Bortle class-9 light pollution. The Bortle scale definition of Class 9 skies is below.
Sky is brilliantly lit with many stars forming constellations invisible and many weaker constellations invisible; aside from Pleiades, no Messier object is visible to the naked eye; only objects to provide fairly pleasant views are the Moon, the Planets, and a few of the brightest star clusters.
With the naked eye, I can generally make out magnitude 3-4 stars a pair of 8×50 binoculars helps a little but not much. Digital capture tends to get me a lot more , I can image stars as faint as magnitude 7.5 even on less than fantastic nights.
What to Shoot?
The Moon
The moon is obvious. It’s bright enough that it takes actual cloud cover to obscure it (use the sunny-11 rule (1/ISO, f/11) as a starting point) and large enough that you can get some detail with reasonably priced lenses in the 300-400mm.
The image above is cropped form the a shot made with a 400mm lens on an EOS-1D Mark 3. A crop camera is even better (i.e. Canon’s Rebels or x0D series or Nikon’s D300) thanks to the higher density sensors and longer effective focal length. I have images made with a Canon 70-300 IS on a 40D that don’t look much different than the one above.
Though nice, and with enough shots one could piece together a nice moon phase chart (a project I’ve been meaning to work on actually), the moon gets old rather quickly.
Planets
The planets are typically the next brightest thing in the sky. Though with out a telescope or a very long lens–which generally brings us back to needing a tracking mount–you don’t get much more than points of light and of all the planets. Jupiter is a notable exception and worth taking a stab at at least.
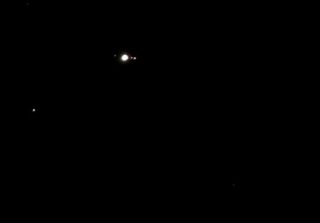
The images below were cropped from a single frames taken with a 150mm f/2.8 lens (left) and a 400mm f/5.6 lens (right) over two nights. Both exposures were a half second long with the lens wide open (f/2.8 on the left, f/5.6 on the right) at ISO 400.
You don’t get much detail, but you can watch orbits of the Jovian moons progress over time, which is marginally more interesting than looking at our moon. (Click the images to see larger versions.)
 |
 |
What about the other planets?
I haven’t tried imaging much more than Jupiter directly yet.
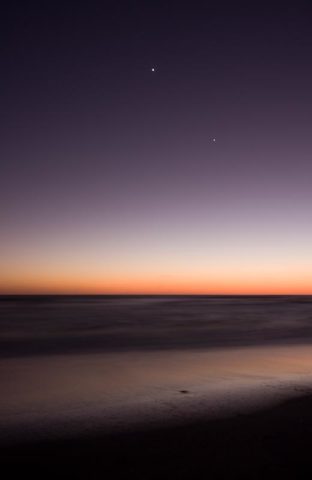
Venus, though bright lacks a moon removing a lot of appeal when you can’t resolve more than just a point of light. Most of the images I’ve made that have Venus in it have been sunsets where Venus shows up as a bright dot in the sky.
Mars, though it has moons, is very small and not that bright and it’s moons are very dim and relatively close.
I doubt Saturn will work very well at all, though. I won’t get a chance to try until January, then again the seeing will be better then too. Saturn itself is bright enough (mag ~1.4) to be imaged but it’s moons aren’t very bright (mag 9.6 max). Further the great distance to Saturn means and the moons will be very close to the planet and I likely don’t have enough magnification to do anything about that.
Something else entirely
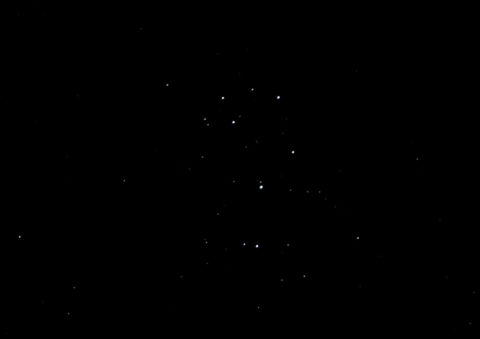
The last thing I’ve turned my camera towards is star clusters. Notably the Pleiades. However, with the amount of light pollution, none of the nebulae are visible, so they simply become a bunch of stars.
However, the stars themselves are readily visible and with digital capture and stacking, you can extract quite a few that aren’t visible with the naked eye.
Given the local conditions, I have never seen any of the Messier objects other than M45 (the Pleiades).
Finding Things in the Sky

I suppose before I go any further I should at least mention how to find things to photograph. Obviously the easiest solution is simply look up and point your camera at what you see. It certainly is passable, and if the conditions are right you can generally see a lot. However, my camera can see more than my eyes can so I need a better way to find things, and for that I use a program called Stellarium and astronomical coordinate systems. Stellarium is planetarium grade software that runs on your home computer, it’s cross platform too running in Windows, Linux and Mac OS.
Stellarium
In Stellarium I can adjust many of the conditions that affect what I can see such as light pollution and the brightness of stars. In addition it can generate the location of stars in the future (as well as the past). This is handy if you know that on a certain date you’ll be somewhere dark, you can already scope out what’s going to be visible.
What I tend to do is turn the light pollution down to 3 or 4 and look around. When I see a star cluster that looks reasonably interesting, I check out the magnitude (brightness) of the stars. If it looks like something that I can actually image, I crank the light pollution settings up and start trying to figure out how to find it.
Since I’m not using a telescope or anything generally that means finding landmarks and a little guessing.
Aligning a Tripod Head
If you have a tripod head with angular measurements you can do things a little easier with some alignment.
To align things:
- Center the camera and set all of the controls to 0°
- Aim everything north (or south if you’re in the southern hemisphere) by turning the tripod or center column
- Then adjust the pitch to match your latitude, in your camera’s view finder you should now see Polaris. If you do you’re more or less aligned properly.
At this point, you can simply dial in the altitude and azimuth for a given target.
I don’t worry about any slop or error, since my exposures are short enough to prevent trailing and I don’t have enough magnification to otherwise make accuracy that important.
There are 2 coordinate systems used to navigate the hevens, the equatorial grid and the azimuthal grid.
The Equatorial grid is aligned to the axis of earth. While the meridian will always be a strait north-south line, the equator will vary in angle based on your longitude.
Coordinates are given in right ascension and declination. This coordinate system is important for us since the declination coordinate gives us the value to use in our trail length equations in the next section.
The azimuthal grid is used with non-polar mounted telescopes. It’s locally aligned to the compass. An azimuth of 0° is north, 90° east, 180° south and so on. An altitude is measured in degrees from the horizon, with the horizon being 0° and straight up being 90°.
If you don’t have a polar aligned telescope this is, in my experience, the easiest coordinate system to use to find things as you can often get pretty close just by guessing.
Long Exposures, Trails and Faint Objects
The earth rotates, rather quickly actually, and because of this stars will streak unless you can move your camera exactly oppose to the earth’s rotation. This is why most serious astrophotographers use telescopes with equatorial mounts (they align one axis of the telescope with the earth’s rotation simplifying tracking stars) and clock drives or even more sophisticated computer controlled tracking systems.

For a guided telescope exposure lengths are limited only by the light in the sky and the sensitivity and noise levels of the camera.
Exposure Time
For those of us that don’t have the fancy gear, our exposures are limited by the Earth’s rotation and how apparent that is in the image, is dependent on the focal length of the lens.
I use the two equations below to calculate the exposure times that I can used with my unguided equipment. The first equation (on the left) gives you the worst case scenerio, tracking something on the celestial equator. The second allows you to calculate the exposure time for a star at any declination.
|
t = TL / ( FL * 0.00007 ) |
t = [ TL * 13,750 ] / [ FL * cos( delta ) ] |
|
Where:
|
Where:
|
| From: Astropix.com | From: Luminious Landscapes.com |
How Long is an acceptable trail length?
The answer, it depends on how much you’re going to enlarge the image after you’ve made it and how small the pixels on your camera are.
Right now I’m using twice the pixel size since I’m making 100% crops to get anything, that seems safe. I wouldn’t go any larger than the circle of confusion1 for your camera’s format in any case. For my EOS-1D Mark 3 that means the trail can be about 0.016mm long. That means for imaging Jupiter I can use an exposure time of 0.57 seconds with my 400mm lens or 1.5 seconds with my 150mm lens.
Dealing with Faint Objects
Normally the solution for faint objects is to open the aperature, slow the shutter speed or up the ISO. Increasing the ISO speed isn’t good here since it adds more noise and that just obscures the faint objects. Normally I’m shooting wide open as it stands so I can’t open up any further and the longest possible shutter speeds are dictated by star trails and I’m already there as well.
That doesn’t seem to leave any room at all. Well there is something and that’s stacking images. For this I turn to some serious astrophotography software called Iris. It’s free and powerful and capable of going well beyond what I’m using it for at least.
The theory is simple, you take a bunch of exposures, add them in the computer so the brightness of faint objects increases. Simultaneously, you reduce the noise in the final image by subtracting frames that contain just noise from the source images. The result is dark objects become brighter and noise is reduced though out the image.

The image of the Pleiades shown above was produced by stacking 14 frames in Iris, then tweaking the levels in Photoshop. Several magnitude 7 to 8 stars are visible in the stacked image that aren’t really visible in single frames, let alone the naked eye.
Capture, Processing and Stacking
Sometimes you write things in hopes that someone else may find it useful, others it’s so you can find it again when you need it. This is the latter. If you already know Iris or are familiar with stacking images in another program you can ignore this too.
Capture
There are 4 sequences of images that are needed to do this properly.
- Light Frames – The actual long exposure images that show the subject
- Dark Frames – Frames taken at the same settings as the Lights, but with the lens cap in place. (Used to remove thermal noise).
- Offset (Bias) Frames – Frames taken at the same ISO but highest shutter speed the camera supports (used to remove offset noise).
- Flat Frames – Frames taken of a uniformly illuminated target that show the dust and dirt on the sensors surface.
Offeset frames can be taken under any conditions, and can even be reused between shoots. Dark frames are taken under the same conditions as the light frames. Flat frames should be made at the end of any shooting session as dust on the sensor can and will change between sessions.
Loosely summarizing the Iris DSLR guide.
- Convert the dark (I call these d-), offset (o-), flat (f-) and light (something descriptive) frames to CFA files using Decode Raw Files under the Digital Photo menu (do this separately for each image type.)
- Create the master offest image using Make an Offset under the Digital Photo Menu
- Save the master offset by typing Save Offset on the command line
- Repeat steps 2 and 3 for the dark frame using Make a Dark and save dark.
- Repeat steps 2 and 3 for the flat-field image using Make a Flat-field and save flat. The normalization factor is 5000 for 12-bit images.
- Create bad pixel list by loading the dark frames (load dark on the cmd line) and running find_hot cosme 200 on the command line. Adjust the threshold (200) to get between 50 and 200 hot pixels.
- Count/load the light files by running number <prefix> from the command line
- Using the Preprocessing dialog box fill in the approprate fields, some of these fields may be filled in already. This will apply the dark, bias, and flats to the source images.
- Convert the source images to 48-bit color files (Digital Photo -> Sequence CFA conversion…)
- Align the images using Stellar Register from the Processing menu
- Stack the images using either add2 or add_norm from the command line or Add a sequence form the Processing menu.
- Crop the image to remove the unstacked edges (win on the command line)
- Darken the sky by selecting an area of mostly starless sky and issuing black on the command line (if desired use offset value to better simulate the sky brightness)
- Color balance if necessary (RGB Balance from Digital Photo menu) and rerun the black command
- Remove the sky gradient if necessary using Remove Gradient from the Processing Menu
Conclusions
Like I said in the beginning, this isn’t meant to be a for serious astrophotography, and some of the techniques are useful even for regular night photography where the sky is intended to be a contributing factor (eliminating or controlling star trails). Personally, I find it to be quite interesting to point my camera skyward sometimes and see what I get and will continue to turn my camera skywards when the conditions are right.
Comments
There are no comments on this article yet. Why don't you start the discussion?