DiY Clap Sticks
To quote Vincent Laforet, “50% of any great film is in the sound design, and the first step to great sound design is capturing great audio while on set.” How you get that audio is the big question. Clap sticks, with or without the addition of a slate, is one way of easily synchronizing sound by producing a sharp peak that can be aligned in post-production, either with a synchronized audio track or with the visual of the boards striking together.
Do you need Clap Sticks or a Clapperboard?
For some people, and in some situations, you’ll only be shooting with a microphone hooked up to your camera. Depending on the camera and its capabilities, that audio may be good enough as it stands. In my experience, a Canon 5D Mk. III and a Rode VideoMic Pro, I can get acceptable audio for my needs with careful levels and 1/8” stereo extension cord to put the mic closer to the subjects. Moreover, since I’m recording into the camera, the audio is already synced with the video and there’s no need to have a sharp spike and visual queue to synchronize with.
On the other hand, if you’re using a camera that doesn’t have passable input options, you’re forced to use auto-mic-gain, or you need to record more than one subject simultaneously then to get good audio you’re going to need an external recorder. Adding an external recorder to the mix also adds the requirement for synchronizing audio in post. The cheapest and easiest way to do this is to generate a sharp spike that coincides with a visual queue that you can quickly and easily align on the timeline in your editor. This is when you need clap sticks or a clapperboard.
Do you need a slate too?
I’ve drawn a distinction here, between the part that makes noise, what I’m calling the clapperboard or clap sticks, and the part that is used to convey information about the scene to the editor though the film, the slate. Commercial clapperboards or slates serve both functions, so there’s no secondary question as I’m posing here. However, for a small indie production or one man interview kind of setup, it’s not always necessary to have both and losing the slate part of the equation, if it’s not needed, can free up a bit of room in your bag.
So do you need a slate or are clap sticks good enough?
To answer this, you need to ask yourself, “Who’s editing your video?” and, “Do they need to know what they’re looking at?”
I write my own material, edit my own video, and what I’ve been shooting doesn’t generally involve takes or multiple cameras. In short, I know what I’m looking at because I was intimately involved with it from start to finish, thus the informational aspect of the slate is not entirely necessary for me; at least not in the editorial metadata sense.
On the other hand, if you pass your work off to another person to edit, have multiple cameras, or do many takes, then you’ll probably want a full slate so the videos themselves contain the needed data so your editors can organized and catalog the files.
There’s one other reason to consider building your own slate. You can build a slate that contains the information you want not what is considered standard for a film. This is my primary reason for building my slate. I don’t really care about what take or scene I’m shooting, rather I’m interested in the exposure and location metadata that my camera isn’t smart enough to note on its own.
Building the Clap Sticks
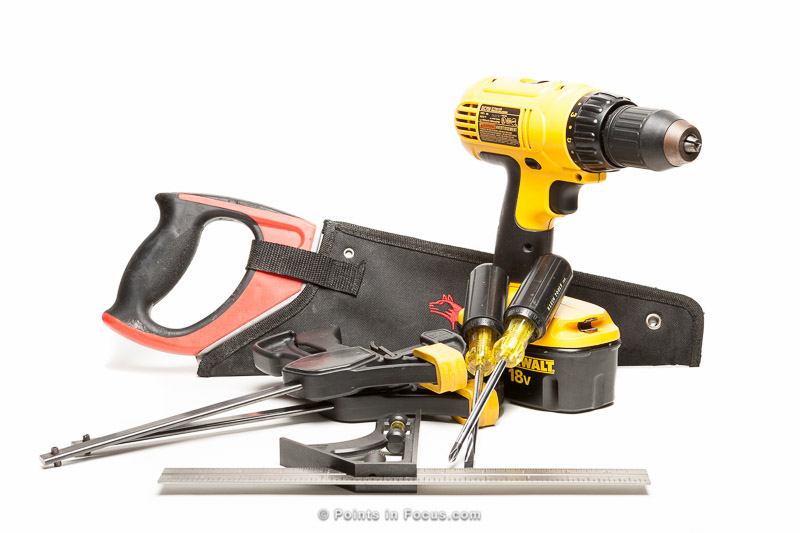
| Materials | Tools |
|
(Tools in italics are not strictly necessary, but do help.) |
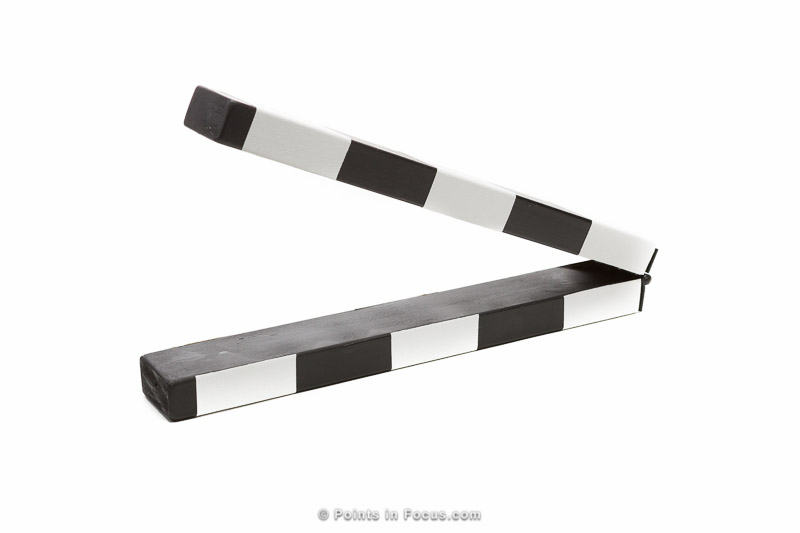
Basic clap sticks are nothing more than a pair of wooden sticks that are hinged together at one end. My first incarnation are two 1-1/2” x 3/4” x 10” (38mm x 19mm x 250mm) pieces cut from a piece of scrap pine 1×6. They’re hinged at one end with a 1-1/2” wide hinge I found in a spare parts box.
If all you need are clap sticks, then that’s good enough right there.
To build mine I cut the two 1-1/2” x 3/4” x 10” sticks from a piece of scrap 1×6” pine. The width (1-1/2”) was dictated by the size of the hinge I found in my parts box. The length was something that was large enough to be easy to handle but not overly large to be hard to pack.
I laid mine out with a combination square, clamped the wood down, and carefully hacked out the pieces with a cheap handsaw.
Since I used a crappy handsaw, I needed to smooth down the cut edges. If you were cutting this on a table saw, or had a finer toothed handsaw, it wouldn’t be as necessary to clean up the edges. To clean up the edges, I taped a piece of 120-grit sandpaper to a flat surface using gaffer tape on 2 sides (though duct tape, or even masking tape would work), and sanded the cut sides until they were smooth.
While you have the sandpaper out, and before you put the sticks together, round over the corners so you don’t have any sharp/pointy edges.
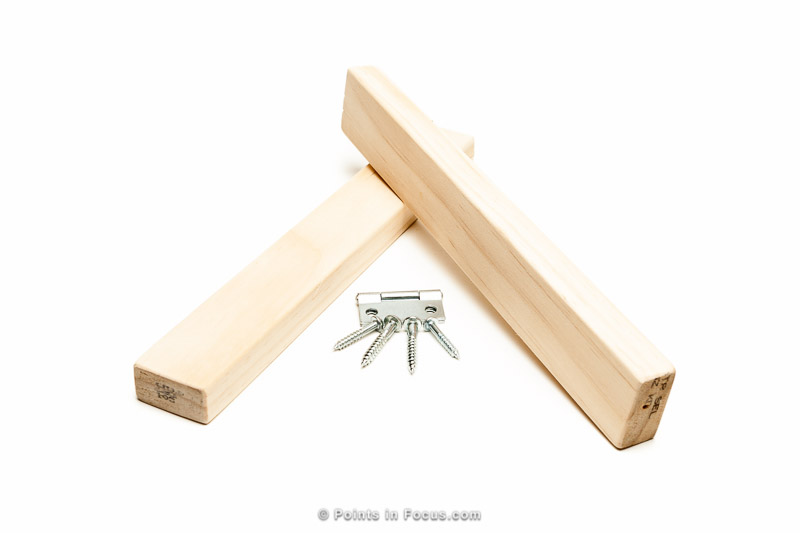
Transfer the marks for the screw holes from the hinge to the end of the sticks and pre-drill them. Then attach the hinge with the screws. A word of warning, it’s very likely the screw holes will be very close to the edge of your sticks. You’ll want to insure you don’t have too large of screws, and that you pre-drilled holes tend towards the center rather than the edges. Even then, it’s possible to split the wood as I did.
How you finish your sticks is up to you. I gave mine a coat of black paint and then wrapped a couple of bits of white gaffer tape around mine to give them clean finished lines on a black surface.
Comments
There are no comments on this article yet. Why don't you start the discussion?