Photoshop Smart Object Stacking for Noise Reduction
Stacking images to improve the single to noise ratio is a tried and true technique in astrophotography. The typical noise reduction most photographers are used to uses sophisticated algorithms to attempt to smooth noise out without smoothing out fine details in a single frame. Stacking exploits the randomness of noise and the consistency of actual signal to either increase the amount of signal faster than the noise or average out the effects of the noise.
For serious astronomical or astrophotographic applications, Photoshop’s stacking capabilities are lacking. It certainly lacks the level of automation that makes the processing the 10s or 100s of images needed to get a proper well processed deep sky image easy or practical.
However, for less stringent applications, like removing high ISO noise from images of the moon, or any truly static low light scene, Photoshop’s stacking capabilities do a good enough job.
Preprocessing in Lightroom
The first step in my process is carried out in Lightroom, starting with the import of all my images from the night’s shooting.
Since I’m currently doing most of my work with an EOS M and the EOS M will shoot 4.3 FPS for a max 6 frames, I tend to work in 3-5 frame bursts, and I typically stack whole burst or 3-5 images at a time. I’ve tried longer bursts, up to 9 frames, but I don’t see a significant improvement in image quality with that many frames, and the process takes that much longer to do.
The first step in my Lightroom workflow is simply organizational. If I have more than a single set of images, I’ll select each set and group them as a stack in Lightroom. This doesn’t do anything for the processing, but it does keep the sets of images organized so that I don’t accidentally do my actual stacking across multiple sets of images.
After I’ve grouped my stacks, it’s time to start the actual development process in Lightroom. When it comes to noise reduction, order matters. Since the stacking step in Photoshop is being done for noise reduction you don’t want to start manipulating the image too much in Lightroom, especially operations that amplify noise such as raising the shadows.
That said, though we’re using stacking to reduce noise in the final images, there is still some use to the noise reduction in Lightroom, especially color noise reduction. Since we’re not doing dark frame and offset subtraction in Photoshop, the stacking won’t remove color noise.
Though my experimenting, I’ve found what works best for my cameras and my images, is to leave Lightroom’s color noise reduction settings the same as I would for any normal image and reduce the luma noise reduction to about half of what I’d normally use.
The only other major adjustments that I do in Lightroom, is the removal of vignetting and lens distortions.
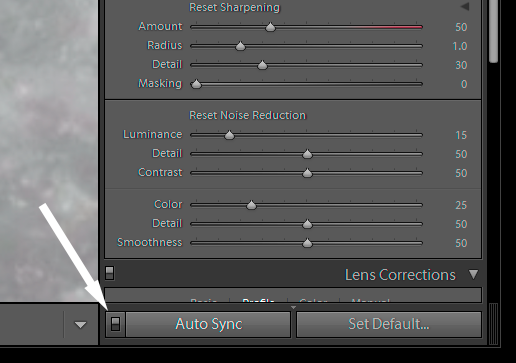
Make sure that you synchronize all the changes you across all your images. You can do this either by selecting the images and using the sync develop settings command, or by selecting the images before you go into develop and making sure the Auto Sync is enabled.
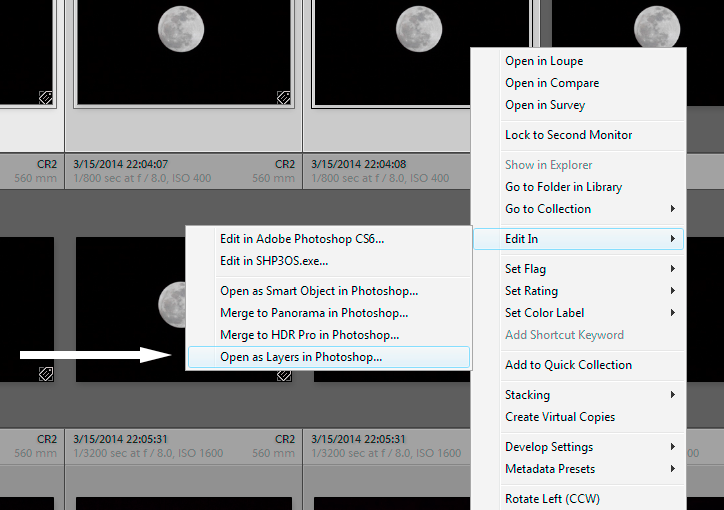
Once your images are synced, select the group of images you want to combine, right click on one and select “Open as Layers in Photoshop” form the Edit In menu.
Processing in Photoshop
One the open processes is completed you should have a Photoshop file that has each of your individual images opened as separate layers.
The first step now is to align the images. I always try the auto-align option under the edit menu. When using auto-align, I use the auto option in the dialog as that seems to do both the best job and have the best chance of succeeding.
However, it seems more often than not auto-align fails and I have to mess with it manually. This is certainly sub-optimal as the alignment will almost never be quite spot on, of course many times the auto alignment won’t be quite spot on either.
In any event, when manually aligning things, I start with the bottom 2 layers, set the blending style to difference for the top most of the two and shift the layer around 1 pixel at a time using the arrow keys until the screen is black, or has as little light gray as possible. When the two layers are aligned, I set the blending mode back to normal, hide the top layer, and then move to the next layer up in the stack, always aligning against the bottom most layer.
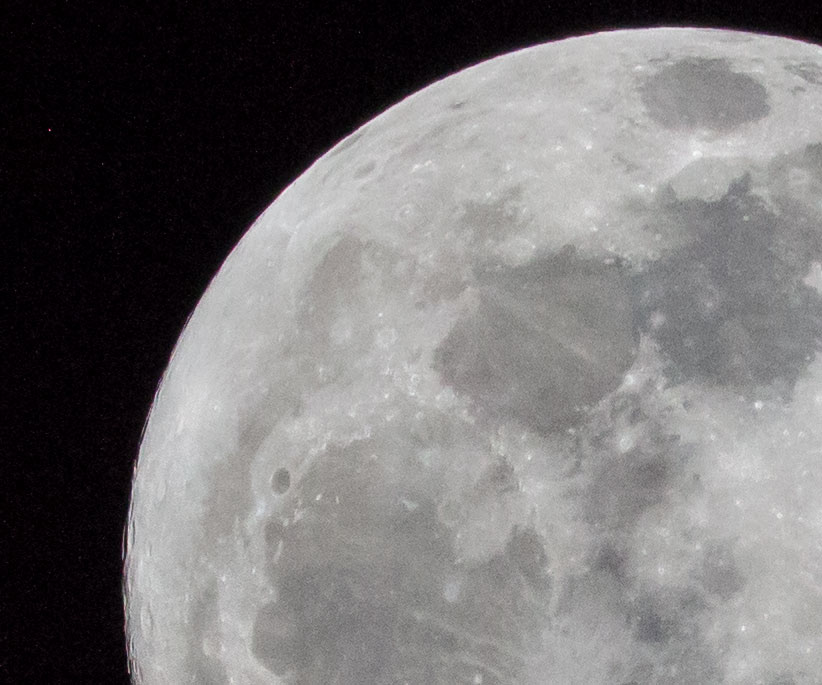
Good alignment with this technique will look something like this.

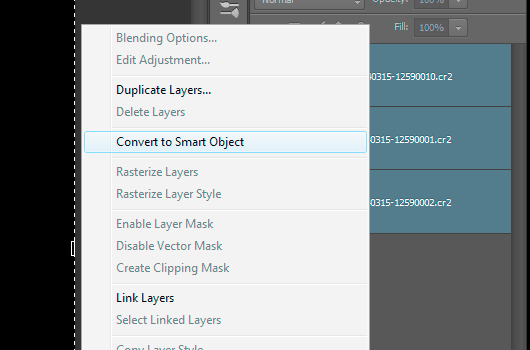
Once everything is aligned, select all the layers in the layer pallet, right click, and pick “convert to smart object”.
The final step in the process is to change the smart object-stacking mode from normal to either mean or median.
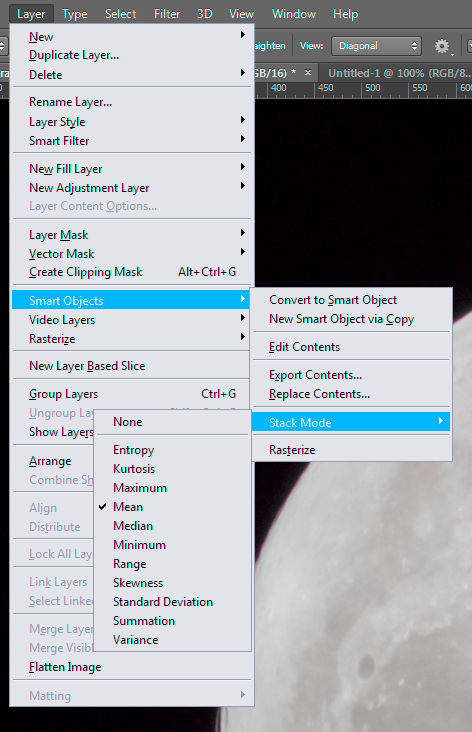
Mean stacking takes the mean value of each pixel in the source frames and makes that the value in the displayed stack. For example if you have 4 images at a given pixel with values of 100, 120, 115, and 200, the mean value of 134 will be used in the resulting stack. In median mode, the output value will be the one that’s in the middle of the ordered distribution, in this case 118.
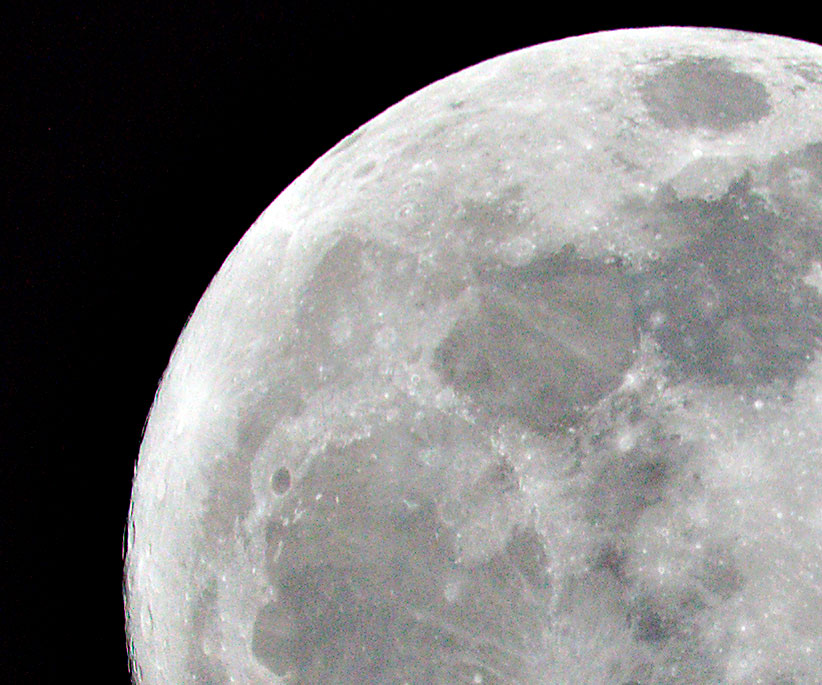
In theory, a median stack should be less susceptible to extreme biases from a single bright or dark frame. In practice, I find you have to look at each of them and judge for yourself. For example, in the lunar photo I posted a few weeks ago, the median stack produced more pronounced speckling in the smooth mares, and no significant gain in the craters detail compared to mean, so I used mean stacking, as I liked the look of the image better.
Once you’ve stacked everything, you can either rasterize the smart object to save some space, or simply save the file and move on to your final artistic adjustments.
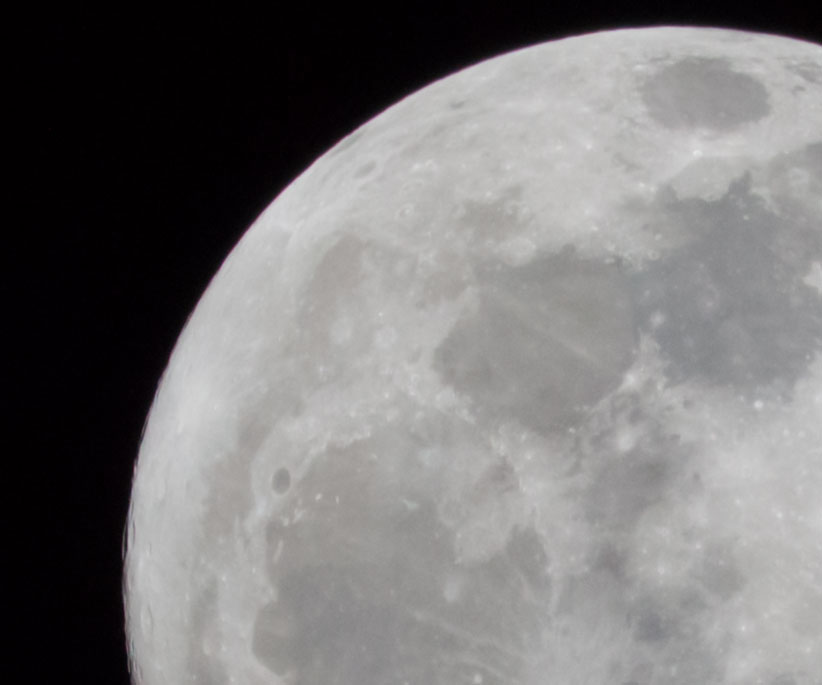
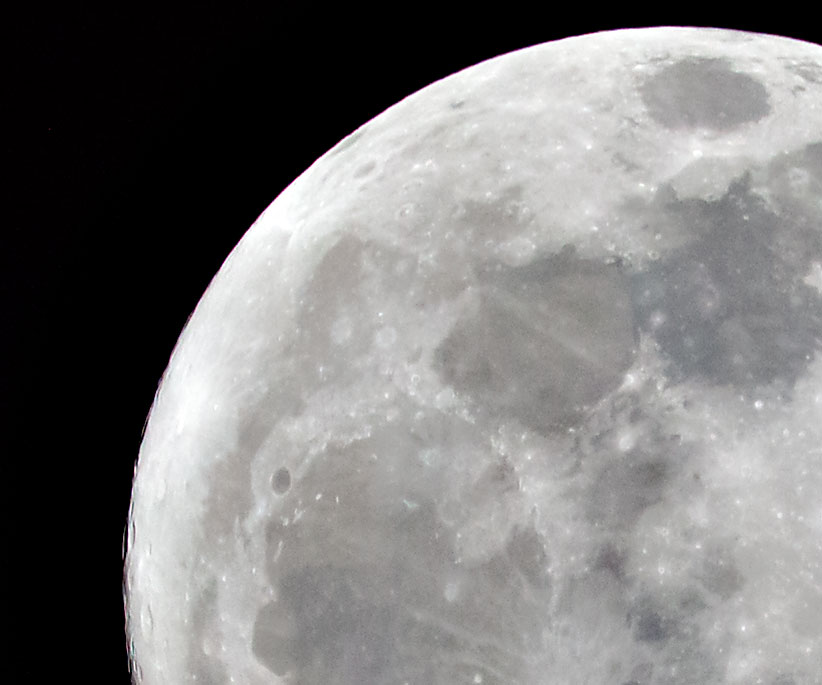
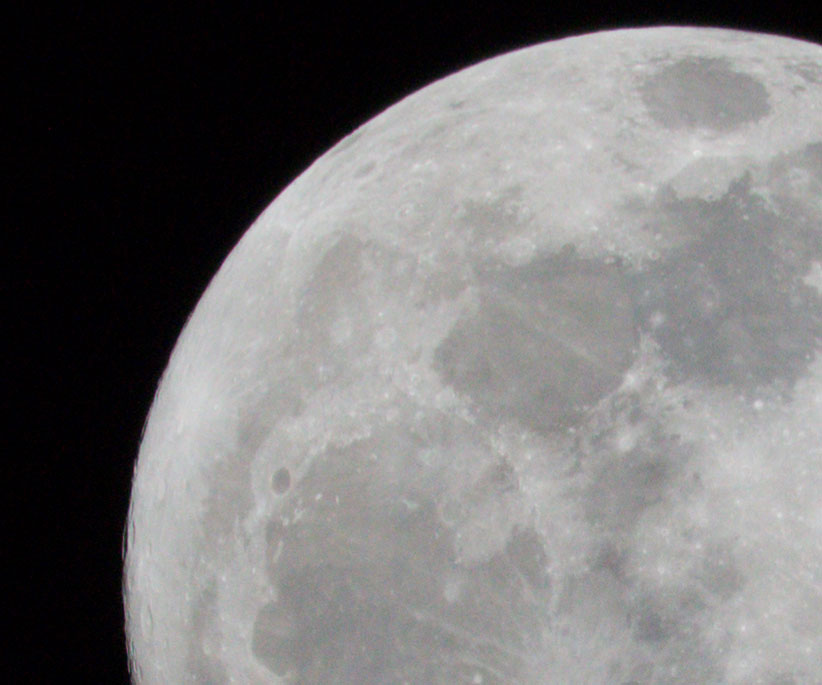
As for how well this works? The following images show 100% magnification views (click to expand) of the same frame after processing.
 |
|
 |
 |
 |
 |
Comments
VERY GOOD PRESENTATION.