Mimicking Neutral Density with Stacking
One technique that’s frequently used when shooting landscapes is to use slow shutter speeds to blur clouds and especially water. Prior to heading out to Yellowstone and Grand Teton National Parks, I had wanted to pick up a 6-stop ND filter. Sadly some poor planning on my part, meant that I wasn’t able to get the filter in time, however, I still wanted to be able to blur moving water at times.
Fortunately, ND filters are on of the filters that can be reasonably mimicked with a combination of in filed capture techniques and post processing.
Background
There are a number of techniques in digital photography that trade storage space and temporal discontinuities for an extended effect through post processing. For example, HDRs make multiple separate images at different exposures to expand the dynamic range. The same can be said for stitching panos, where images are speared out over time to cover a wider angle of view than can be achieved in a single exposure.
However, in both of those cases, you’re adding an additional time related discontinuity to your captured images. Each frame happens in sequence, and between each frame something can change. This makes these techniques slightly risky in that you can get unwanted movement and blurring that you otherwise wouldn’t have in a single exposure.
With an ND filter, that’s precisely what we want anyway; to extend the exposure over time.
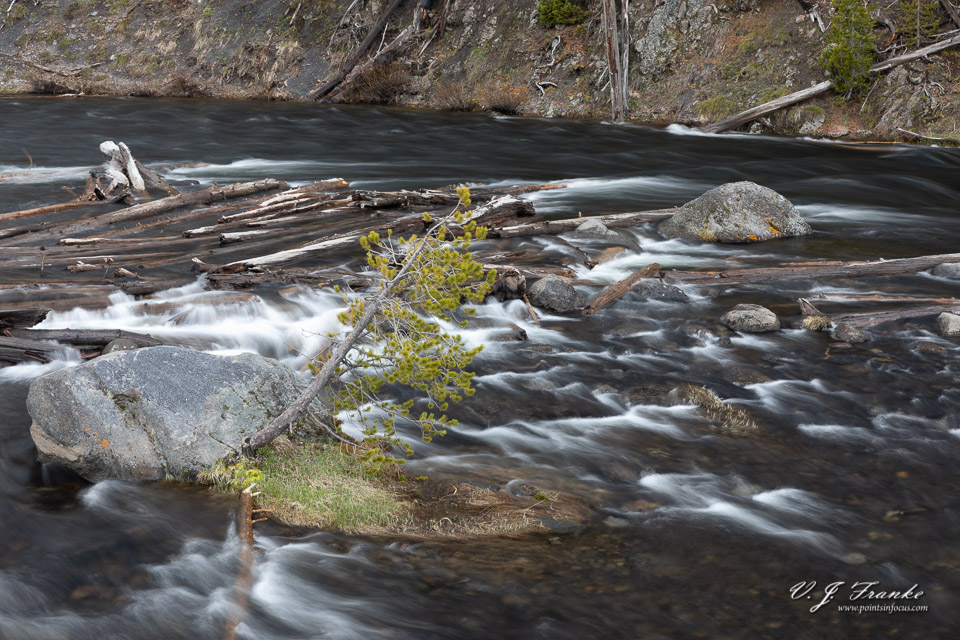
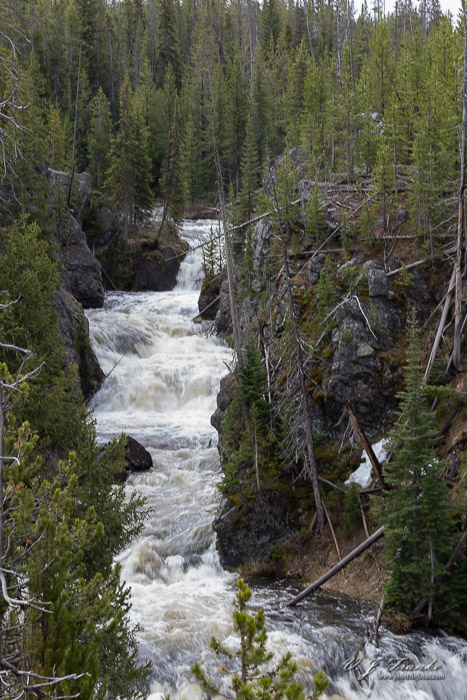 (ISO 50, f/22, 1/25) |
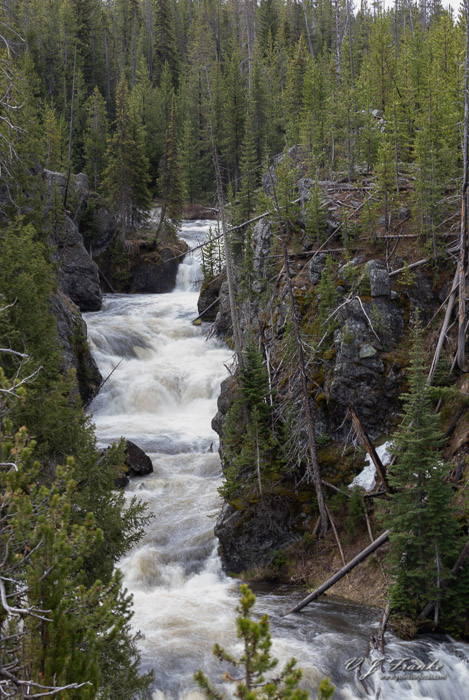 (2-stop simulated, 4 frames @ 1/25, f/22, ISO 50) |
Physical ND filters attenuate the light that reaches the camera’s sensor/film. This means that to achieve a proper exposure, we have to in turn keep the shutter open longer to make up for less light getting through.
To mimic an ND filter, we simply need a way to collect light over the same amount of time and to average the resulting data out in post processing. In other words, we shoot a bunch of exposures in the field. Then in post processing we stack them, and average out the pixel values for the stack.
The biggest downside to this approach should now be quite obvious; storage use.
This technique doesn’t circumvent the need for a equally longer exposure. The computer isn’t making up data or faking things, it’s merely doing in digital form what the darkened glass is doing optically in one shot.
With a practical ND filter, you get the effect in a single image. With the digital process, you need to have many exposures to match the density of the practical filter. Moreover, because stops yield a power-of-two increase in exposure time the soft process requires exponentially more frames to keep up with increasing densities.
The following table shows the number of frames that have to be shot to account for a given level of physical ND attenuation.
| ND Strength | Number of Exposures to Match |
|---|---|
| 1 stop | 2 |
| 2 stop | 4 |
| 3 stop | 8 |
| 4 stop | 16 |
| 5 stop | 32 |
| 6 stop | 64 |
| 8 stop | 256 |
| 10 stop | 1024 |
| 15 stop | 32,768 |
Suffice to say, while this technique isn’t terrible if you want to blur for 1-4 stops. Beyond that the number of frames needed, an the resulting storage requirements, becomes increasingly untenable.
For example, in my case, I’m shooting with a 30 MP EOS 5D mark VI, at ISO 100 my images are about 35 MB. Matching a 2 stop ND filter with 4 images, means I end up burning around 140 MB on my card. That’s maybe not terribly unreasonable. However, mimicking a 4 stop ND filter requires 16 frames, or around 560 MB of card space which starts getting significant. Push the process out to 6 stops and you’re talking about more than 2 GB of images to shoot, and process.
Ultimately, it’s that requirement for increasing numbers of frames that makes this process problematic. At least for replacing high density filters.
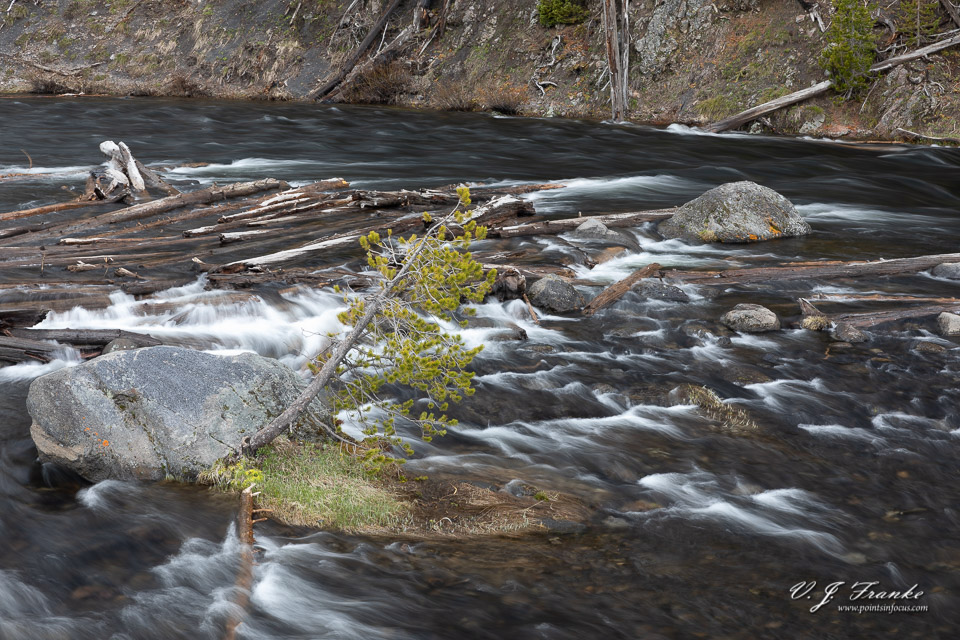 (0.3s, f/22, ISO 50) |
 (1-stop simulated, 2 frames @ 0.3s, f/22, ISO 50) |
Hybridizing Physical and Digital
That said, you can hybridize this approach with a physical ND filter.
Like stacking ND filters, the density in stops is additive. If you have a 2-stop ND filter and you want a 4-stop one, you can use the 2-stop then shoot 4 exposures to average together with this technique. In many ways, I think this is potentially the most flexible approach. If you have a 2 or 3 stop ND filter, you can fairly easily stretch that to a 5 or 6 stops without having to many extra images.
Other Pros and Cons
I’ve already mentioned the biggest con of this approach, which is that you need to use a lot more storage space and shutter clicks than you otherwise would if you were shooting with a physical ND filter.
That said there are some other pros and cons that are maybe worth considering. First, if you don’t need a huge amount of ND in your work, say 2-4 stops, the digital approach cuts down the gear you need to carry and the difficulty of working with filters in the field.
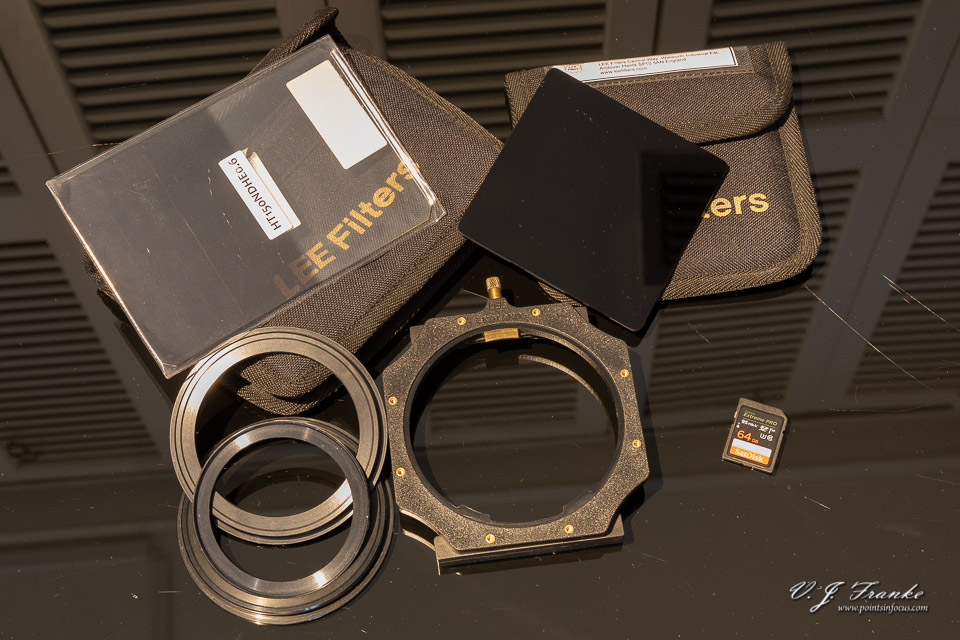
For example, I use 120mm (4″) square ND filters in a Lee holder. Which means if I want to carry practical ND filters, I have to not only carry the filters themselves, but the Lee holder, and the adapter rings to mount the Lee holder on my lenses. All told that ends up being a fairly substantial pouch of gear that I need to carry. Moreover, when I have the Lee adapter rings mounted, I can’t attach a lens hood or lens cap to my lenses.
I use Lee’s system because it makes it easy to attach and detach the filters from the camera, and allows me to compose and focus with the full brightness of the lens. You can do the same thing with a screw on filters, though it’s slightly more of a hassle.
Using the digital approach you trade all that extra gear for some extra files.
One other advantage is noise reduction. Because the digital processes is averaging the values of the pixels, it’s averaging out the noise in each individual image. Moreover, since it’s many short exposures, there also won’t be as much cumulative thermal noise in the final image either.
That said, for me at least, noise isn’t a major consideration. I’ve shot 10-stop ND exposures for 5+ minutes at mid-day sun in Florida when it’s more than 90°F out and the noise wasn’t an obvious issue.
Mimicking an ND Filter
I’m calling this processing mimicking not faking in a large part because it depends on capturing the full extent of time that the ND filter would otherwise have resulted in. The capture part is as important to the overall result as the post processing an not just digital trickery.
Capture
There’s no specific process to capturing these images that needs to be spelled out in steps. However, there are a couple of things you will probably want to do. At least these are things that I’ve found work best.
To start with I shoot from a tripod. While it’s possible in some situations to hand hold, and I do auto-align images in post processing, for the vast majority of these cases I find it’s simply much easier to just use a tripod.
Second, I find it moderately helpful to have an intervalometer that has a frames counter. Canon’s TC-80N3, for example, can be set to shoot up to 99 frames. One note here, the fastest rate Canon’s TC-80N3 can shoot at using the frame counter is 1 FPS. So this will extend the overall shooting time for the effect compared to a ND filter.
As for camera and exposure settings, you’ll want to properly expose the scene for the exposures. This isn’t an additive processes in the sense that you’re going to make say 32 under exposed images and them stack them into a single properly exposed image. It’s a averaging process that will take 32 properly exposed images and create a single properly exposed image.
If you’re going, in total, for a long exposure, then you’ll want to get your exposure as long as possible (e.g., shooting at ISO 25 or 50, and at f/22). Remember, if your aim is a 2 minute total exposure, and you can only get 1/2 of a second on the camera, you need to shoot 240 frames — which is why I don’t see this as a replacement technique for actual ND filters, at least as things currently stand.
Processing
For this article I’ll be using Adobe’s Photoshop CC, though Photoshop CS6 can also do the same thing, as well as many other applications. Additionally, I’ll be starting from Lightroom Classic CC, though it’s not necessary to the process, it’s just part of my workflow.
In short, the processes uses the mean stacking capabilities of Smart Objects in Photoshop to achieve the same effect as an ND filter. To accomplish this I use this procedure.
- Select the images I want to stack in Lightroom
- Right click on one fo the images and choose
Edit In>Open as Layers in Photoshop... - When the files are opened as layers in photoshop select all of the layers from the layers pallet (click the top one, then shift click the bottom on)
- Align the images by clicking
Edit>Auto Align Layers - I use the auto settings in the align layers dialog
- Combine the layers into a smart object by clicking
Layer>Smart Objects>Convert to Smart Object - Change the smart object stacking mode to mean by clicking
Layer>Smart Objects>Stack Mode>Mean
You can save the file here, though it will certainly be quite big due to having many layers stored in the smart object. At this point you can rasterize the smart object by going Layer > Smart Objects > Rasterize to convert the smart object into a single layer in your document. If you do this, you won’t be able to go back and make changes to the layers in the smart object, but you will save potentially a lot of disk space.
Final Thoughts
I don’t really consider this a viable alternative to physical ND filters for a number of practical reasons. Largely it’s the shear number of images that are necessary to cover the same exposure as an ND filter past 2 or 3 stops. Moreover, there can be some minor discontinuities between frames when there’s a significant change and not many frames to average over.
Finally, if you shoot video and are using ND filters to get proper exposures with wide apertures, this isn’t even a consideration to start with.
With that said, it’s still a useful trick to have in your belt for those select occasions where you don’t have or can’t readily use an ND filter. While I wouldn’t want to deal with a 1000 frame 10-stop mimicry, it’s certainly useful for when you just need a bit more blur than you can reasonably achieve with just the aperture and ISO alone.
Another thing I think is worth pointing out. In many cases, at least for fast moving water, you don’t need tremendously long exposures to get acceptable amounts of blur. It’s the slower moving areas that require longer exposures to blur. This is a lot more viable of an approach if you can get away with a 1 or 2 stop adjustment than if you need 4 or 5 stops or more.
One final note, this is very much a feature that camera makers could conceivably build into their cameras. By reading out the sensor and preforming a cumulative moving averaging on it, cameras could produce the same effect and do so without the necessity to have tons of files or post processing later on. Functionally this would massively reduce the need for solid ND filters in still photography — for video, this is a completely different story.
Comments
BTW I prefer this way:
1) In Photoshop (Extended only, IIRC all CC users get this) do File->Scripts->Statistics…
(2) In the resulting dialogue select your files, Select “Mean” in the drop-down and tick “Attempt to Automatically Align Source Images”.
(3) Wait for it all to happen
(4) Crop to suit