Configuring Multi-Rear Button Focusing on Canon DSLRs
This is the companion piece to my video on this topic which you can either watch here, or check out on my YouTube channel.
One of the aspects of Canon’s cameras that I think is frequently overlooked is the extensive capabilities available to the user when it comes to the ability to control and activate the AF system. In this article, I’m going to look at some of how I configure my camera’s AF system, and more importantly the way I activate it, to get the most out of it.
So let me start with a bit of background. When I got started in photography, I was predominately a bird photographer. In bird photography, probably more than I’ve experienced with any other kind of wildlife photography, there’s a much larger change for the subject to jump from being purely static to rapidly moving and dynamic.
With my early Canon AF systems, such as on my 40D or EOS-1D Mark III, the best I could do was setup the camera for most dynamic condition, and hope that it didn’t cause problems with the static ones. This essentially meant that I would set the camera to auto AF point selection and AI servo, and hope that it picked a good point for static compositions. Well, actually, my other option was to give up a lot of potential flight shots and set the camera up properly for perched birds.
With the introduction of the EOS-1DX and EOS 5D mark III, Canon added the ability to save a secondary AF configuration, and recall it using a separate button for focusing. With this I could have one focusing button configured for the static situations, and a second button for the dynamic ones. Making the switchover from a single point and one shot AF to the entire AF grid and servo AF as simple as moving my thumb over a fraction of an inch.
Over the years, this setup has become quite fundamental to my way of shooting, even now since I’ve moved away from birds and on to other types of wildlife and even to landscapes. In fact, it’s one of features that keeps me shooting with Canon cameras; as it’s not something I’ve seen available on any other brands cameras when I’ve looked. And it’s important enough that even though I’ve wanted experiment with mirrorless cameras in a serious way, it’s omission from the EOS R cameras, at least so far, has prevented me from buying one — even when they’ve been available at substantial discounts.
Parts of the configuration I’m going to describe can be done on virtual all Canon cameras — especially rear button focusing. However, the use of registered AF points and multiple AF on buttons, that’s core to making this as powerful as it is, is only available on the following higher end models.
- EOS-1DX Mark 2
- EOS-1DX
- EOS 5DS and 5DS r
- EOS 5D mark 4
- EOS 5D mark 3
- EOS 7D Mark 2
In this article I’ll be showing the configuration steps on a EOS 5D mark 4. The steps will be similar on the other models, however, some menus may be different due to differences in the camera’s overall feature sets, or simply the point at which the camera was release. You should be able to find the exact menu pages and steps in your camera’s manual.
Rear Button Focusing
The heart of my setup revolves around using rear button, or two button, focusing. This is a fairly common technique among professional and serious photographers as it gives them a lot of control over the activation of the AF system.
If you’re not familiar with the approach, put simply it decouples the activation of the AF system from the shutter release, and places it on a separate control on the rear of the camera. This way, when you press the shutter release, the camera simply takes a picture, instead of trying to focus and then take a picture.
This becomes extremely useful in situations where the AF system may have trouble focusing on a subject, and it’s attempt to refocus the image before every exposure may result in missed shots.
There’s an additional reason that I like using rear button focusing, and that’s because it gives me a more consistent way to control the camera.
In the low light and low contrast conditions I just described, you could also get around the problem of the camera refocusing by flipping the AF/MF switch on the lens to manual focus. This of course disables the camera’s AF system and keeps the camera from messing with the lens’s focus.
And to be honest, there’s nothing wrong with this approach if it’s what you do.
However, in my experience at least, I’ve been bitten on many occasions by messing with the AF/MF switch. It’s simply not something I do frequently, and that leads to problems.
For example, one example that’s repeatedly bit me before I switched to rear button focusing, was shooting night landscapes. Due to the low light and low contrast, when I first got started, I’d flip the lens to MF and focusing on the stars manually in live view. I’d then shoot for several hours, and being very tired at the wee hours of the morning, put the camera gear away forgetting that I had the lens set to MF instead of AF. By the time I got home, and cleaned up the gear, and put it away, I’d have completely forgotten that I’d messed with the AF/MF switch.
Fast forward some months, and I’m going to use the lens for something and it’s not focusing. Immediately, since I won’t remember that I messed with the AF/MF switch months ago, I’m thinking that my camera or lens has failed. Of course, I’d quickly realize what the problem is, but the initial shot of adrenaline and the worry is something that I found very disruptive to my focus on shooting.
By using rear button focusing, I never have to mess with the AF/MF switch. Unless I activate the AF system by pushing the AF-On button, the camera behaves as if the lens is in manual focus mode.
To configure rear button focusing we need to head over to the Custom Controls menu on the Custom Function 3 menu page.
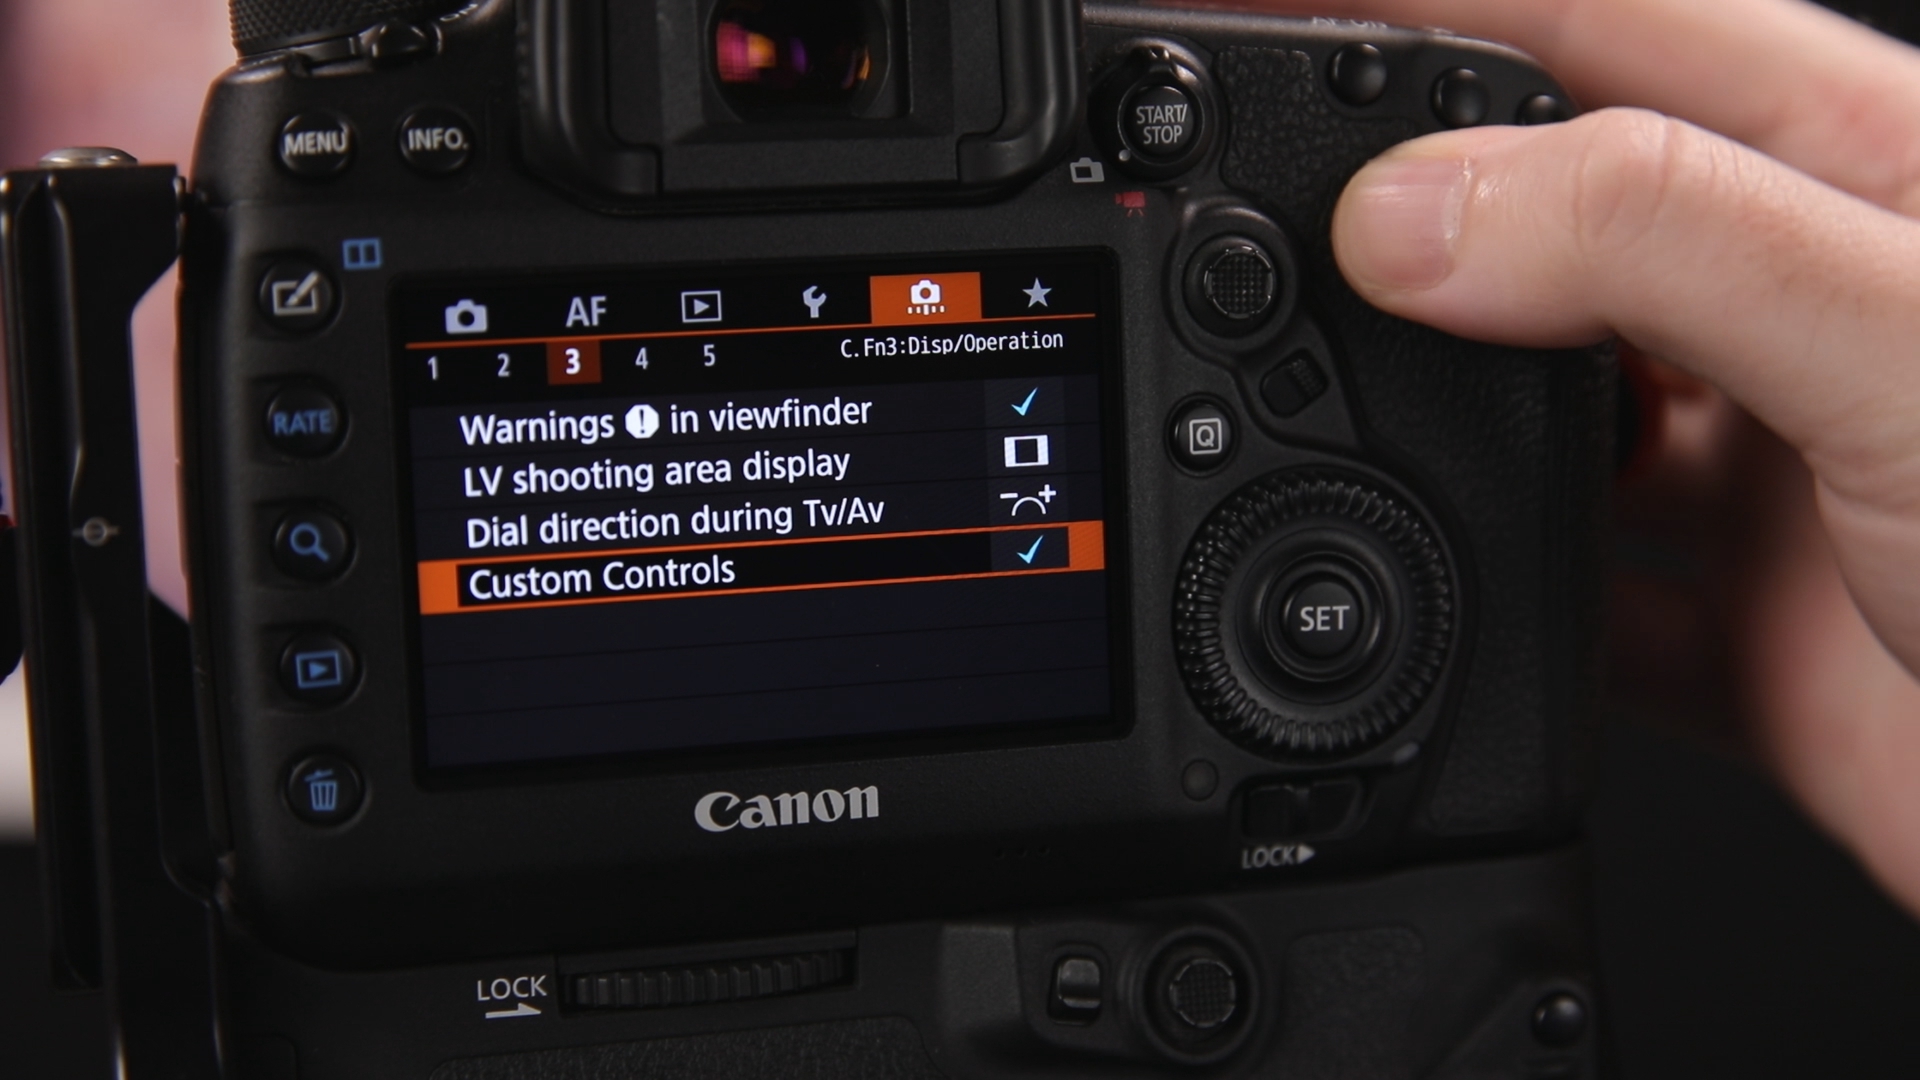
In the custom controls menu we need to look at the settings for two buttons: the shutter release, and the AF-On button.
The shutter release’s settings with be selected by default, so press set to enter the config page for the shutter button.
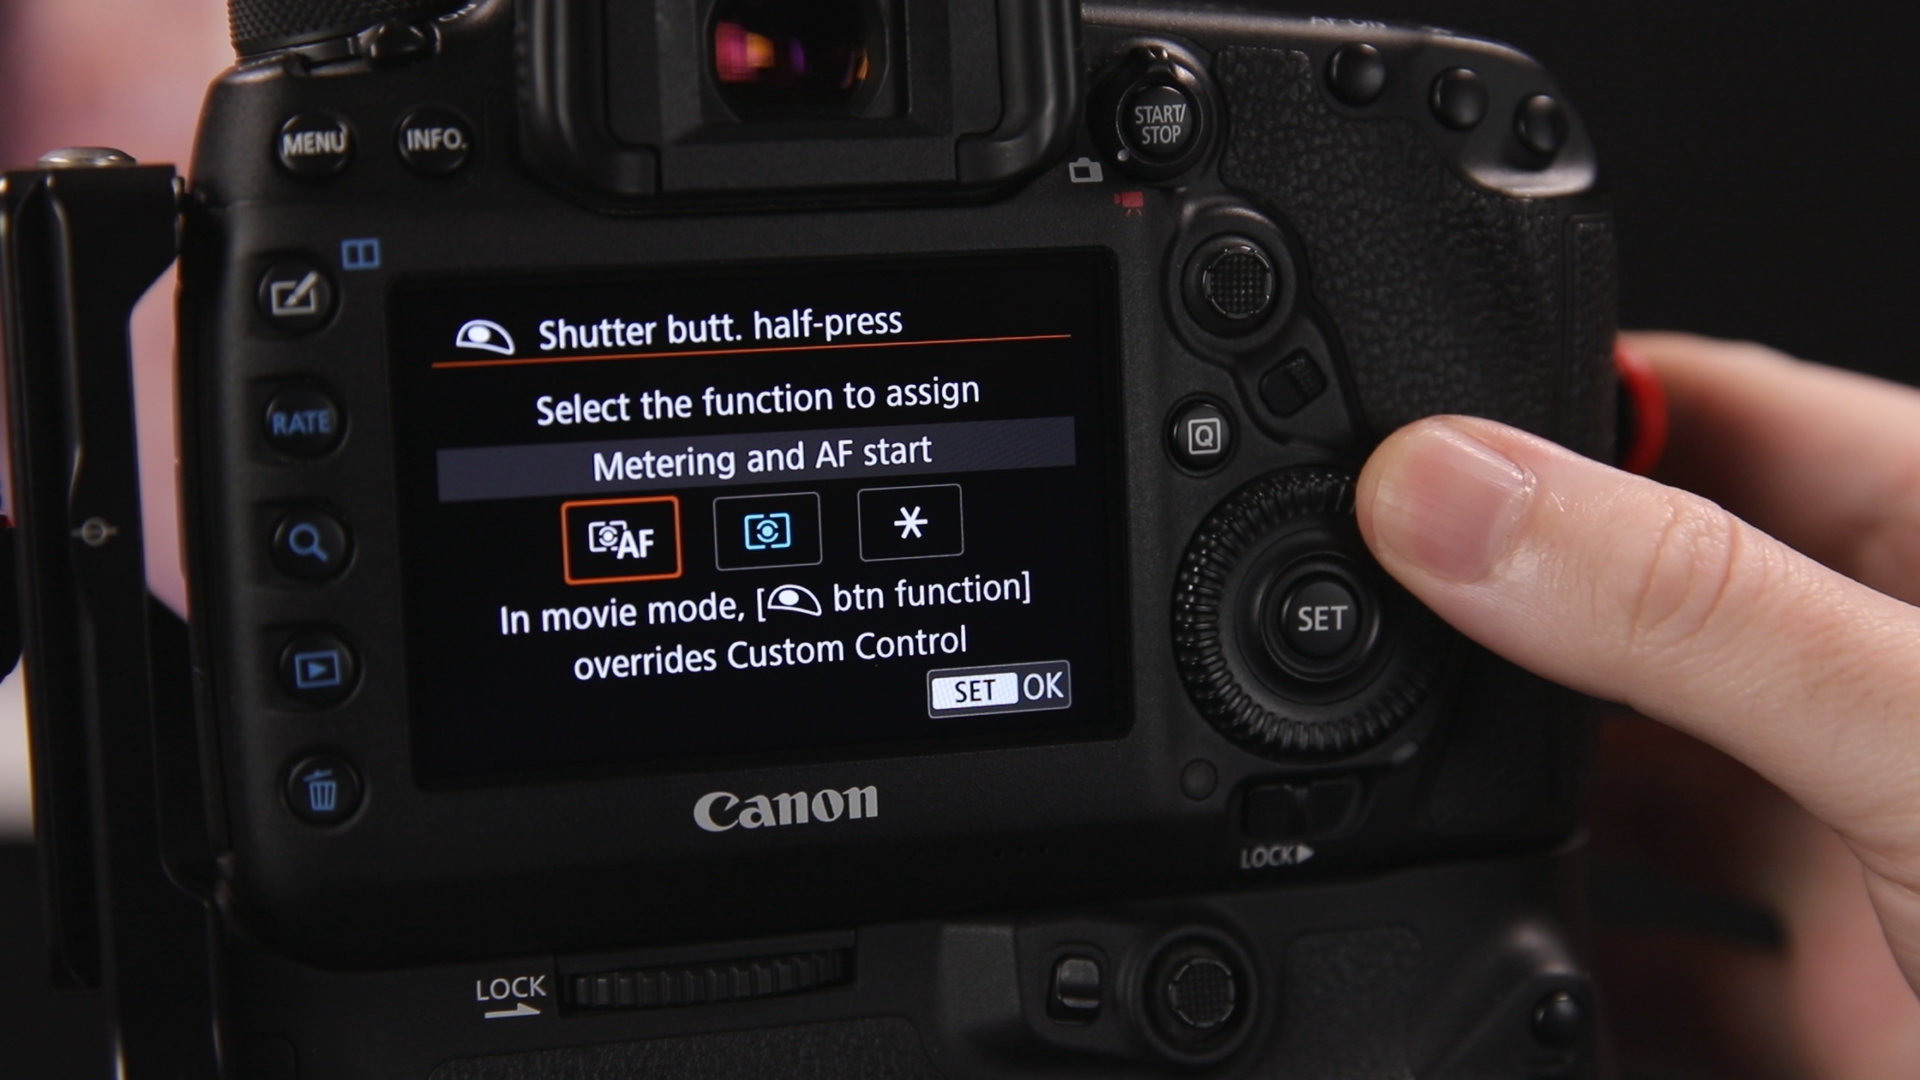
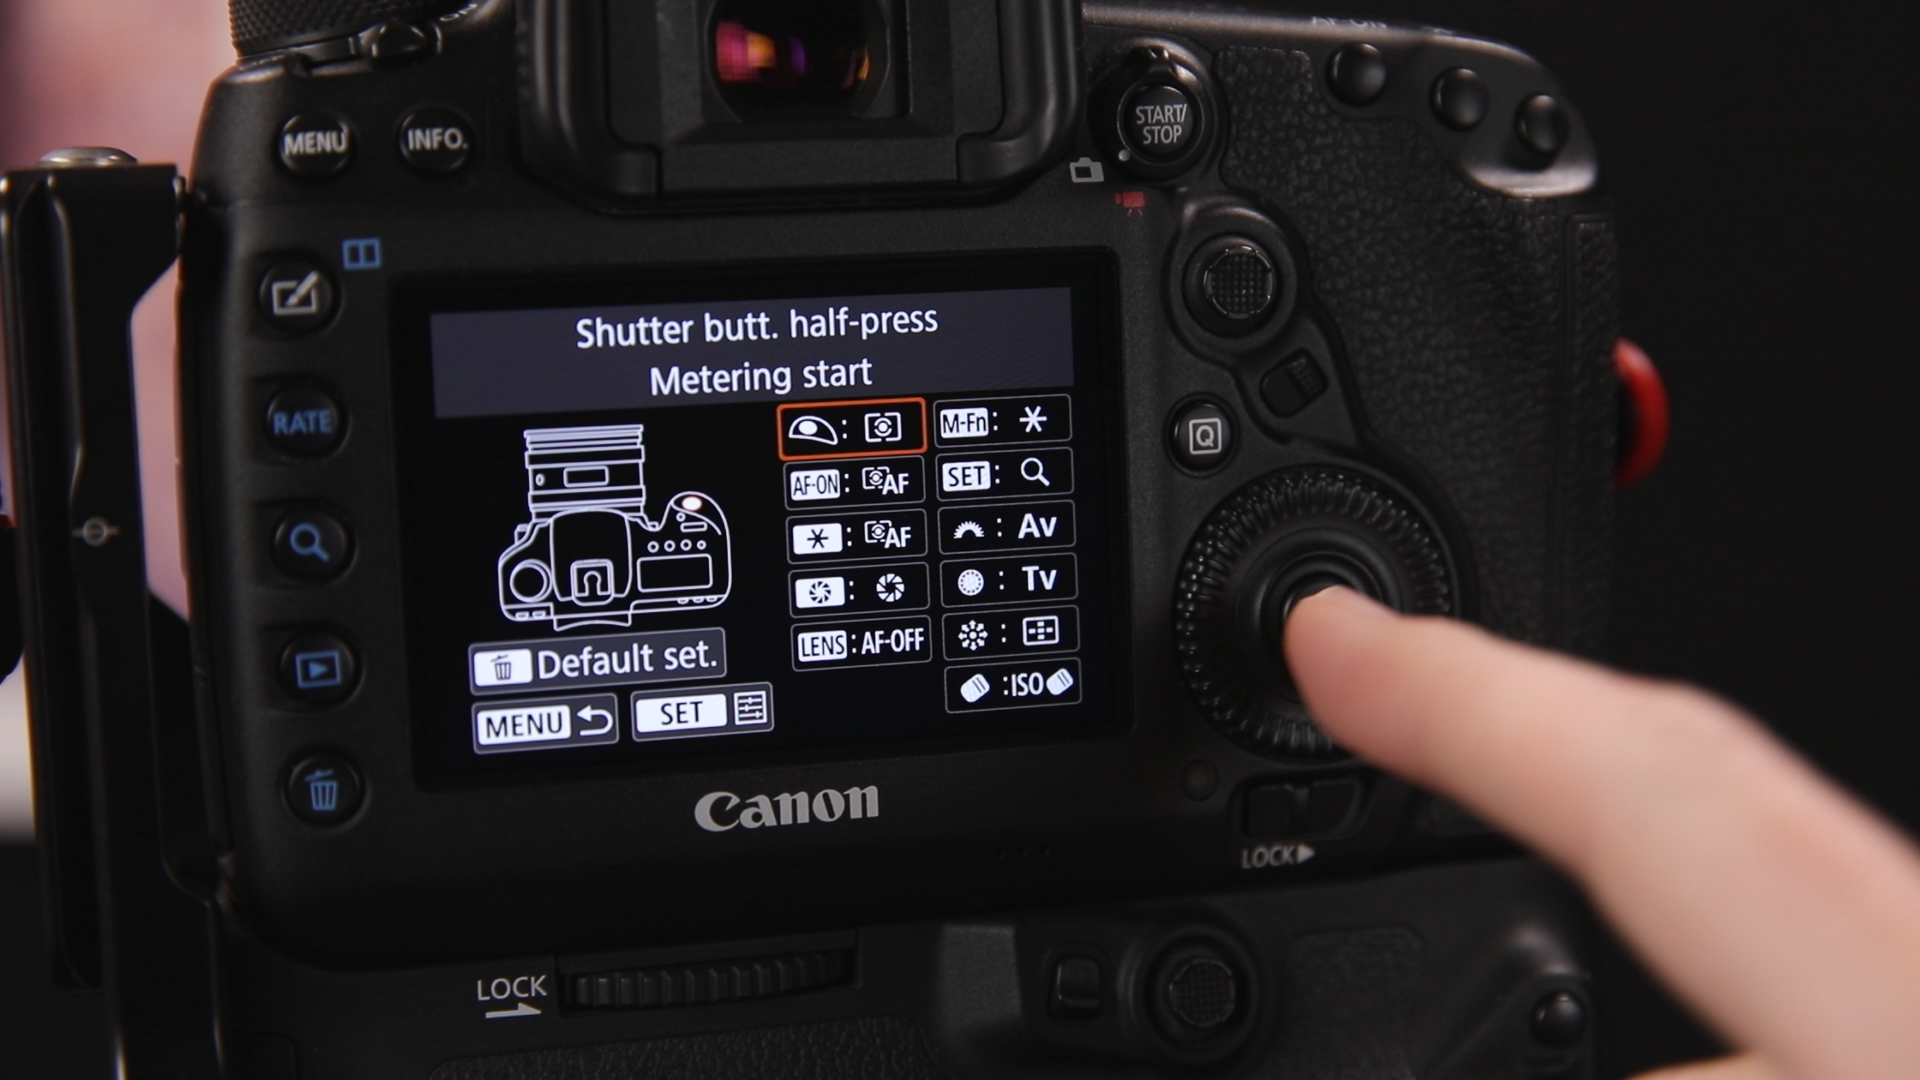
By default, the shutter release will be set to the left most option, “Metering and AF start”. To make rear button focusing work, this needs to be changed to the middle option, “Metering Start”.

Next we need to look at the settings for the AF-On button. By default the AF-On button should be set to “Metering and AF Start” and this will be indicated by the text displayed under the button’s name at the top of the screen.
If this isn’t set, you’ll need to enter the settings page for the AF on button, and change it.
At this point the camera is now setup for rear button focusing.
You can of course, verify that everything is correct at this point. Half pressing the shutter release should not cause the lens to focusing, and pressing the AF-On button should.
Registered AF Points
The second part of this process is to understand how to register AF points and modes. While there are other ways on these cameras to accomplish something similar to what I’m doing, I find that using registered AF points to control the secondary AF setup is more efficient.
Registering an AF point and mode is done in the AF point selection mode. This is the mode the camera switches to when you push the AF point selection button on the back of the camera.
Changing the AF point, mode, and saving a registered point can be done though the viewfinder. However, to illustrate it in this article, I’m using the rear LCD. However, normally, I tend to make changes to my AF point and mode while looking through the viewfinder.
When in the AF point selection mode, to register an AF point and mode, hold down the AF point selection button and press the backlight button.
To clear a registered AF point, again while in the AF point selection mode, hold the AF Point selection button, and pressing the ISO/FEC button.
On some cameras, these button combinations may be different, most notably this will be the case if the blacklight button is located to the left of the top plate controls instead of to the right.
Other AF Options
There are a few other AF configuration options that I’ve changed on my cameras, though they’re not necessary for this to work. However, since I’m talking about AF configuration, I though it would be useful to include the two big ones as they do have some impact on how the camera behaves when using two AF-On buttons.
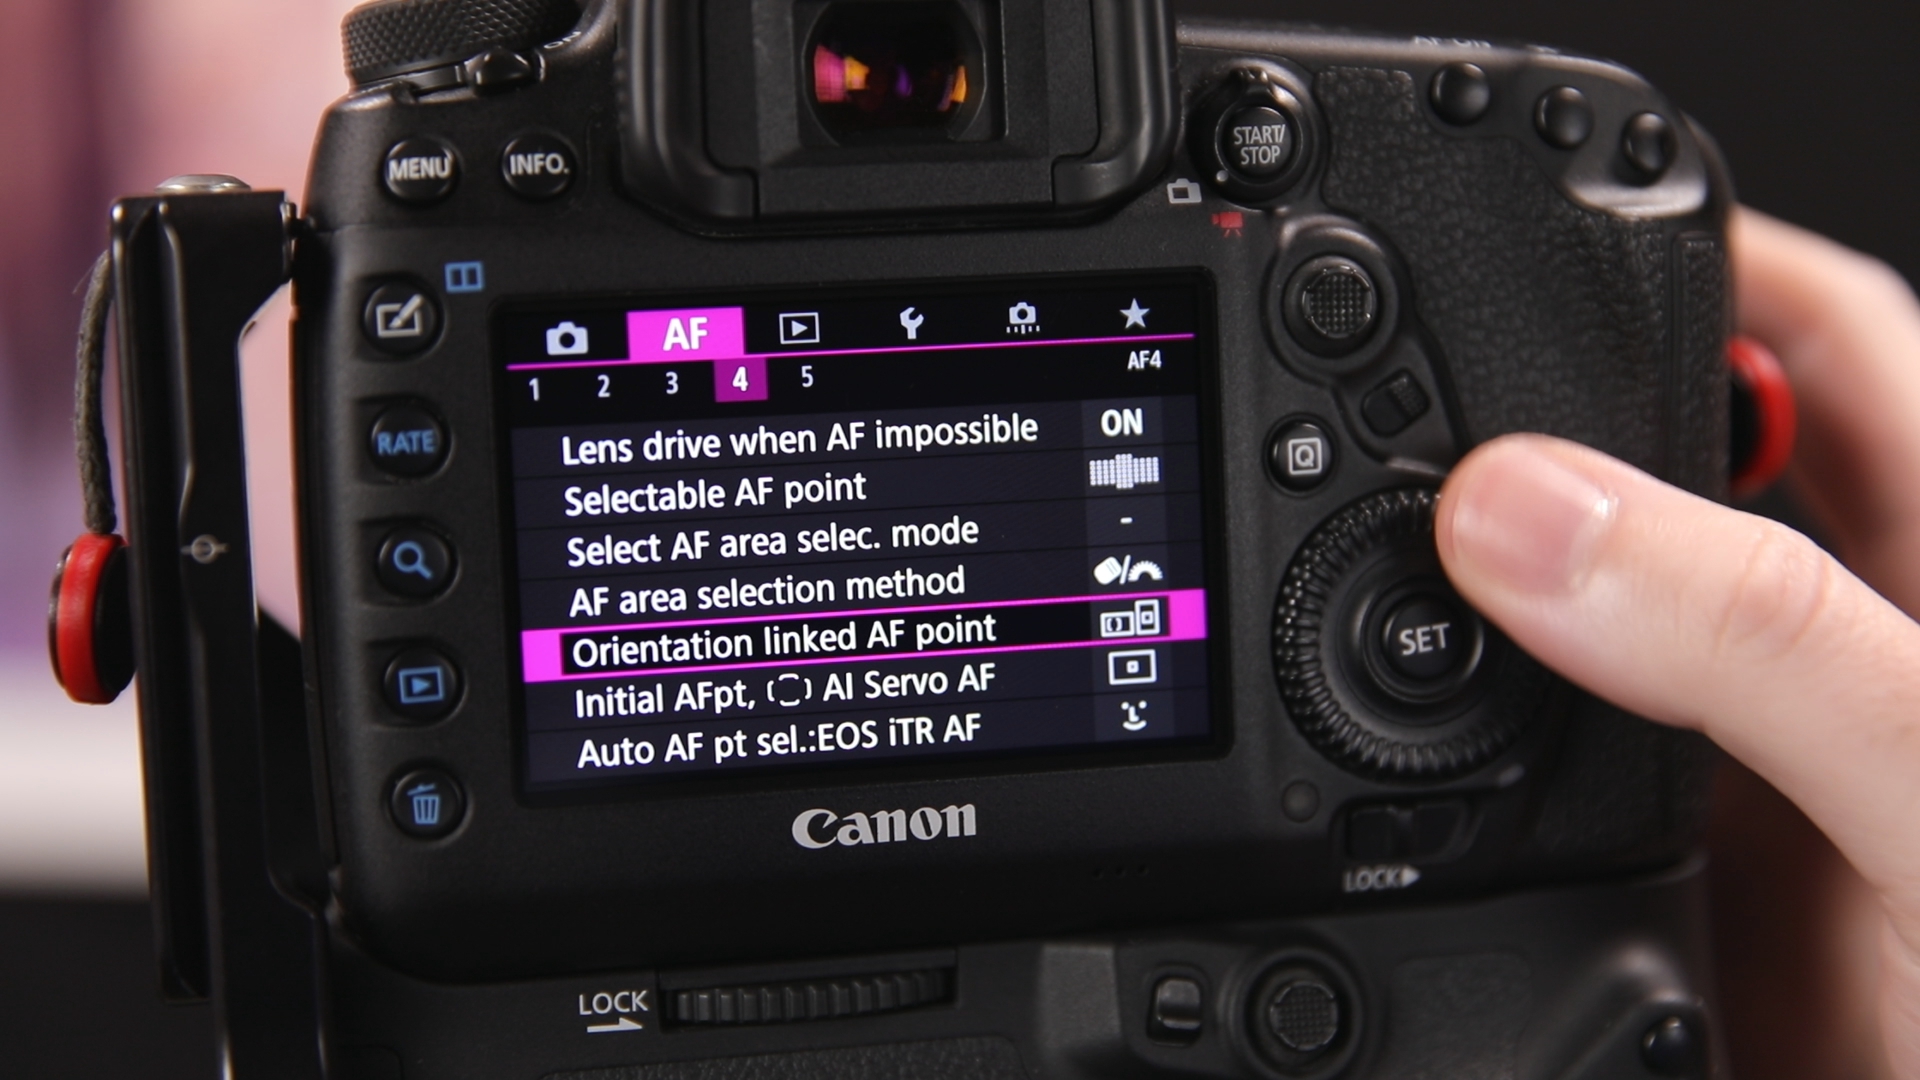
The first of these two options is orientation linked AF points.
Orientation Linked AF Points
Orientation linked AF points allow camera to save the position and mode for the active and registered AF point depending on the camera’s orientation. You can have different AF points for each of the three orientations the camera recognizes. These are, landscape, portrait with the grip under the lens, and portrait with the grip held above the lens.
In the orientation linked AF point menu, there are three options:
- Same for both vert/horiz – Turns orientation linked AF points off, and uses the same AF point for both all orientations
- Separate AF pts: Area+pt – Saves both the AF point and the AF point mode (e.g., spot, single, auto point selection) for each of the 3 orientations
- Separate AF pts: Pt – Saves only the point, not the area mode, for each fo the three orientations.
The difference between the second two options is whether you can use a different area mode in the two different orientations. When using the second option, which is what I use, you can have a single AF point for the landscape mode and an expanded AF point mode for portrait, or something similar.

On the other hand, the 3rd option unifies the area mode, but allows you to use different points. For example, if you set the area mode to 8-point expanded, it will be used regardless of the camera’s orientation.
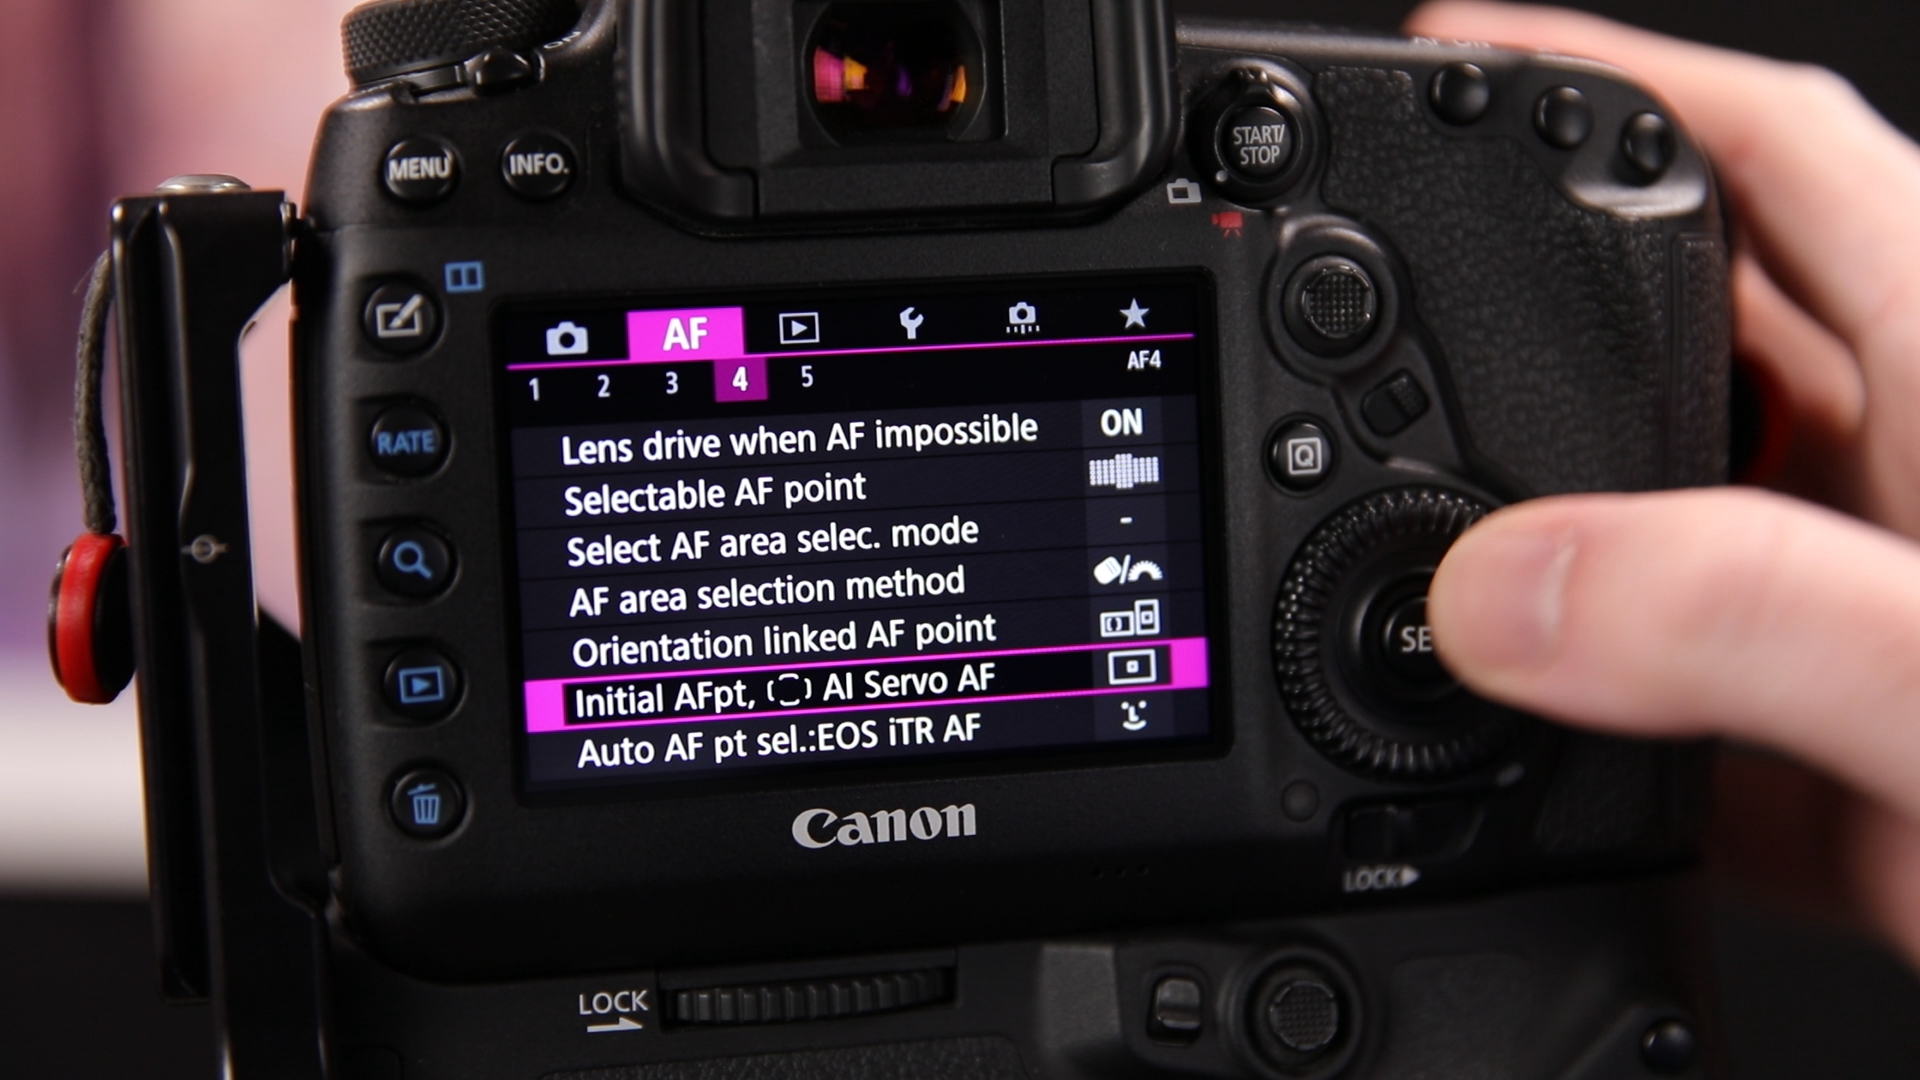
Initial Point, Auto AI Servo Selection
The second option I tweak is the option that controls the initial point used when switching to AI servo focus and auto AF point selection mode.
To be honest, exactly how the options in this mode differ, and what exactly they do, is a bit beyond me. I’ve read the description in several camera manuals, as well as Canon’s white papers on their AF system, and in some respects the text just is a jumble of words.
In the menu page, there are three options.
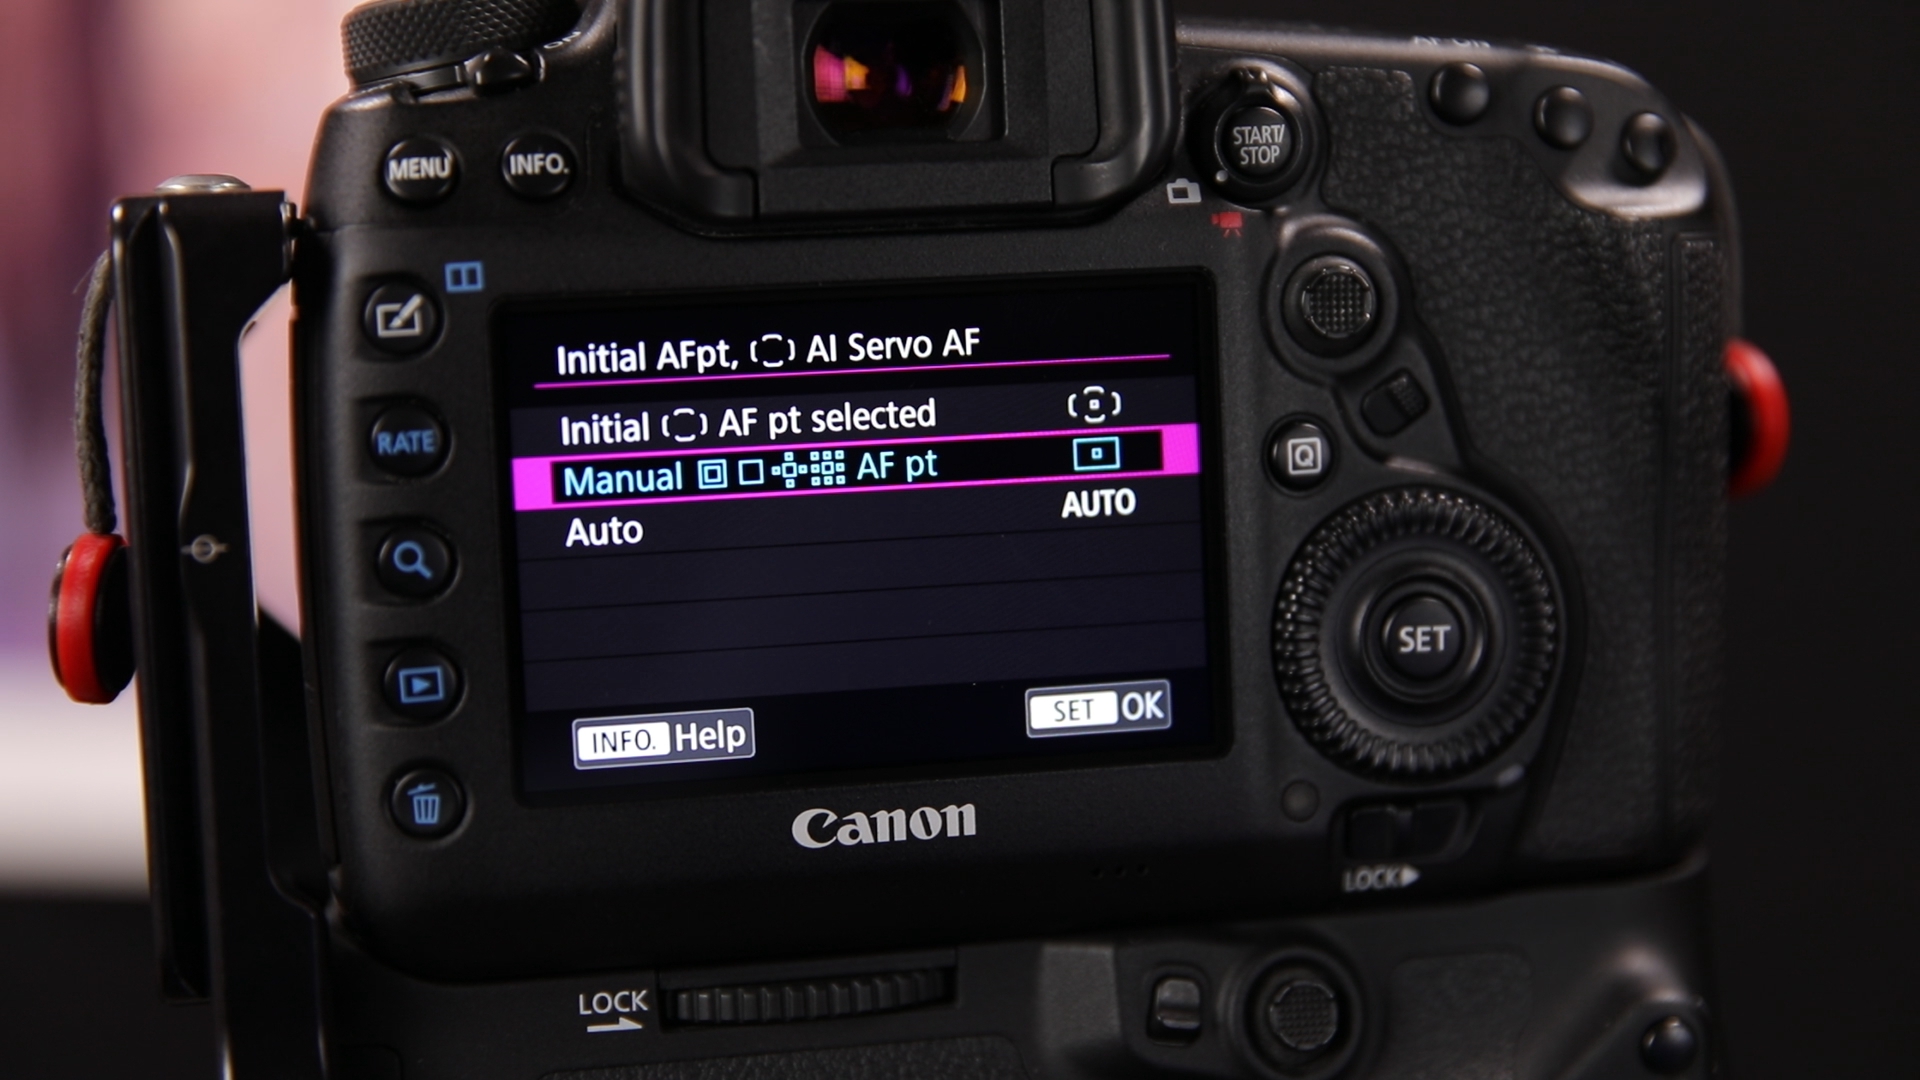
The manual for the 5D mark 4 has this to say about the options.
Initial AF pt selected AI Servo AF will start with the manually-selected AF point when the AF operation is set to AI Servo AF and the AF area selection mode is set to Auto selection AF.
AF pt If you switch from Manual select.:Spot AF, Manual selection:1 pt AF, Expand AF area: , or Expand AF area:Surround to Auto selection AF, AI Servo AF will start with the AF point that was manually selected before the switch. Useful if you want AI Servo AF to start with the AF point that was selected before the AF area selection mode was switched to Auto selection AF.
After setting the AF area selection mode to Auto selection AF with the [83: Custom Controls] menu’s [Metering and AF start] (p.500), [Switch to registered AF func.] (p.502) or [Register/recall shooting func] (p.508), during shooting with Manual select: Spot AF, Manual selection: 1 pt AF, Expand AF area: , or Expand AF area: Surround, you can press the assigned button to start shooting with Auto selection AF set for the AI Servo AF using the last used AF point as the initial AF point.
Auto The AF point which AI Servo AF starts with is set automatically to suit the shooting conditions.
So I use the second option, as I think based on my interpretation of what I think is being said, is that this option uses the AF point that was last selected manually when switching to a registered AF point that’s using the Auto point selection mode.
In other words, if my currently selected AF point is the top left most point on the left most grid, and I hit my second AF-On button which is set to AI Servo AF and the Auto AF point mode, then the camera will use that top left most point to determine what the AF system should track across the whole grid.
Suffice to say, as much as I’d like to elaborate on this and provide a more clear explanation, I simply can’t.
And with that covered, these are the changes that I’ve made to the AF system that are most relevant to this discussion.
Configuring the Second AF On Button
So with the basic configuration steps out of the way, we come to the key bit that makes this so powerful. Having not only a second AF on button, but having that second button be able to do something completely different from the first AF on button.
Unfortunately, Canon only allows a limited number of buttons to be mapped to activate the AF system. However, one of those is the AE Lock button and that’s conveniently located right next to the normal AF-On button.
Of course, this does mean giving up the normal function of the AE Lock button. However, if this is something you regularly use you can remap AE Lock to the M-Fn button right next to the shutter release — which is actually where I’ve mapped mine.
Configuring the second AF-On button starts similar to the first one we did earlier, only instead of selecting the AF-On button from the custom controls menu, we select the AE Lock button.
Likewise, we change the buttons function to “AF and Metering Start” just as we did with the AF-On button.
However, this time instead of just hitting set and jumping out of the screen all together we want to hit the Info button to jump into the “Detail set” screen.
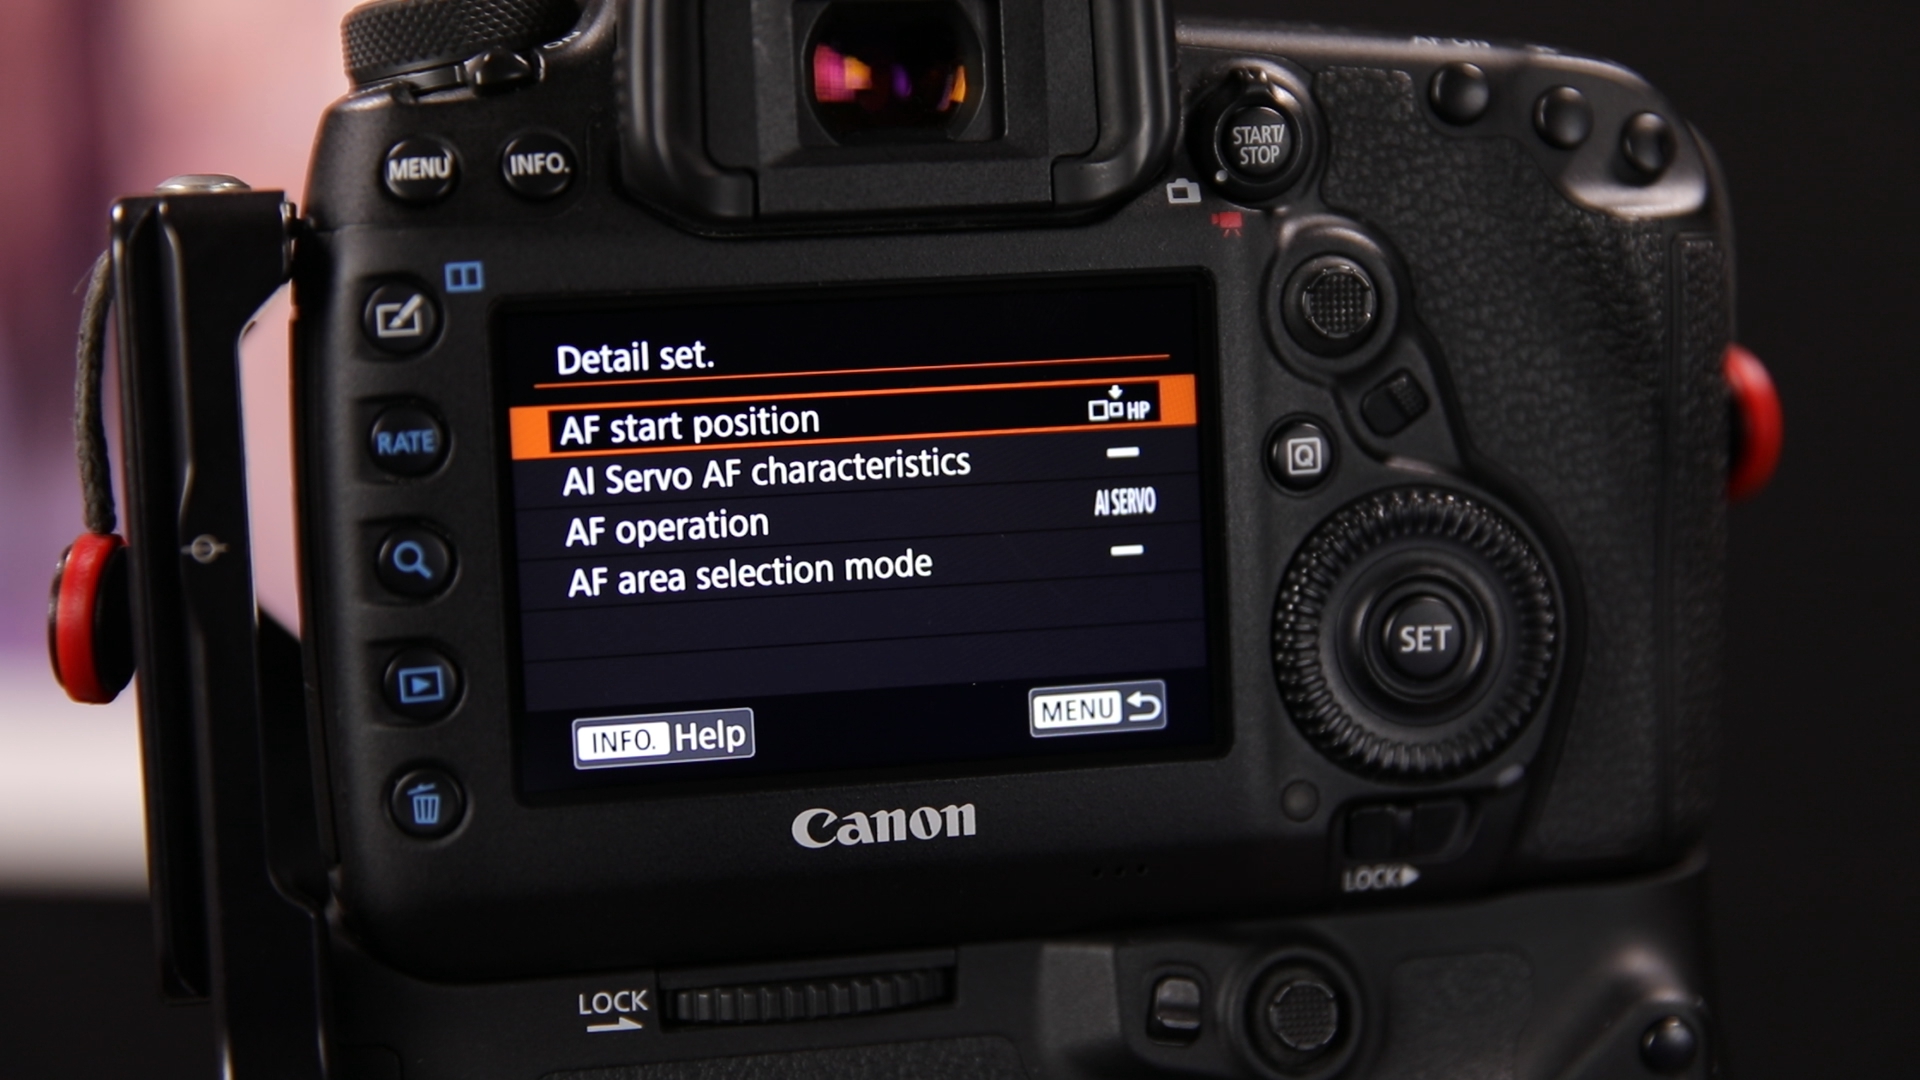
In the detail set screen there are a number of options that can be configured that govern how the AF button behaves. And I should point out, that these options can also be set for the main AF-On button as well, though I leave mine set to the defaults.
The first menu entry is “AF start position”. This entry governs whether this button will use the normally selected AF point, or the registered one.
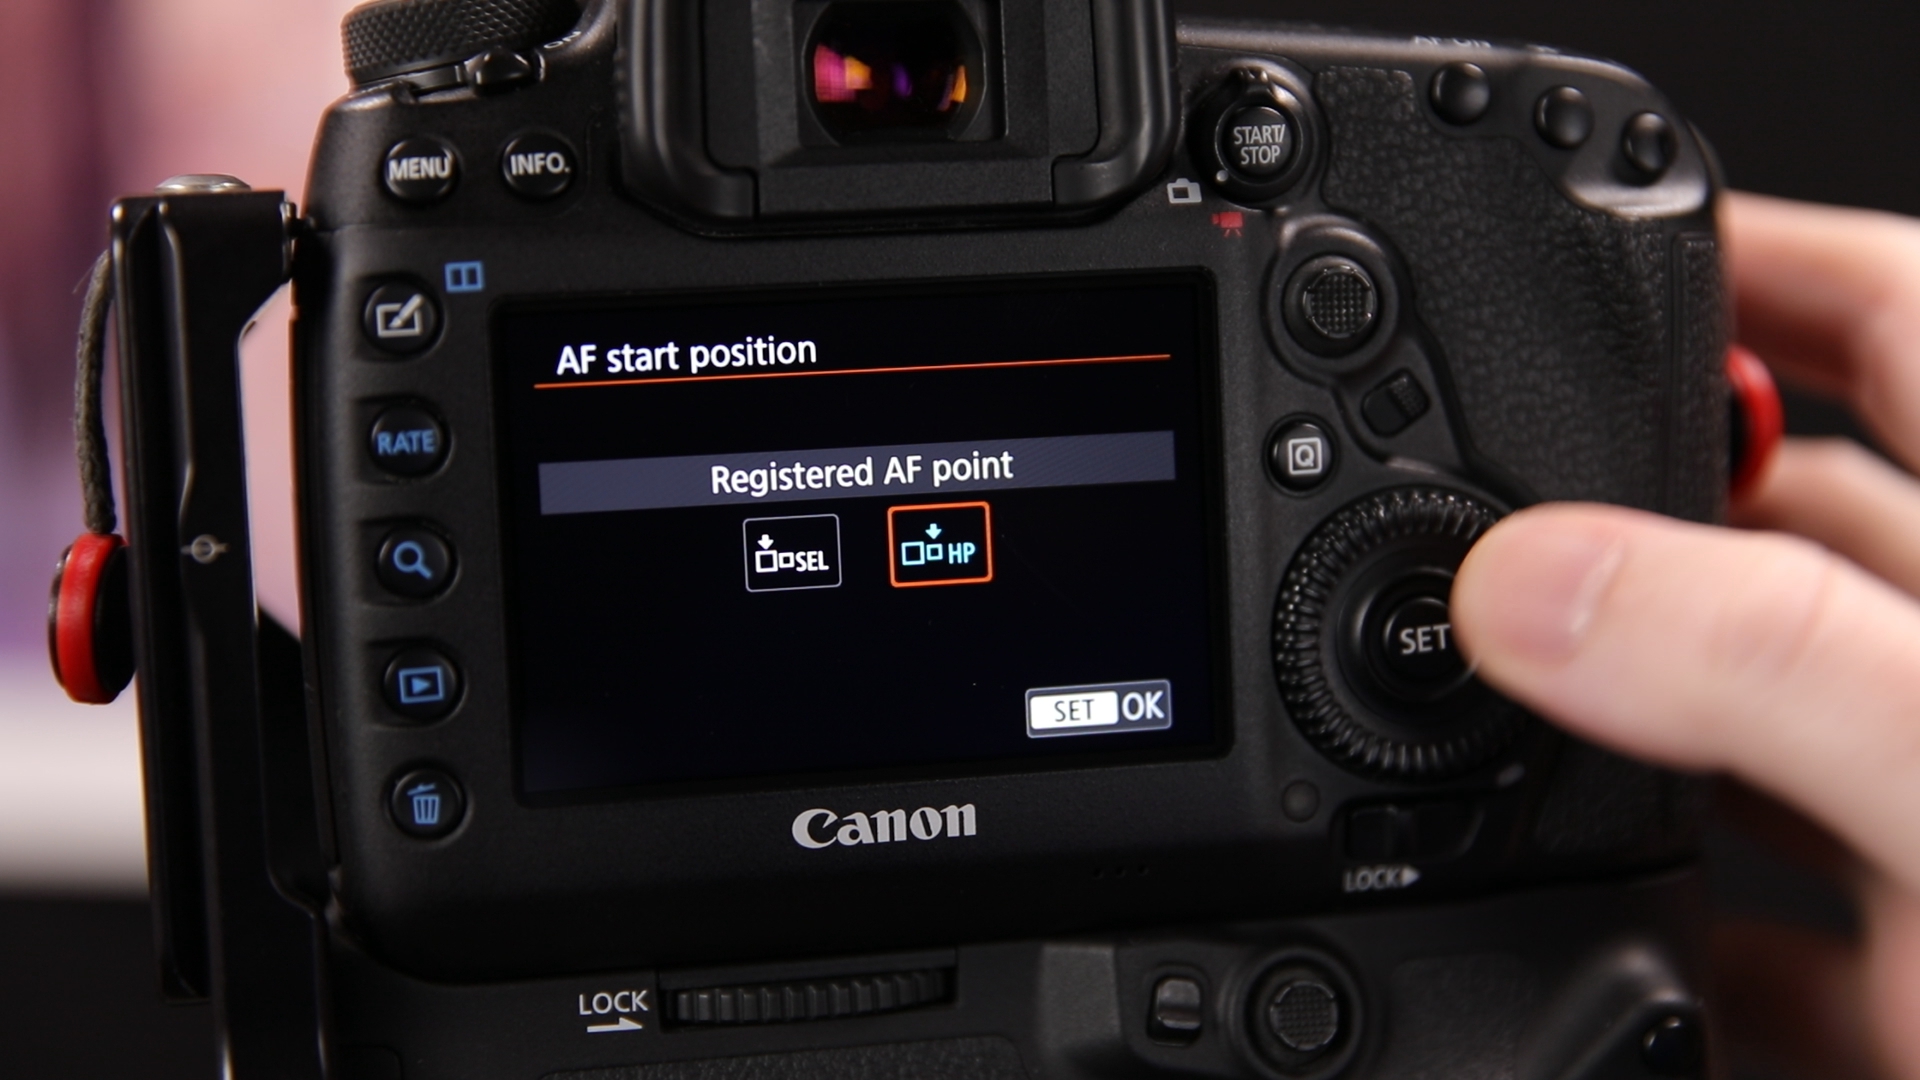
Since my plan here is to use this second AF on button with the registered AF point, I switch this to “Registered AF Point”.
The second menu entry controls which of the AI Servo AF tunings the camera will use if you have AI servo AF set.

I leave this set to Maintain current settings, as I don’t generally run into situations where I want to change the AI Servo tracking tunings. However, this may be something that you might want to consider changing depending on what you shoot.
For example, if you’re a sports photographer, you could have your main AF-On button and your normal camera setting set to use the AI Servo AF mode that ignores obstacles. However, for your second AF-On button, you might want to have it use the tuning for subjects that rapidly accelerate and decelerate. This way your normal shooting would allow panning past intervening obstacles, like light poles. However, when the your subject started moving erratically, you could switch to a more aggressive tracking configuration simply by using the second AF-On button. Of course, in this instance, you also might not want this button to use the registered AF point too.
The third menu option, “AF operation” controls how the AF system will behave when this button is pressed.
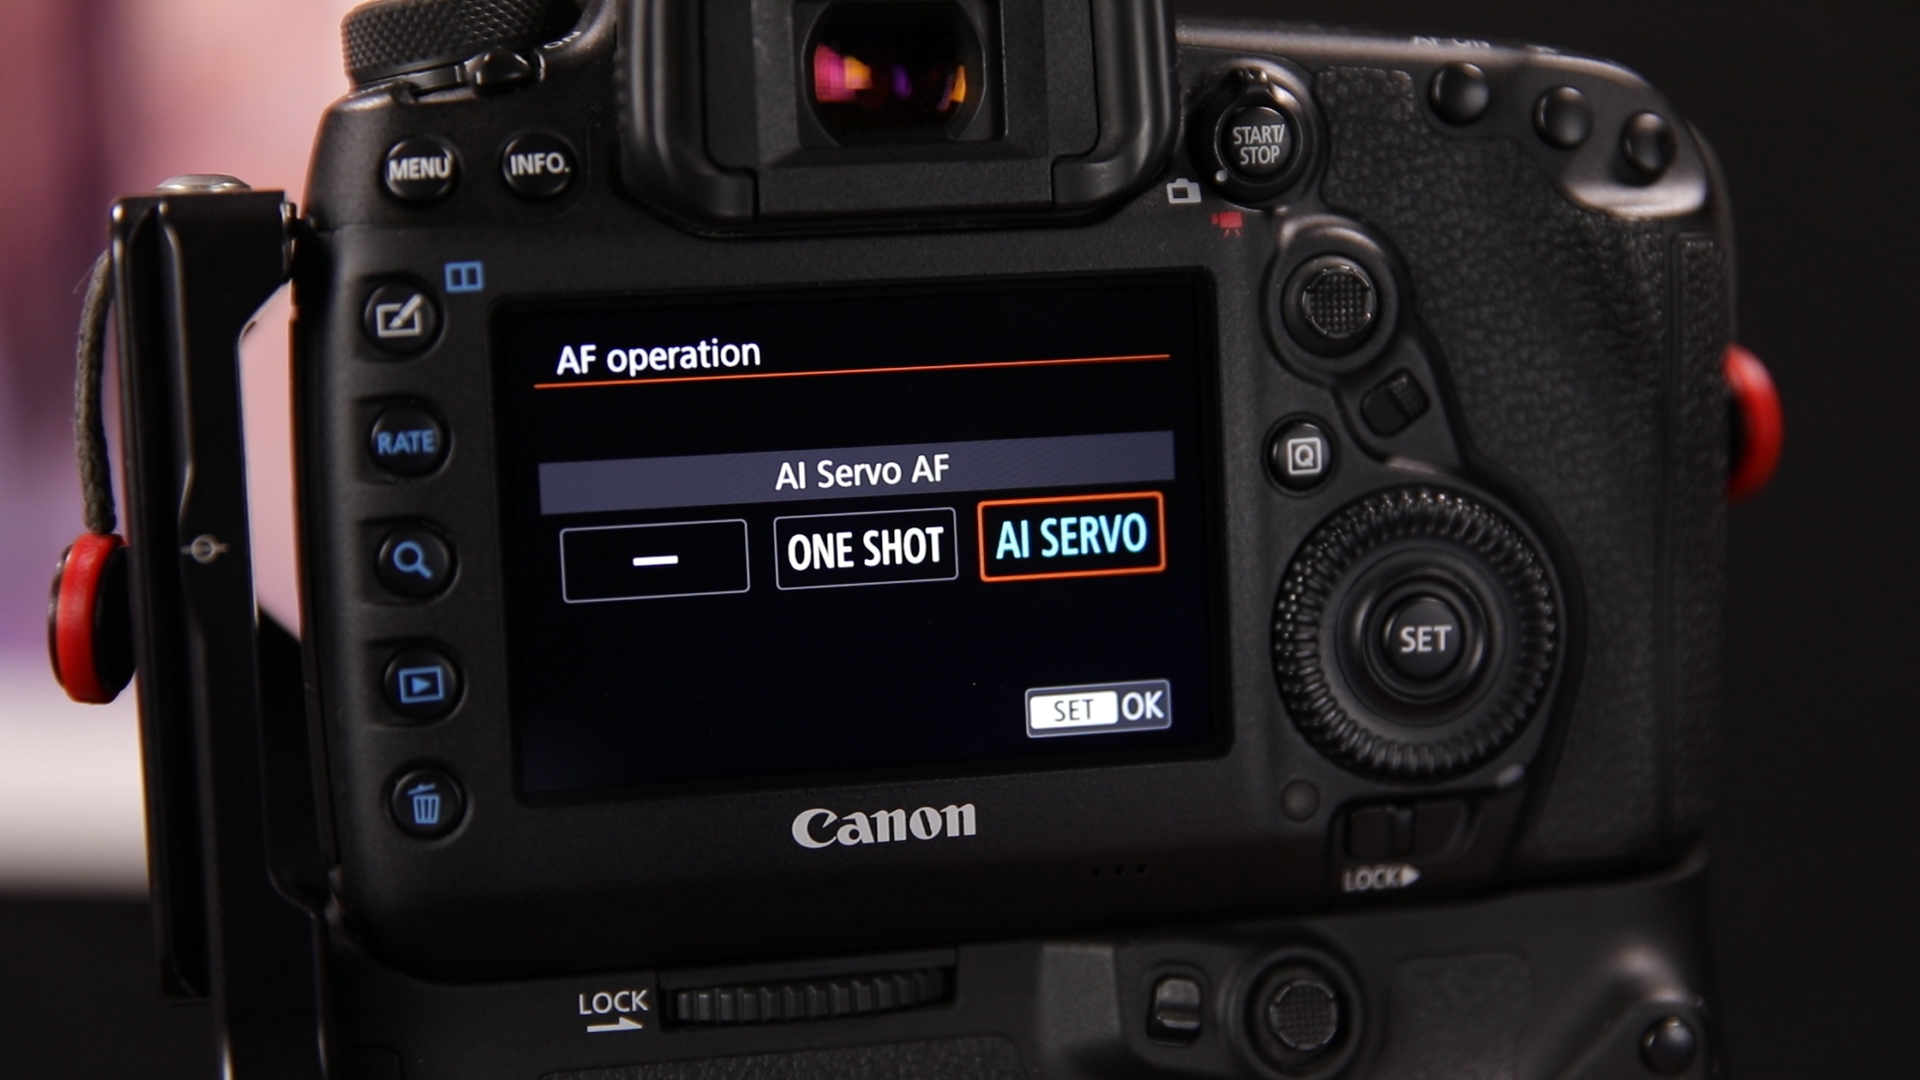
In this menu there are three options. The first, the long dash, is to use the camera’s normal settings. So if you have the camera set to AI Servo, then when you press this AF-On button the camera uses AI Servo AF.
The second two options, “One shot” and “AI Servo” override the camera’s normal AF configuration. So if I have this option set to “AI Servo”, as I do in the image, then the camera will always use AI Servo AF when this AF-On button is pressed.
My choice to override the AF operation mode on my second AF on button goes back to my time with bird photography. Regardless of how I might otherwise have my camera setup, I wanted to the secondary button to be ready to track a bird in flight as it took off or if it flew overhead. This meant that I needed the camera to be in AI Servo AF, and I couldn’t rely on having the camera set that way through the normal settings.
The final menu entry allows you to override the AF area selection mode.
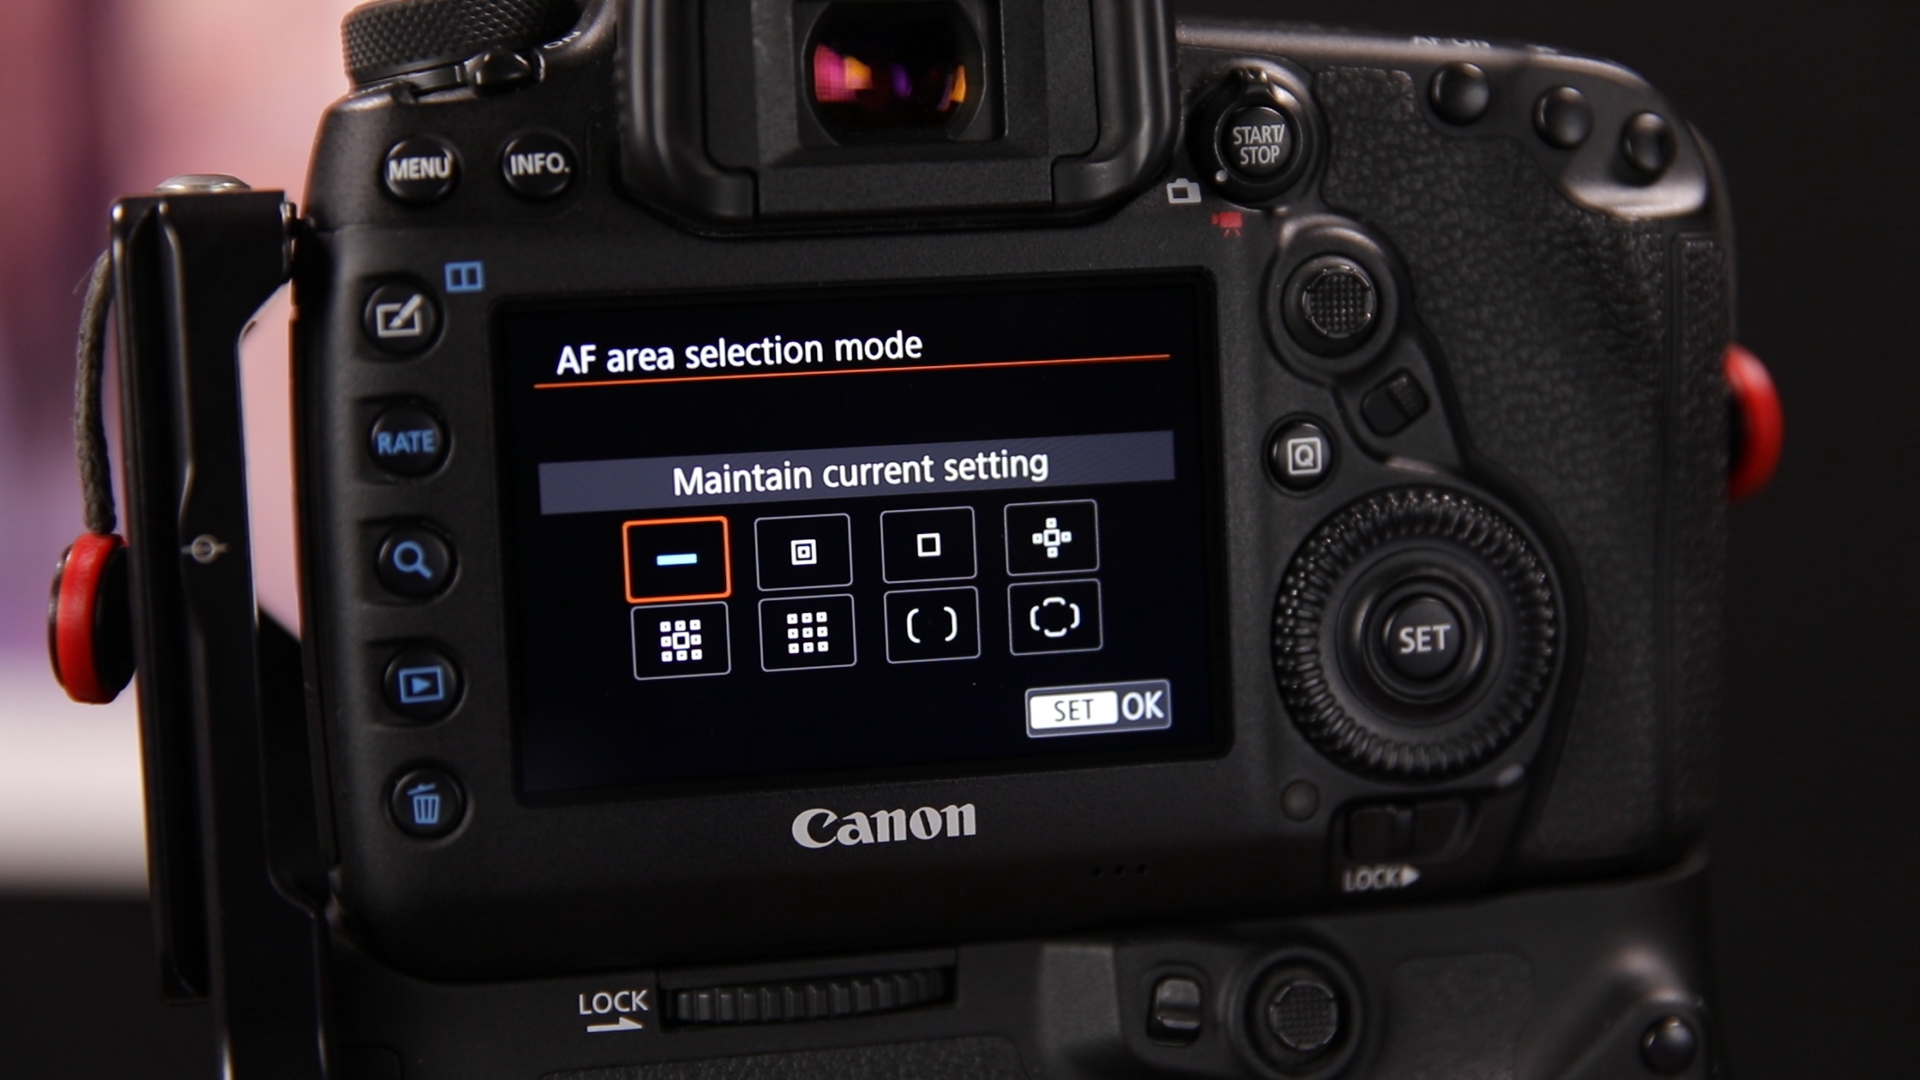
Again, I leave this on the “maintain current settings” (big dash) option, as I control the AF area through the registered AF point.
Personally, I can’t really envision a lot of reason I’d want to hard code the AF area mode here, as compared to using a registered AF point, as it’s certainly more cumbersome to step through the menus. That said, there are ways you cold leverage this with a little be more complicated AF control setup, such as using the DOF Preview button to switch between the normal and registered AF points.
Conclusions
Suffice to say, Canon’s AF system and the control the expose over it goes a bit further than most other cameras. Unfortunately, it’s also a bit of an esoteric feature set that I don’t see talked about a lot. It’s certainly not as sexy as dynamic range, megapixels, or frames per second. However, in many respects, I find it substantially more important in my ability to make images. After all, all the dynamic range in the world won’t save an image where I missed the subject I was after, or it’s out of focus because I wasn’t in the right tracking mode.
Of course, I’ve been talking about this in the context of more action oriented subjects; birds and wildlife. However, don’t dismiss the utility of registered AF points in more sedate settings.
Again, a lot fo my philosophy goes back to having a consistent camera configuration in the broadest range of situations, and this does that well. Even if you don’t use the second AF mode frequently, the system fundamentally is just two button focusing using the AF however you have the camera setup.
Comments
Hi Jason, thank you very much for this tip, its been maybe 2 years that im looking for this because a fews years back i saw somebody else talked about this setup, and since then, i reset my camera to factory default and was trying to put this back but to no preveil. It is very explained and easy to follow, thank you very much again.
Eric Peloquin