Points in Focus Photography

The Rocky Road to Video

When it comes to getting my head around video, I’m seriously reminded of Monty Python’s Spanish Inquisition sketch. Every time I think I’ve sorted something out or made progress, I find yet another thing, or three, that leave me feeling totally lost again.

I come to the world of video as a still photographer. In fact, it wasn’t until early this year, when Canon announced the 5D mark 3 that I even really considered shooting or working with video in any serious way.

When it comes to still photography, I feel as though I at least have a handle on what I’m doing. I may not always be as successful at what I set out to do as I’d like, and there are certainly many areas I have a lot of learning to do; but at least when it comes to being behind the camera, on the computer, or composing a scene, I don’t feel like a fish out of water.

My limited experience with video so far is that virtually none of what I thought I had a handle on applies. In many ways, about the only thing I find video and still photography have in common is that they both use cameras and they both capture light, outside of that it’s a very different can of worms.

To make matters worse, not only is it different, there’s a whole lot more to deal with as video has a number of extra dimensions that simply aren’t an issue or consideration for the still photographer. If taking a photo is a 6 variable problem (depth of field, shutter speed, exposure, composition, perspective/focal length, and lighting), video adds another dozen or so variables on top of that. Things that are simply not a consideration, like sound, or a consideration in one way, like camera motion, are first-rate considerations, and not always in obvious ways.

I’m not necessarily looking to become a Hollywood cinematographer, or start producing my own indy shorts. In fact, I haven’t really developed a real direction for where I want to go with video beyond using it as a complement to stills where video tells the story better or more concisely than stills or text does. At a minimum, to me this means at least having a functional understanding of how to light, shoot, edit and process video content. Moreover, not having the budget for a production company, means being able to do it all myself.

This brings me to what I’m trying to do with this series.

I’m sure I’m not the only photographer who’s decided to try their hand at video, and I’m not at all convinced I’m going to be able to make a successful go of this. Nevertheless, I thought it would be worth sharing some of the hurdles, thoughts, and solutions I’ve come across along my rocky road to video.

Though it’s certainly not the first thing that comes to mind when thinking about the rocky road to video, the post-production workflow is something that’s become an annoying thorn in my side even. I think part of this is organizational in nature and part is related to the way the software manages things.

I think, for me at least, there are two major factors in my discomfort with my video workflow. The first stems from the fundamentally different relationship between video clips, projects, and my portfolio and that of stills and my portfolio. A side effect of this is a fundamentally different way or organizing is that most of the video post-production software operates on a per-project level.

Okay, let me step back a second. I’ve come to video from still photography where tools like Adobe’s Photoshop Lightroom have provided a really simple, yet incredibly powerful workflow form camera to client. Everything I shoot goes into one big Lightroom catalog; from there things can be grouped dynamically or statically based on my needs. To me at least, this makes sense, regardless of whether or not the images are part of a specific project, or just random images. Either way, overall they’re more a part of my portfolio as a whole first than the individual project.

The most obvious way I see this, and admittedly it’s only a minor annoyance, is that every time I go to work on a new project, say a lens review, I have to create a folder for it, then entirely new projects in Prelude, Premiere Pro, and potentially After Effects, then go about my way. Admittedly, I could just have one big lens test project, and make everything separate but unconnected sequences and go that way, but that just seems off as well.

The second aspect that continuously bugs me is the lack of any real integration between Adobe’s video software. Coming from Lightroom, going between Lightroom and Photoshop is largely seamless. Photoshop can handle the RAW files natively and Lightroom passes along the settings. On the way back the PSD or TIFF Photoshop creates is seamlessly brought back into the Lightroom catalog to be managed though the library.

With Lightroom 4, Adobe improved its ability to handle video content by adding a native player, the ability to tweak the white balance, exposure, contract, and saturation, and even trim the clip. Not serious video features, but perhaps a step towards broader utility.

The first couple of weeks I was shooting video, I figured I’d give Lightroom a shot from the management side—I already knew it wouldn’t cut it for anything else. What stunned me more than anything else in that time was that while Adobe had added all those new features, they completely missed a couple of killer ones that made no sense not to have.

First, there’s no way to send a video file from Lightroom to Premiere Pro, not like there is to send a still to Photoshop. Quite honestly, I don’t really see why not either. Certainly there are users between the photojournalists, that Lightroom’s video features obviously are designed to cater too, and the video production people who wouldn’t use it at all.

Though I admit, the workload I was putting on Lightroom certainly is not the most standard. While I’m still playing with things, I’m shooting cards more in line with what a photojournalist might (a combination of video and stills) but I’m aiming the video more towards what a straight video person might be shooting (clips to be edited together to tell the story, as opposed to a self-contained clip). As a result, at least for now, I often have to sort some stills from the videos, and this is where Lightroom really falls down. With no easy way to get the videos from Lightroom into a Premiere Project, there’s also no easy way to filter them out during the import or send them to a different location.

Of course, Lightroom isn’t marketed as a video production tool, so it’s somewhat unfair to blame it completely for the lack of video production features. However, the last point, not being able to filter out the videos from the import, is really ridiculous to me.

Of course, to some degree, Adobe has a solution for this problem. Production Premium CS6, introduces Adobe Prelude—formally Adobe On Location introduced in CS5—the partial spiritual equivalent to Lightroom in the Adobe Video production chain.

Prelude is the first step, ingestion/capture stage of Adobe video chain. You don’t need to use it; in fact, for small projects it may not be very useful at all. Unfortunately using it shows one of the “kinks” in the video workflow that consistently drives me up a wall.

First, Prelude, like Premiere Pro, doesn’t manipulate the organization of the data on the disk. If you create a new bin in Prelude or Premiere Pro, to organize your clips, they stay where you put them on the disk originally. If you imported everything to f:\my project\src videos, but later decided to organize them further into bins, the files don’t move even though you’ve created bins for them.

Of course messing with the structure on the disk is problematic at best in this case. Unlike small image files, video clips could easily be spread out over a number of disks simply due to their size, and trying to move them wouldn’t be good. Then again, not being able to reorganize the files on disk though Premiere or Prelude, means when you do change them on disk you end up wasting time relinking the files.

Moreover, since Prelude stores that data in a .plproj file, and Premiere stores that data in its .prproj file, they don’t communicate it between each other. Making a bin in Premiere to organize the project doesn’t update the Prelude file to show the organizational change.

Not syncing or sharing the logical structure between Prelude and Premiere makes the workflow considerably more one directional than I’m used to. Again, it’s a minor complaint, and perhaps it’s something that will go away as I get more familiar with the planning → shooting → producing thought process, but it bugs me right now none the less.

With all the grumbling out of the way, here’s what I’ve come up with for the moment.

Other than doubling my efforts not to shoot split media cards, I’ve found no real acceptable solution to the problem of dealing with separating video and still data easily. This is frustrated by the 5D Mark 3’s behavior where it slows down writes to the slowest media in the camera, so it’s not even a real good solution to put all the video data on one card and all the stills on the other—not that the 5D Mark 3 makes it real easy to do that either. Of course, it doesn’t help that even fast SD cards are painfully slow when compared to mid-range CF cards.

When I do end up with a split media card, I’ve taken to manually moving the video files from the card to a folder on my desktop before importing the stills into Lightroom. From there I can either manually move the video files to their project folder, or ingest them though Prelude.

That brings me to Prelude. I’ve been half trying to get in the habit of creating prelude projects and using it for the ingestion step. Only I just don’t see a point to it for the kind of shooting I’m doing, or really anything where you’re not in a position to be the media manager, and even then I’m not sure it’s a good solution. Moreover, once I’ve started moving clips from Prelude to Premiere there’s really no going back to Prelude to do anything, so it’s not as if I can rename something in prelude and have that show up in premiere automatically.

Organizationally, I’m still working on what to do consistently. Right now, I’m doing something like the following.

  • Project
    • Project.prproj
    • After Effects project.aeproj (if needed)
    • Source Videos
      • Clip1.mov
      • clip2.mov
      • etc…

I’m organizing the source files either one of two ways. For real simple cases, I just dump than handful of clips in there unorganized; if there’s only a dozen or fewer files I don’t see a lot of point to making things more complicated. For a more extensive shoot, i.e. something with scenes or multiple cameras (not that I’ve gotten that far), I organize the source files by scene then camera if applicable; or the camera if it’s essentially only one scene.

One thing that is slightly frustrating about the situation is the naming of files. The 5D mark 3 only allows 4 customizable characters in the file name (and you lose the first one if you’re color space is set to Adobe RGB). For a long time I used my initials followed by an underscore (_). I’ve since changed to using the camera model followed by a letter designating whether it’s the A, B, etc. camera, though, for the moment, I only have an A camera unless I rent or borrow another body. Of course, one problem with this is that the camera designation this way doesn’t designate the camera used for the scene, but the body being used. I.e. you may shoot take one with the A body as the primary camera and the next take with the B body as the primary camera for thermal noise control reasons.

What I’d really like to see, and maybe this is just because I’m not “Hollywood” enough to see the battle tested utility in the way things are, is something that has a real good grasp on managing, naming, and organizing files in the beginning of the video workflow. Even better would be if it had a real nice by-directional integration with premiere, allowing the project file list to be organized independently of the on disk organization and reflect the changes in either place. Or I could just be completely off my rocker, and the way things are could be very intelligently thought out when you’re working on a serious production and I just don’t see it yet, on my down the rocky road to video.
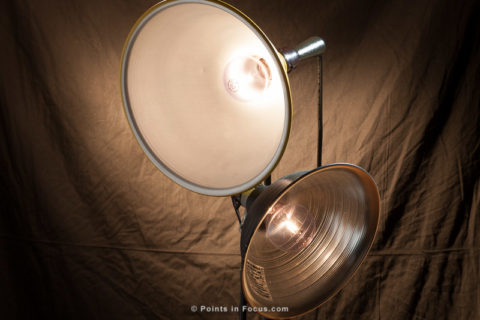
I originally wanted to call this zero-budget lighting, but then I realized it’s silly to work on that premise. There is one useful zero-budget light source, the sun, for everything else you need to spend some money or scrounge something that cost someone else money. That’s not to say you can’t go some way on a small budget, but there needs to be a budget none the less. Simply put, I think if you have any aspiration of producing something with a decent production value, you have to spend at least a few dollars on lights, and that’s what I want to talk about here.

“Pan” Work-lights

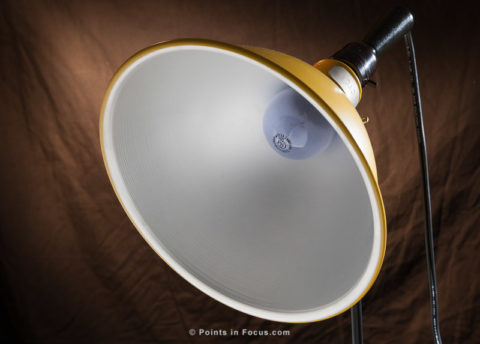
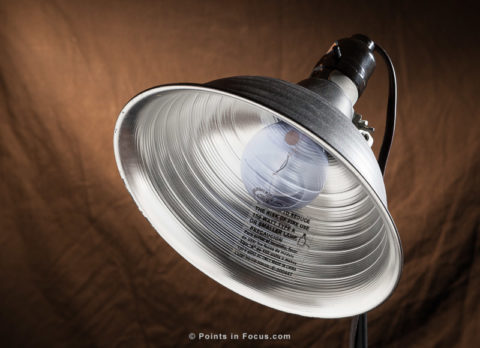
At the very bottom of the barrel, are the home-improvement-store clamp-on “pan” work-lights. They are cheap—mine cost me all of $5 apiece—produce light, and in a way that’s all that really matters. However, like most things, you get what you pay for; compared to higher tier lights, they have poor reflectors, no handles, short cords, and typically low power ratings. Some of those shortcomings can be worked around, sometimes easily, others not so much.

The typical 8″ work light, painted black to look more professional.

For example, fixing the short cord. The sockets in most if not all of these kinds of lights, can be disassembled simply by unscrewing, and the cord replaced with a suitable lamp cord and plug assembly of whatever length is needed. Or, you can just plug them in to an extension cord and be done with it.

Or consider the reflectors. They simply aren’t designed to produce an even beam. However, you can always whack a bit of heat resistant diffusion over the fixture, or remember always to use a frosted lamp instead of a clear one.

Even the lack of a handle can be worked around.

That said, the real problem in my opinion, is the inability to handle high power lamps safely. A 100W or 150W lamp may be perfectly passable for a tabletop still setup but my experience is that you need at least two times more than that for a key light for a video production. The simple reality is you need light, and lots of it, or you have to settle for highs ISOs and very shallow depth of field.

All that said, for $5 apiece, the hardware store pan lights are a decent, but not perfect, solution. I used them for a quite a while for still photography when I was first getting started, and they came back out when I first started playing with video. They’re certainly good to have, but they’re best used as background or accent lights.

Smith-Victor Adapta Lights

Taking a step further up the lighting pyramid, you have something like Smith-Victor’s Adapt Lights—or in my case Smith Victor’s Adapta Lights. In a way, they’re just overgrown hardware store lights, with a slightly bigger price tag—sort of. What your $35-45 buys you is a reflector designed to even out the beam and attach accessories, and a lamp holder rated and tested to accept 250W or 500W incandescent lamps.

A Smith Victor A10UL., from the 1970s or 1980s as they are now painted black. Even having been around all that time, the reflector and cord set are still in good condition.

The first part of the story is power. The Adapta-Lights are tested and UL listed to handle 250W lamps, with some listed for 500W lamps. Better yet, they stay manageable at those powers thanks to a handle for reaming them that stay’s cool.

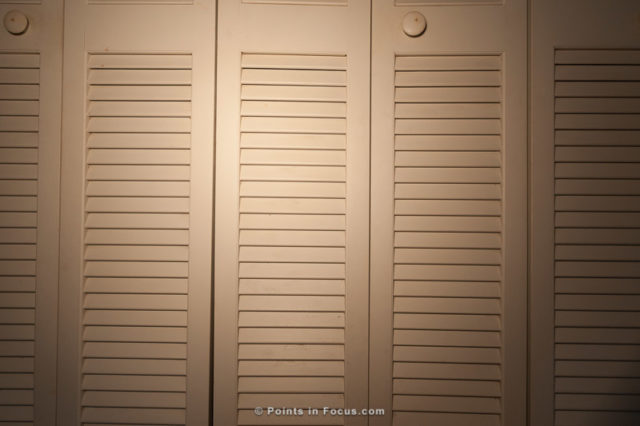
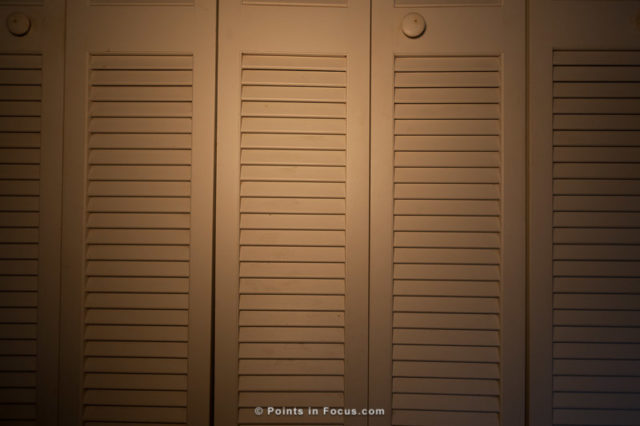
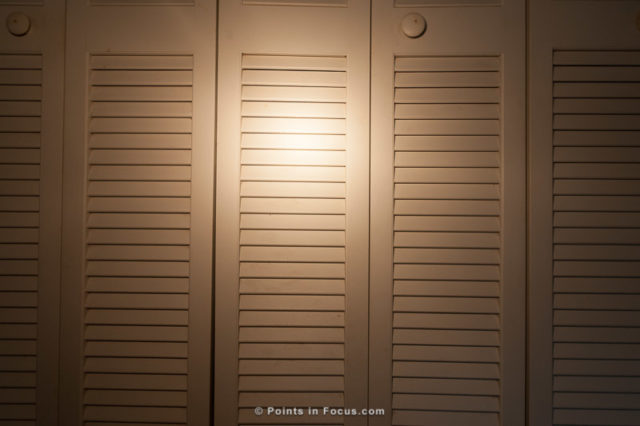
The second factor is quality of light. Simply put the reflectors in the Adapta Lights are much better at evening out the beam from even a clear lamp than the hardware store lights are. Though there is still a hot spot to some degree, the falloff is much smoother and better controlled.

Adapta Light with clear lamp.

Adapta Light with frosted lamp.

Hardware store fixture with clear lamp.

Hardware store fixture with frosted lamp.

Then there’s the line of accessories designed to mound directly to the reflector, from scrims to diffusers, to barn doors. All of which are fairly reasonably priced.

To me the real question comes down to production value. The hardware store work lights are cheap, and that’s a quantity that’s hard to beat. On the other hand, the Adapta Lights being designed for photo and video work are ever so slightly better and actually having the little touches that make things that much easier.

As far as lights go, either the hardware-store pan lights or the Adapta Lights are essentially 0 budget items. The difference really comes down to how much you can get out of them in terms of production value. Being able to safely handled 2 to 4 times more power means I’m not forced to shoot up in the ISO 3200 range but can drop down to 1600 or 800, which makes a difference. Moreover, the smoother beam means that if I have to shoot with lamps from the hardware store, I don’t have to care whether I can get frosted lamps at high wattages.

The Next Step Up

The next step up is to invest a couple of bucks into a real video/cinema light. On the low end, there are tons of choices.

Ryan Connolly, of Film Riot fame has shown and uses fixtures from Lowel. Lowel’s Omni-light provides a reasonable 500W source with a handle and variable beam from 16° to 53° for around $170-200. Industry giant Arri has a line of location Fresnels with powers from 150W to 650W and beam angles from 15° to 55°, priced between $280 and $380. On a slightly tighter budget, Smith Victor has a 600W fixed focus halogen lamp, that runs $130, and a variable focus one with a 22° to 36° beam for $141.

Moreover, all these halogen lamps turn out to be ever so slightly cheaper on the consumable side, as their lamps are generally rated for 100-200 hours of operation, compared to the 20-60 hours you can expect from the photo incandescent lamps.

Unfortunately, I haven’t made this jump yet, so I don’t have much to say about any of these specifically.

Budget Drawbacks

The real downside to budget lighting is heat. The simple reality is that video takes a lot of light, and incandescent lamps radiate most of their power as heat, technically infrared light, not visible light. Regardless of how well designed the lamp housing is at keeping itself cool, the subject is still in front of a good deal of IR producing lights, and will get hot.

To make matters worse, florescent lamps aren’t readily available at powers much higher than 150 equivalent watts. To get decent power levels, manufacturers pair multiple lamps in a single fixture. Likewise, I’ve yet to find a photographic LED source that can be screwed into an Edison base lamp fixture.

In the end, I think the best budget lighting kit draws a little from the various available sources—for example, lots of cheap hardware store fixtures for the background lights and a good fixture for the key light—especially given the number of fixtures you’ll probably find you need to light anything decently.

A while back, I linked to an Academy of Motion Picture Arts and Sciences study on “Solid State” Lighting. Specifically of interest to me was the simple fact that none of their tested “solid state” sources–which included CFLs, LEDs, and plasma technologies–reproduced colors the same way the tungsten lamps they claimed to be direct replacements for did. Worse yet, while the colors looked right to the eyes of the cinematographers, they were wrong on film and video, and not correctable in color grading.

Though my next-to-zero-budget video lighting setup is in no way cinema quality, there are still compelling reasons to want to move away from tungsten hot lights to more modern alternatives, such as CFL and LED. For me the biggest of those reasons is heat.

There’s a problem space here that’s not at all unlike the still photographers problem of balancing shutter speed, aperture, and ISO.

Even with the incredibly high ISO capabilities modern digital video cameras provide, video production still requires a tremendous amount of light to shoot. In many cases, I find it’s necessary to shoot at ISOs as high as 3200 and 6400 to get the needed balance in depth of field and exposure. That light, at least when it’s provided by tungsten sources mean heat, and heat means air conditioning.

Heat poses an interesting problem. If there is no need to record audio, then dealing with the heat is as simple as turning up the AC and running some fans. However, none of those noise sources can really be running when you’re recording audio. In the end, video needs light, tungsten lights are hot and require cooling, and cooling the set and subjects interferes with recording audio.

To a lesser extent, the secondary benefit of non-tungsten light sources is energy savings. CFL and LED sources are more efficient. They waste less energy as radiated heat, which saves money on cooling, but also lowers the amount of power the lights use directly. I can tell you from experience, I’m not especially fond of sitting in front of a 250W lamp for any length of time, never mind even being in a small room with a 500W or 1KW light that’s on for any appreciable amount of time.

Switching seems to make sense, and probably isn’t that big of a deal if you aren’t really critical about your equipment rendering colors. In the following series of images, I’ve exposed the same scene and color balanced them to render neutral whites. These test shots were made with generic hardware store CFLs, the kind of thing you might use if you were trying to get some kind of no-budget CFL lighting going.

2800K Tungsten (100W GE Reveal 2800K)
2700K CFL (42W/150W equivalent EcoSmart Soft White CFL)
6500K CFL (19W/75W equivalent Commerical Electric Daylight CFL)

Okay so going into this I didn’t really expect things to be prefect, and they aren’t; not even close. You’ll notice shifts in the blues and rends on the Maxwell house tin, and in the red cap on the Eclipse bottle. As well as in the writing on the Uncle Ben’s tin.

Is accurate color rendition really that important?

I think it is, especially since I rely on my equipment to be able to sort things out like getting colors right. This applies doubly so as I don’t want to light a person I’m interviewing then get to post and have to choose between them looking sickly or the rest of the colors in the scene not matching. It’s certainly enough of a problem to me to give me pause and keep me looking at light sources.

Unfortunately, I didn’t have access to any high (95+) CRI CFLs intended for photo lighting when I did this test, nor did I have any LED lamps available. I intend to revisit the issue in the future when I have a chance to try some of those light sources. Additionally I’ve been using more and more LED lamps as general room lighting and have become more comfortable with them as a continuous light source, so I’d also like to look at how well say LED flood lights might work as a low budget source.

The second problem with zero-budgeting many of these sources is simply that there are large design issues with them. For example, an 85W CFL, which produces the equivalent light of a 250-300W tungsten lamp, is almost 9 inches long. Compare that to a ECA (250W) or ECT (500W) tungsten lamp which is barely 6” long. Most tungsten fixtures have been designed to accommodate the short lengths of the tungsten lamps. For example, using an 85W CFL in my Smith Victor A80 Ultra Cool lights means the lamp projects well past the front edge of the reflector.

LEDs aren’t much better in many ways. The Phillips LED lamps(Affiliate Link) I’ve been using seem to be designed to throw more light out radially around the axis of the lamp, as opposed to in all directions evenly. The second problem is just finding suitably powerful ones. 200W equivalent CFLs are hard enough to find, but available, as they’ve become used for photography. 200W equivalent LEDs in a screw in form factor simply don’t seem to exist yet.

So where do things stand now?

Well for me I’m still using tungsten lamps in tungsten fixtures and suffering for the moment, I can deal with hot in short spurts. Moving forward on the low-budget end, I’ve been looking at some inexpensive LED arrays (like these(Affiliate Link)  or these(Affiliate Link) ) but I haven’t tested any yet. I’ve also been considering playing around with photo CFLs in my existing fixtures, however, at $50 a pop that’s, for the moment at least, a big gamble on a technology that’s already proven to be less than perfect.

If there’s one thing that’s clear to me, it’s that there doesn’t appear to be any panacea. LEDs and CFLs are coming and manufacturers are going to steadily improve them. At least I hope they will. But for the moment, I’m finding it hard to move away from tried and true tungsten.

Our cookie and privacy policy. Dismiss