The Grand Canyon: Southwest Adventure 2016
As if it was a lighthouse in the dark of night, the brilliant golden glow of the setting sun reflects off the unseen windows of the main dining hall on the North Rim. The building is unseen, buried in 100 foot high firs and pines that line the North Rim some 14 miles away.
It’s hard to talk about something like the Grand Canyon in a meaningful way. For those that get it; those that care; those that are willing to allow themselves to stand quite, humbled in the face of rock and water and air at the precipice, there’s little that really needs to be said.
For others, there are few, if any, words that can convey anything of value. They can come and stand at the precipice, and see only a tick in a box on a bucket list of places that merely visiting for a brief moment is felt sufficient to speak accomplishment.
This is my struggle when it comes to writing about the Grand Canyon. Anything I write seems to me to be either an echo of something already known, or merely noise demanding care or attention over something seen with little value.
In late October of 2016, I went with my family on a 2 week road trip around the American Southwest. This is the second part of my ongoing story. The first article talked a bit about the traveling aspects of the trip: driving and flying. This time I’ll be talking about the Grand Canyon.
Getting to the Grand Canyon, at least the National Park, is almost an adventure in itself. Our route took us from Las Vegas by way of I–40. A trip that takes about 4–1/2 hours.
If you’re up for a bit more of an adventure, or have a sense of history, you can bypass I–40 from Kingman, AZ, to Seligman, AZ, and drive a section of the famous historic US Route 66. Google Maps suggests that taking Route 66 instead of I–40 should only add about 15–20 minutes of travel time. However, if you’re stopping to take pictures or see the sights, it will take significantly longer.
We didn’t do Route 66, and I certainly feel a small twinge of regret for not having prepared for that in advance. Route 66 parallels the BNSF railroad’s southern transcontinental mainline, it’s of course, also a historical route in and of itself. Both offer a lot more potentially interesting photography for those inclined.
An Unremarkable Road to a Remarkable Place
Arriving at some places, you’re greeted by a herald of sorts. A grand vista or monument that sets the tone for what’s to come. At other places, you simply have no clue what you’re in for until you finally reach it. The Grand Canyon is a bit of both, depending on where you’re coming from and where you’re going.
Of all the ways to get to the Canyon, the road from the Williams is the least impressive. The road up to the South Rim from the East largely follows the course of the Little Colorado River, and gains some 3000 feet in elevation climbing onto the top of the Kiabab plateau. There are mesas and canyons in view the whole way.
The road into the North Rim is similarly impressive, skirting around the Vermillion Cliffs and climbing some 4000 feet to the North Rim.
The road from Williams is none of this. Leaving Williams, you gently descend about 1000 feet out of fir forests into high desert. There are no remarkable mountains, no impressive mesas, no bottomless chasms. Your only indication that you’re getting close to the Canyon is the change in surrounding terrain back to fir forests. Otherwise, the road is as straight as an arrow, and the grades are shallow enough to be virtually unnoticeable.
Visitors to the South Rim of the Grand Canyon National Park start or spend the bulk of their time in the Grand Canyon Village. This is the permeant settlement that houses the in park hotels, camping and RV parks, the visitor centers, range stations, and accommodations and utilities for the rangers and employees that live in the National Park.
I generally have a good sense of direction, but there are now two places that thoroughly confuse and disorient me. The first is Walt Disney World in Florida, the second is the Grand Canyon Village. Both places share a similar trait, lots of curved roads through forested areas that make it hard to maintain spatial orientation. In fact, perhaps somewhat shockingly, while driving around the Village, it’s quite difficult to actually see the Grand Canyon — much better views from a car can be had along the eastern approach on Desert View Drive.
The El Tovar Hotel
On this trip, we stayed at the El Tovar Hotel. It was built in 1905 by the Atchison, Topeka, and Santa Fe railway at the end of their 64-mile Grand Canyon branch. Incidentally, the train still operates today, though under the ownership of the Grand Canyon Railway instead of the AT&SF (which is now the BNSF), and the BNSF mainline still passes through Williams over the Grand Canyon Railway’s tracks.
In the past, I’ve also stayed at the Bright Angel Lodge, which is slightly less expensive than the El Tovar, and not quite as neat in a historical sense, but access to the rim is every bit as good.
Additionally there is the Kachina and Thunderbird lodges, nestled between the Bright Angle lodge and the El Tovar hotel along the same section of the South Rim.
My personal experience is that there’s a good deal of value in staying at one of these rim side lodges in the park. At least for me it enabled, and made easier, a number of opportunities that I otherwise wouldn’t have had without traveling alone, or waisting a lot more time.
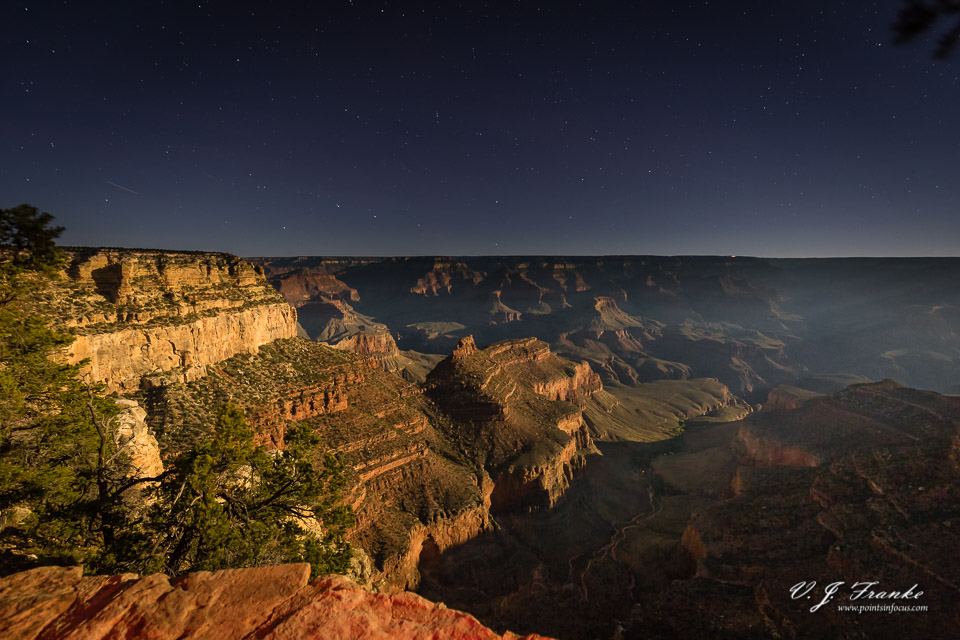
Specifically, I was able to do some night landscape photography without having to work around anyone else’s schedules. I could, literally a the drop of a hat, walk out the door to the room, and be shooting night landscapes. Or squeeze in a sunset shoot minutes before our reservations for dinner.
In any event, if you’re serious about photographing the Grand Canyon, you have to stay there, and you have to spend at least a couple of days there too.
Photography
I guess you could call this the meat of the post.
Photographing the Grand Canyon is both amazingly easy and extremely hard. Beautiful places always make beautiful pictures. And for those who just want a snapshot for a memory, it’s hard to mess up.
However, as a serious photographer, I want more. I suspect this is true for anyone else that’s a serious photographer as well. This is where the Grand Canyon poses a real challenge.
The size of the Grand Canyon poses a real challenge to a photographer to communicate. Consider this, while virtually all movies and TV shows that feature canyons in the American West, virtually none of them film at the Grand Canyon. Instead they film in smaller locations like the canyons in Canyonlands National Park in a large part because they provide a more manageable canyon in terms of the visuals.
Yes, you can shoot an image; even a big one, of the Canyon and still not really convey the scale. I have a 20×60″ pano print, made for a 300 MP stitched source file hanging on my wall, and even that doesn’t even begin to convey the real grandeur of the Canyon.
Landscapes
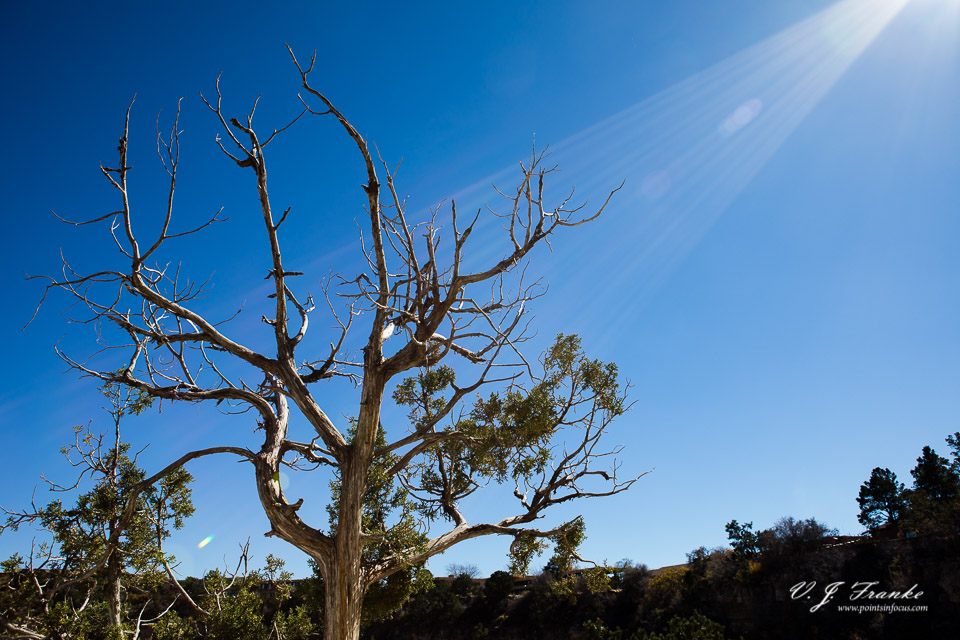
Fundamentally, photographing the Grand Canyon is pretty standard landscape photography. Yes, the subject matter is large and difficult to capture effectively, the major techniques and strategies are very much those of landscape photography.
To me, that ultimately translates to light and weather, which in turn dictate time and timing. And above all, a healthy dose of luck is required.
You might have noticed that the images in this post have pretty dull and uninspiring skies. It just so happened that the 3 days we were at the Grand Canyon a cool front had just passed through, and that meant that there wasn’t going to be much in the way of clouds. Bad luck.
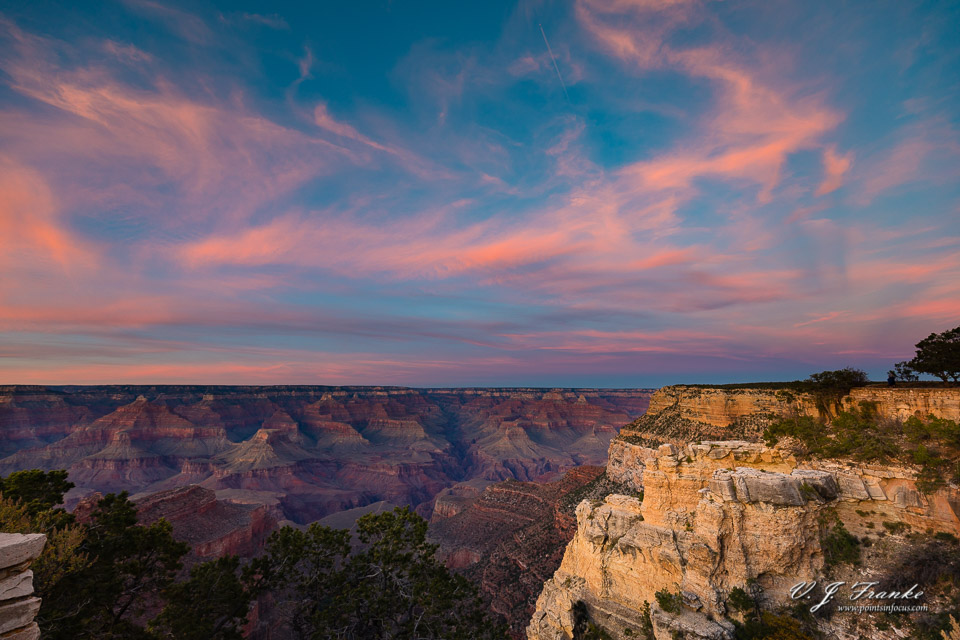
Four days after we left, we were in nearby Page, Az up the road — arguably at the start of the Grand Canyon itself — and thunderstorms rolled through along with them lots of interesting clouds and potentially skies. Never mind the weather itself, which would have potentially offered a lot of interesting opportunities.
This kind of variability in the weather is the necessitating factor behind spending time at the Canyon. Time gives you the opportunity for the weather to change. If it’s overcast, it can clear. If it’s clear, some clouds can crop up.
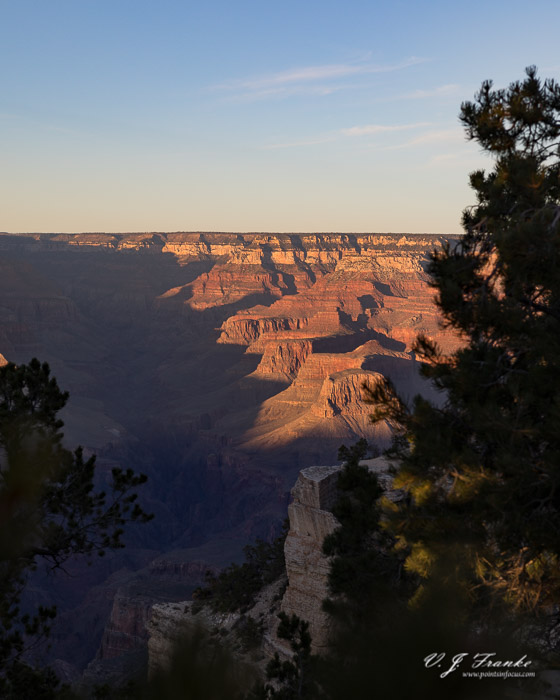
One composition challenge I do want to talk about is dealing with the orientation of the Canyon. Depending on where you are along the Canyon, and where you’re pointing your camera, can dramatically change the profile of the canyon you’re photographing.
For example, the South Rim hotels are all located in a small recess, or side canyon (if it was a shoreline, I’d describe it as a bight), off the main Canyon. Maricopa and Yavampi points jut out in such a way that you’re basically constrained to shooting across the Canyon. This imposes some interesting challenges to overcome in the design of your images.
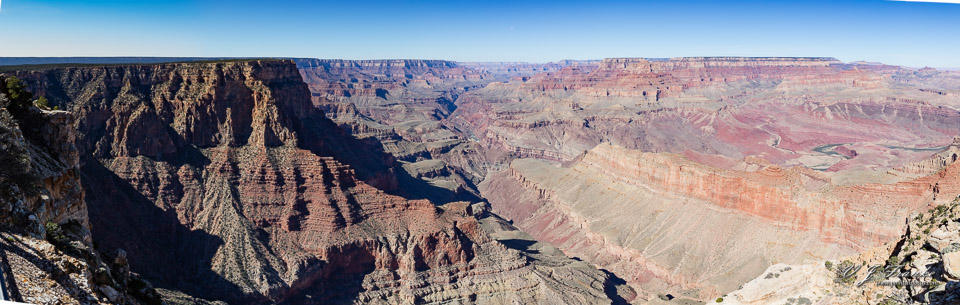
Given the scale of the Canyon, and the lack of reliable visual clues to its size, it becomes very difficult to convey a real feel for scale. If you’re shooting in the middle of the day — which okay, is generally not the way to get great landscapes — this is compounded by the light being above and behind you yielding generally flat and shadow free landscapes.
Getting out to either of those points, or to Hopi Point, or Pima Point, or many of the overlooks along Desert View drive to the east of the village area, gets you into a position to make images of the Canyon in profile instead of transversely.
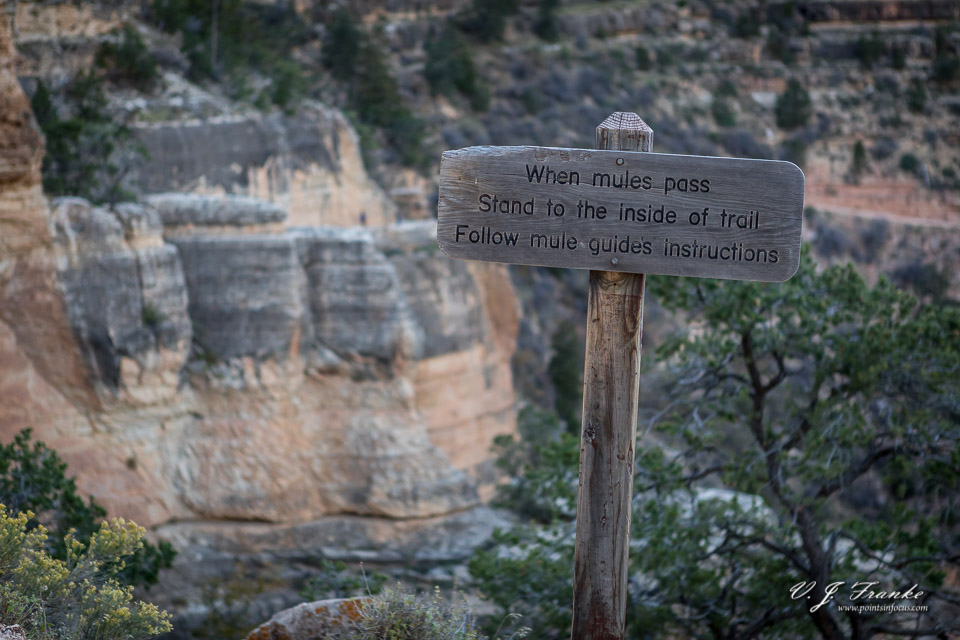
One other point that might be worth considering, though I can’t speak from personal experience on this, if you’re in good enough shape to do it, is to hike the South Kiabab Trail out to Ooh-Ah Point. Ooh-Ahh Point is about a 1 mile (~2 mile round trip) hike out to a promontory 600 feet below the rim, but with what’s essentially a 360° vista of the Grand Canyon. Given the topography of the area, images made there could be very interesting indeed.
As for landscape photography in the Canyon itself, in my very limited view and experience, it’s much more constrained. Most of the side canyons the trails follow are relatively narrow and steep, but not so narrow and steep to be interesting in the way say a slot canyon is. While I’m sure there’s some great imagery in the Canyon itself, you’ll have to work for it considerably harder than you would at the rim.
Wildlife
Some readers coming to this article potentially could be trying wildlife photography in a natural uncontrolled space for the first time while visiting the Grand Canyon.
There are two overreaching points I want to make regarding wildlife photography in wild spaces. First is a philosophical one. As wildlife photographers our job is to convey the beauty and power of wildlife to those looking at our images without harming that wildlife, or ourselves or other people, in the process. Ultimately, for me that means understanding something about the animals that I might encounter, their behaviors and the broader possible risks in the areas in question.
Moreover, it’s our job to insure that our actions don’t set the stage for future harmful interactions between animals in people visiting the same areas. Specifically this means not interacting with, or feeding, any wild animals you may be trying to photograph. While it may seem kind, or just an easy way to get an animal in the right place for a shot, it creates the foundations for potentially dangerous interactions down the line.
My second point, is that it’s ultimately it’s our own responsibility to be responsible for ourselves and our safety; at least to the extent we can be. Travel to various places in the US, and world, can potentially expose you to diseases, animals, and conditions that you might not be familiar with at home.
For example, in the Northeast, deer tics carrying lyme disease are prevalent, and as such you should be cognizant of where you can pick up ticks, and how to prevent that from happening.
In the case of the Grand Canyon, like much of the American West, there are at least 3 major infectious diseases that some animals can cary. The three that are called out especially by the National Park Service at the Grand Canyon are rabies, Bubonic plague, and Hantavirus. The odds of you contracting any of these are pretty slim to start with, and the Park Service monitors camp sites and areas frequented by people for signs that infectious animals may be in the area.
Additionally, larger animals are often much stronger and faster than most people assume they can be. And many animals, can render serious, and even fatal, injuries in defense of themselves.
Fortunately the easiest way to generally remain safe is to do what you already should be doing and remaining a healthy distance away from the animals in question. Remember, we have telephoto lenses that let us reach out and photograph something at a distance. We don’t generally need to get close enough to be bit, scratched, rammed, or trampled, just to get a shot.
Novice or expert, I always suggest doing your research on what potential hazards you may run into before you go. I also make it a point to do some research into the kinds of animals I may encounter (especially predators in the area) and any behaviors that might be useful; either as a warning or as an indication of something worth photographing.
One place to start with that research is the Grand Canyon’s own Wildlife database.
With all that said, wildlife, specifically birds, was one of the things that got me seriously in to photography. And wildlife is still something I’m always interested in photographing.
This was also a place where I wasn’t at all sure what to expect. On one hand, the first time I visited the Grand Canyon that Mule Deer could be found around some parts of the village and hotels. Additionally, small animals (like say squirrels) and most birds, don’t have a huge problem dealing with lots of people. On the other hand, larger animals tend to stay away from areas that are heavily trafficked.
I didn’t end up shooting a lot of wildlife imagery on this trip as a whole, or at the Grand Canyon specifically. Though remember, wildlife is always a luck driven pursuit; there are no guarantees.
As expected there was frequently Mule Deer around the hotel areas where there was at least some open space and grass to graze on. Tourist shots were certainly to be had, but there were no good opportunities for photography that didn’t have cars, people, or ugly fences in the backgrounds.
And as expected, there were also lots of squirrels, running around and diving over the edge and into a tree. I’m not a huge squirrel photographer, and due to the limited time constraints I had at the Canyon I didn’t spend any time trying for any images of them anyway.
Birds are something that I’m interested in, and did try to get images on when I could find them. Of course, all the standard bird photography problems apply at the Grand Canyon as they do anywhere else.
Most small birds are fast and generally quite active. Following them from tree to tree, or even trying to follow them as the move around a tree is a significant challenge. The Grand Canyon poses some interesting additional challenge as canyon drops off very sharply from the edge. In many cases, a bird in a tree now more than 10 or 15 feet away from the rim, would be significantly below the rim. This combined with frequent low walls and vegetation made it difficult to work from a tripod — though that might not have helped given the rate at which the smaller birds would flicking around from tree to tree.
One species I had really hoped to catch sight of was the California Condor. As of February 2017, there are 83 of these extremely rare and endangered birds in the wild population in Arizona and Utah combined. All condors are tagged, which does reduce their photographic interest, at least to me. Sadly I saw no condors in the areas I was in, or at all on the trip. Then again, wildlife is a pursuit of luck as much as anything else.
The biggest surprise for me, was running into a heard of Bighorn Sheep while hiking back up the Bright Angle trail.
In the end, the Grand Canyon is a spectacular place to visit. And as a photographer it poses a lot of challenges and rewards with great opportunities. That said, it takes time to really explore, and that was a luxury I didn’t have on this trip. We were there for what most people would describe as 3 days and 2 nights; though in practice we didn’t have a full 3 days due to arrival and departure times.
Doing it again, I personally would want to spend another full day or two at least. I didn’t get to go along Hermit’s rest road, or out to Yavampi point. Though I think there would have been good opportunities for photography in both places.
On our way out, we did stop at most of the overlooks along Desert View drive. But that was somewhat rushed; it was a travel day and we were on our way 5 hours east to Durango, Colorado.
Comments
There are no comments on this article yet. Why don't you start the discussion?