Photographing Fireworks: A Simple Guide
Fireworks can provide subject mater for interesting images, and shooting firework displays can be rewarding. In this guide, I’m going to look at some of the challenges of photographing fireworks and how to overcome them.
Challenges
In my experience there are a number of challenges that fireworks present to the photographer. Most of these can be worked around relatively easily, and some can be addressed with some post processing.
To start with, you likely won’t know the exact size and location of the display until after each individual burst goes off. Additionally the size, and height, of the display can change throughout the display. I’ve photographed shows that started with relatively low effects, then as the finale arrived moved to much larger and higher bursts than were being done earlier in the show.
My general approach to the problem of size and composition is to shoot with a looser framing than I know I ultimately want and crop the images in post.
Another challenge comes with balancing the differences in brightness that often occurs between the various firework types. Many blue fireworks that look spectacular to the eye, don’t translate nearly as well to the camera and come out quite dim. On the other hand, the bright white flash and bang type that seems to have become popular, produce a tremendously bright white flash which can easily overexpose.
I’ve never really found a good solution for the obnoxiously bright white flash/bang types. For me, at least, if the show starts in with them heavily, I generally just stop shooting (or toss the images after the fact).
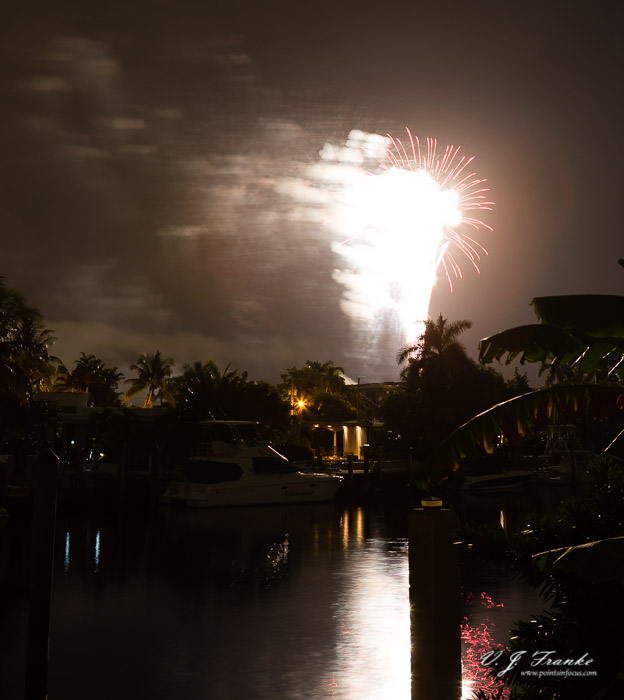
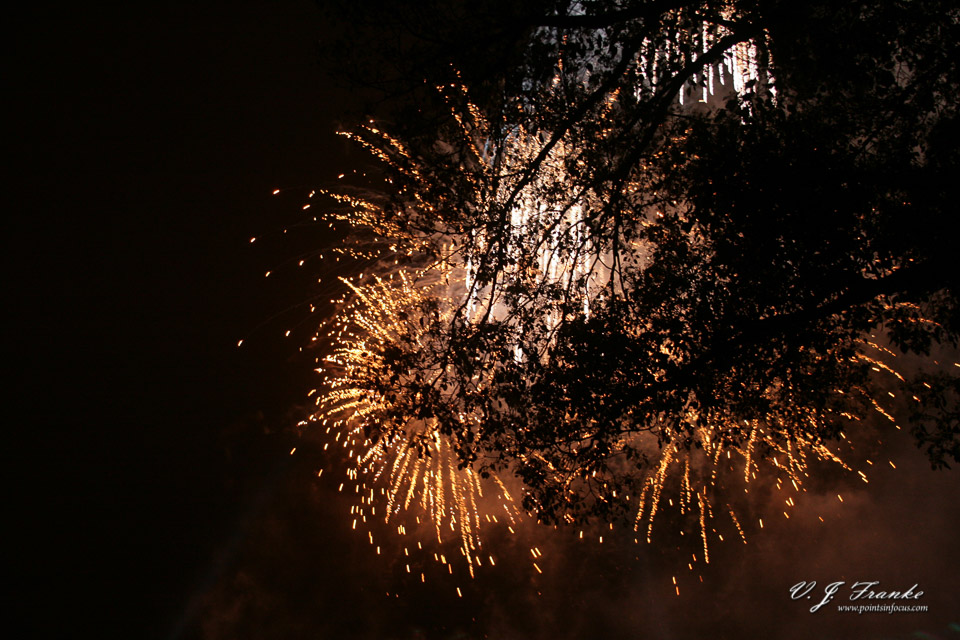
One additional challenge in getting good images is the smoke produced by the fireworks. If there’s a reasonable wind, this likely won’t be a problem. It doesn’t take a strong breeze to blow the smoke clear of the show, but in dead calm situations it can become a significant problem.
Smoke can be partially dealt with both in camera and in post. In camera, you can darken the overall exposure (typically by stopping down) to make the smoke darker and less impactful in the image. Of course doing this also darkens the rest of the elements in the image. A second approach is to adjust the brightness of the smoke in post processing. I’ll touch on this more in the Post Processing section.
Compositions
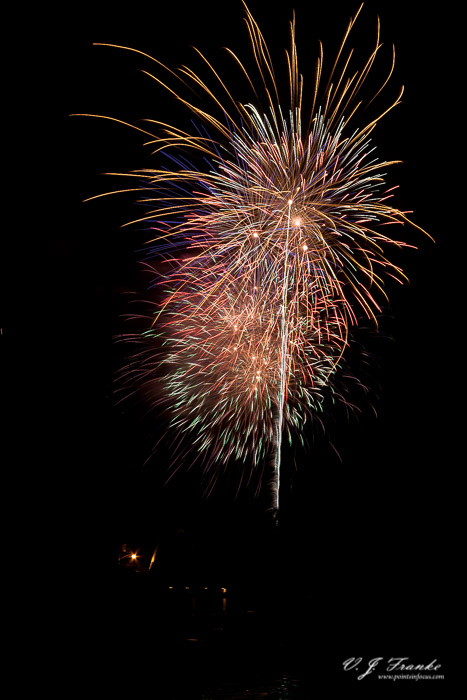
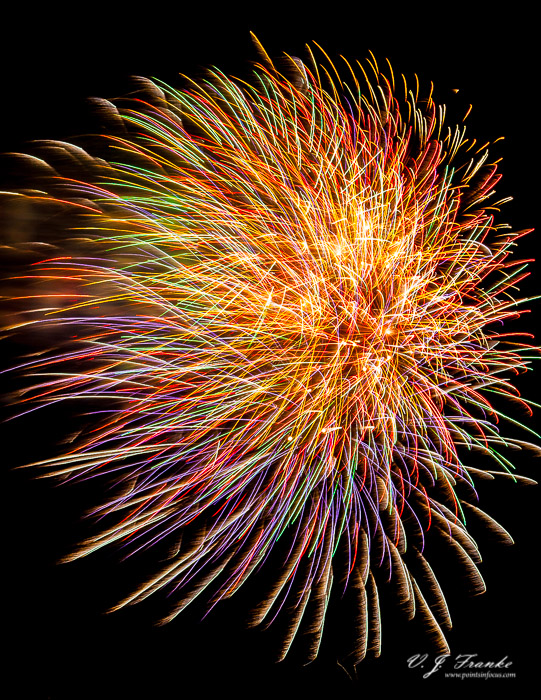
In my experience there are two ways to approach firework photography from an artistic perspective. One is as part of a broader scene or landscape, the other is to approach them purely on an abstract note.
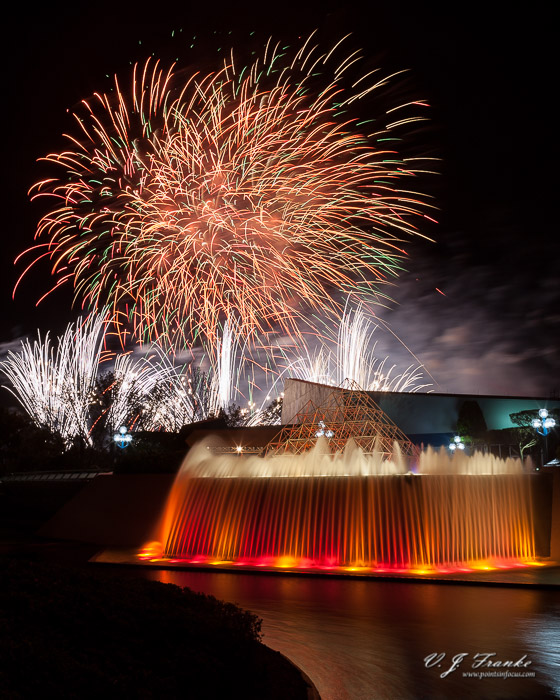
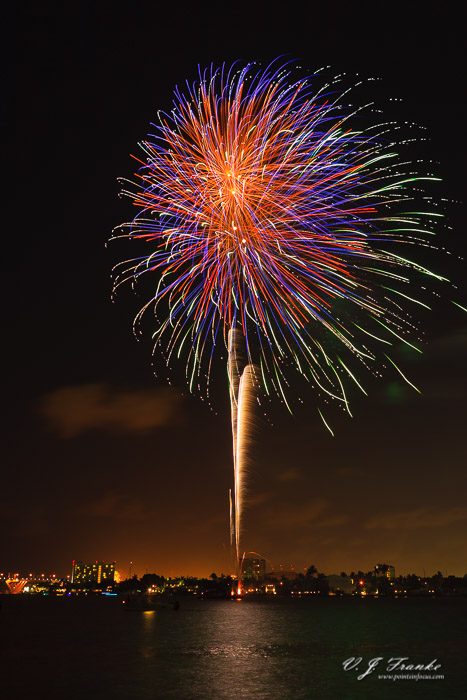
Like most things, fireworks as part of a broader landscape or setting I find tend to carry more lasting weight. Fireworks over an iconic monument or structure have a much deeper meaning than ones that are just in abstract. They can convey a sense of time (e.g. new years celebrations), and certainly convey a sense of place.
Of course, to integrate fireworks into a broader context, you have to have an environment that’s conducive to that to start with. When you don’t have that as an option, as is the case for me most of the times I’ve shot fireworks, then you have to do something else.
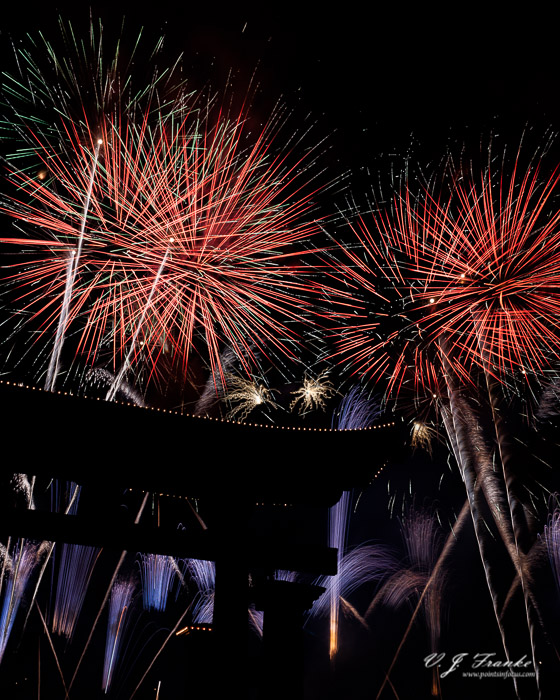
That something else for me is to punch in and focus on the color and patterns of the fireworks in the abstract. Ultimately, at least for me, the images are far less compelling in the long run, but they still can be interesting none the less.
The Gear You Need
It’s hard to put a together a complete list of gear you’ll need to photograph fireworks. This is, in part, because there are several approaches that work well that use slightly different gear. That said, there are a couple of basic requirements that you can’t do without:
- Sturdy Tripod
- Remote Release
Most techniques for photographing fireworks require longer than handhold-able exposures. Typically in the 8-15 second range, but sometimes longer. You can’t really do that without a reasonably sturdy tripod.
You don’t need a $1500 carbon fiber Gitzo, but you do need something that’s study enough for your camera. The first firework displays I ever shot, I used an old aluminum Manfrotto 055. It was big and heavy, and a modern equivalent in Manfrotto’s 190 series can be had for $150.
Actually, in the modern environment, the situation is even better as far as tripods go. With companies like Induro and Benro offering carbon fiber tripods in the $300 range that are pretty good deals in general.
Strictly speaking, the remote release isn’t necessary, but in general I find it’s quite useful.
On one hand, with the long exposures you shoot when doing fireworks, the remote release helps reduce vibrations from touching the camera. Additionally, depending on your technique it is a easy way to either lock the shutter release open or allow you to operate the camera from a more comfortable position.
Techniques
Over the years of doing this, I’ve basically come across two broad approaches to executing the actual photographs. The technique I prefer is the to do as little as possible during the show and push all the heavy lifting to post processing. Of course, I don’t come from a heavy background in film and photojournalism, so not getting it all done in camera is not a major concern for me.
A fired of mine, who both shot more film than I ever will and is a photojournalist, has a separate approach where he does almost everything in camera that I would do in post. The upside of this, is that there’s very little post processing that’s necessary to get a final shot. On the other hand you’re spending a lot more time working the camera while the show is going on. Plus in some cases, this demands some heads up for the show — which is something my friend often has when he’s covering a display.
In general, regardless of the technique you use, there are some points that are common.
- Focus your lens at infinity and lock the focus (switch the lens to MF)
- Compose somewhat loosely, especially above where the show is expected to be.
- Expect to need to recompose after the first frame
What about mirror lockup?
In my experience, mirror lockup isn’t necessary, and using it just slows everything down. Generally mirror lockup is really only necessary for exposures between about 1/60 and 1/2 second. For the 4 – 8 second exposures being done here, mirror slap shouldn’t be a problem. At least, it’s never been a noticeable issue in any firework images I’ve ever done.
A far bigger problem than mirror slap is physically touching the camera to relapse the image; hence the use of a cable release. Your hand is going to exert far more force on the camera than the mirror does, and there’s a much greater chance your touch will shift the composition slightly between exposures.
Continuous Release and Enjoy the Show
This is the technique I find I use and like the best. The idea in principal is shift the burden of compositing multiple independent bursts into a single frame into a post processing operation. As a result, once you’re set up and have made the first couple of test exposures to check composition, you can sit back and enjoy the show instead of fussing with the camera.
Camera settings are typically along the lines of the following:
- Manual exposure
- 4 – 8 second shutter speed
- f/8 – f/16
- ISO 100
- Continuous drive mode
During the show, lock the shutter release down. On most wired remote releases, there’s usually a lock for the shutter button that will keep it depressed.
If you don’t have a remote release, or yours doesn’t have a locking mechanism, you can gaffer tape a small wad of gaffer tape over the shutter release on the camera to keep it fully pressed.
Bulb and Black Card

The second technique I mentioned is to use the bulb capabilities of the camera to hold the shutter open, and a black card to cover the lens between the bursts you want to capture.
Camera settings are typically along the lines of:
- Bulb exposure mode
- f/8 – f/16
- ISO 100
The process is then to cover the lens with a black card or wand, so the sensor sees no light and open the shutter. Then for the bursts you want to capture, remove the card for the duration of the burst. This allows multiple bursts to be captured in a single frame without post processing.
One potential gotcha of this technique is that there’s no guarantee your actual exposures will be both consistently long and proper for the scene in question. This isn’t so much of a problem if the background and foreground are mostly blackness. However, if you’re trying to keep a consistent foreground at a proper exposure, this technique can be problematic at best.
Bulb and Process
This is a bit of a hybrid of both of the previously outlined techniques. With this technique, you make use of the bulb exposure mode to capture just the bursts you want, then stack them together in post to achieve the same final effect.
Camera settings would be the same as they are for the Bulk and Black Card technique. Additionally the same limitations on exposing for foregrounds applies.
Post Processing
 Regardless of technique you use, it’s almost a guarantee that there will be some post processing you’ll need to do. At a minimum this would just be cropping to get a better composition. However, if you’re compositing multiple exposures to form a single burst, this process can get significantly more complicated.
My workflow starts, the same as it does for all the rest of my photography, by bringing the images I shot into Lightroom.
I’ll make minor exposure tweaks to get the base images looking good to my eyes. This would be things like bringing the blacks up to remove excessive sky glow from the horizon. I won’t usually do a tremendous amount of work on the images in Lightroom, largely because when I bring them into Photoshop I can do a lot more tweaking there.
After I’ve made my minor corrections and decided on the images I want to composite, it’s time to start the compositing.
Compositing
I do my compositing in Photoshop, but you should be able to do something similar in any bitmap editor that supports layers and blending modes.
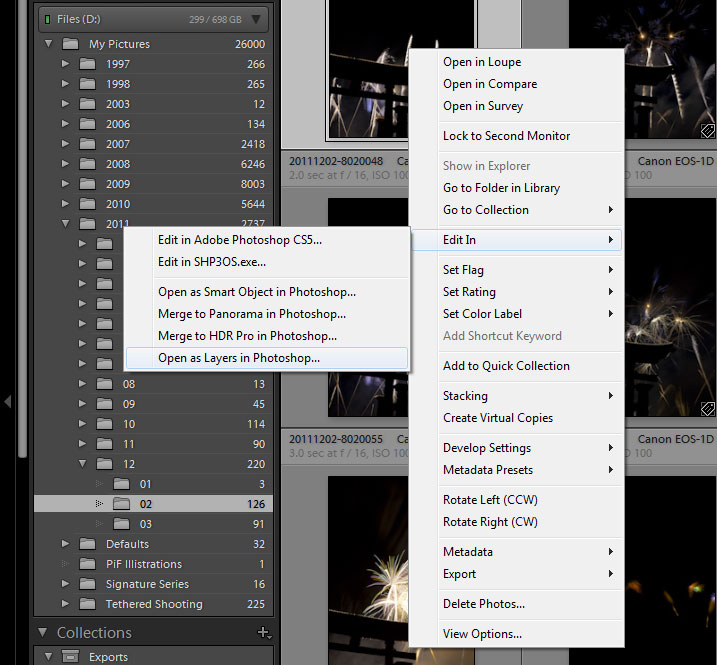
You need to bring all the images you want to composite into a single document as separate layers.
From Lightroom you can do this by ctrl or command clicking the ones you want to select them. Then right clicking on one of the selected images and selecting Edit In → Open as Layers in Photoshop.
Next, setup the bottom most layer. For images with a foreground or background you want to keep, make the bottom most image the image with the best foreground/background. For images that will be on black, make a new layer, fill it with black, and move it to the bottom of the layers.
Now for the compositing part. For each of the layers above the base layer adjust the blending mode. I find that screen and overlay are typically the most useful.
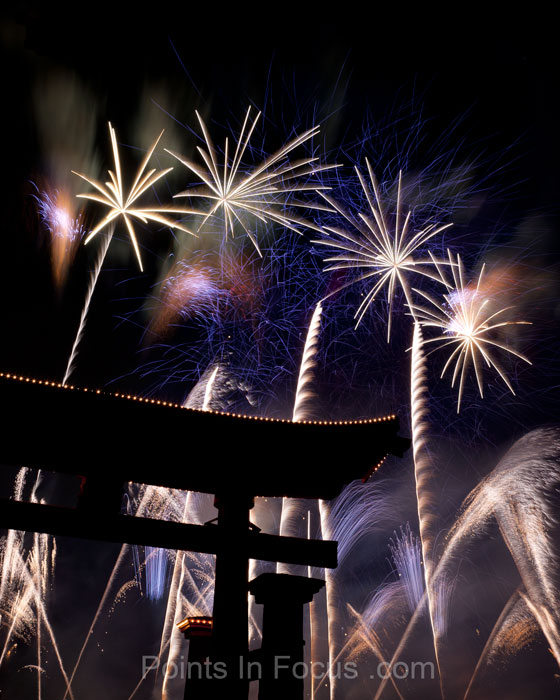
Photoshop’s screen blending mode looks at the color information for the layers and chooses the lightest color from all of the layers. For black and even dark images, the firework will always be the lightest color where the firework’s trail exists. As a result, the effect will be that the fireworks stay are laid over the background of the bottom most image.
Dealing with Smoke in Composites
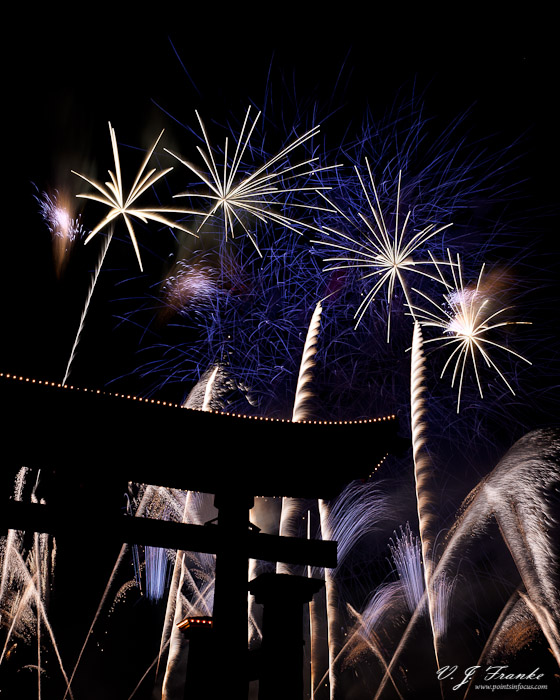
In my experience, smoke typically becomes a bigger problem in composited images. In these images, the technique I’ve found that works best, is to adjust the layer’s blending options in the Layer Style dialog.
For this typically you’ll want to partially blend the darker values of the layer being blended. (The smoke should typically be darker than the firework trails.) To do this, hold alt/option and drag the dark slider of the the This Layer slider until the smoke mostly disappears.
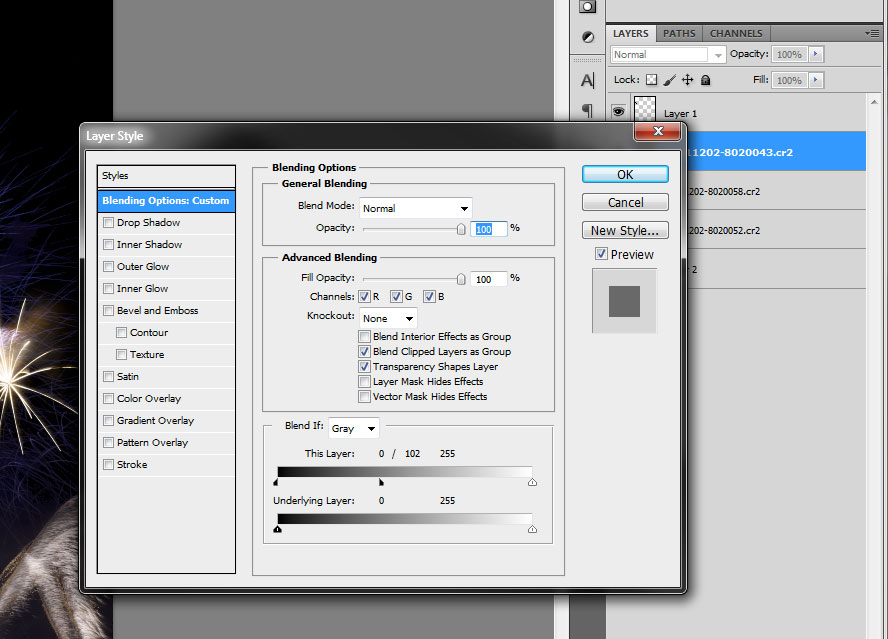
I wouldn’t recommend completely removing the smoke, as that tends to make the images look wrong. However, this technique can be used to reduce the smoke in the resulting image.
 |
 |
Unfortunately, this technique cannot be used on single images with bright backgrounds. For those you would need a background image that was smoke and firework free, that you could composite over.
Comments
There are no comments on this article yet. Why don't you start the discussion?