Camera Settings for HDR and Multiple Exposures
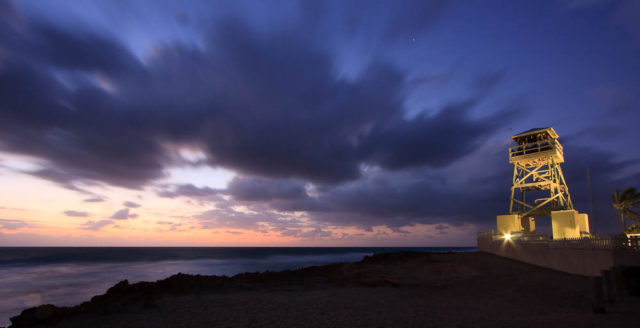
Summer, for many photographers it’s a welcome relief from oppressive cold and snow and a chance to get outside and start shooting again. For me, it’s the beginning of months of oppressive heat, humidity and bugs. That is, it’s time to start looking for ways to stay cool. One solution that still lets me go out is to shoot sunrise landscapes. Of course, that brings a couple of hurdles. First, that requires early, often very early for me-think 4 AM or earlier-wake up times. Second, the dynamic range between sky and earth often demands a way to compress to the dynamic range the camera can capture.

Historically this large dynamic range was dealt with using graduated neutral density filters. While in many cases they are still one of the best ways to compress the high dynamic range scenes. However, I find using graduated neutral density filters to have some drawbacks.
- First, they slightly less flexible than blending separate exposures together, as they can’t deal with peaks and valleys in the horizon.
- Good ones, like those form Singh-Ray, are expensive and you often need more than 1 to deal with changing conditions properly.
- Finely, they simply are one more thing to contend with while trying to work very early in the morning.
As such, I generally avoid them and work with bracketed shots and HDR techniques. Blending images after the fact works best, and sometimes only, when absolute alignment is maintained between frames. The key to doing that, aside from using a tripod, is insuring focus, zoom and camera position don’t change between shots.
I was reminded of all this by my recent early morning failings and coincidentally timed post from Moose Peterson discussing the Nikon AF-S 14-24 f/2.8 where he reminds us about the importance of focus not changing between frames:
If you’re shooting something like HDR or anything else where the camera is on a tripod, I highly recommend that you first let the camera auto focus. Once it’s auto focused on the subject, take the MA switch and set it to M. It’s such a wide lens it can search for a subject. Even the smallest, smallest change in focus can really mess up something like an HDR series of images.
While he is talking about the Nikon 14-24mm f/2.8 specifically, the same applies to any wide or ultra-wide angle lens and especially any wide-angle lens with an internal focus design (basically anything where the front element doesn’t move when you change the focus).

Unfortunately, the auto/manual focus switch is not something I tend use in general use and therefore is something that’s frequently ignored or forgotten when I need it. But there is another way.
Use the AF-On Button to Control the AF Instead of the Shutter Release
Some time back I wrote a Cool Camera Tricks article about using the rear AF-ON (or alternatively the AE lock) button to control the auto-focus system, it’s time to dig this back up. By decoupling the AF from the shutter release, I insure the camera won’t change the focus when I expose a frame and I no longer need to worry about changing the AF/MF switch.
This way, focus only changes when I push the AF-ON button and I don’t have to remember to flip switches on the lens back and forth constantly.
In addition, for this scenario, I turn the AF lock beep back on. In most cases I consider it annoying and unprofessional, but in this case it’s a lot better than trying to remember to look for the AF confirm light in the viewfinder. A simple beep when it’s very early is a lot more noticeable than a small light in the viewfinder as well.
Also, because the rear-button focusing technique wont prevent you from shooting if the image is out of focus, that some extra confirmation isn’t a bad idea. Effectively this makes the shutter release behave as if the camera/lens is in manual focus mode but it’s not and you still have the ability to press a button and it auto focuses.
Shooting now becomes straight forward.
Compose the image as you normally would, pressing the AF-On button to engauge the auto focus system and get things focused. When focus is achieved the camera beeps, and we’re ready to shoot. Now when you start the camera off shooting the burst, it won’t refocus and we don’t have to remember to switch the lens’s auto/manual switch either.
The following table shows what custom function to set for most Canon and Nikon cameras. Refer to your owners manual if you’re camera isn’t listed.
| Canon | ||
| Camera Model | Custom Function | Setting |
| D60 | 02 | 3: AE/AF, no AE lock |
| Rebel XT (350D), Rebel XTi (400D) | 04 | 3: AE/AF, no AE lock |
| Rebel XSi (450D) | IV, 10 | 3: AE/AF, no AE lock |
| Rebel XS (1000D) | IV, 9 | 3: AE/AF, no AE lock |
| 10D, 20D, 30D, 5D | 04 | 3: AE/AF, no AE lock |
| 40D, 50D, 5D Mark 2 | IV-1 | 2: Metering start/Meter + AF Start |
| 1D, 1D Mark 2, 1D Mark 2n | 04 | 3: AE/AF, No AE Lock |
| 1Ds, 1Ds Mark 2 | 04 | 3: AE/AF, No AE Lock |
| 1D Mark 3 | IV-1 | 2: Metering start/Meter + AF Start |
| 1Ds Mark 3 | IV-1 | 2: Metering start/Meter + AF Start |
| Nikon | ||
| Camera Model | Custom Function | Setting |
| D40, D40x, D60 | 12 | AF-ON |
| D50 | 14 | AF-ON |
| D70, D70s | 15 | AF-ON |
| D80 | 18 | AF-ON |
| D90 | f4 | AF-ON |
| D200 | a6 | AF-ON Only |
| D300, D700 | a5 | AF-ON only |
| D2X, D2Xs, D3, D3x | a5 | AF-ON only |
Normally I’d call it quits here, I’ve addressed the focus between shots issue and I could just say remember to set your camera up the night before. However, that just seems like a cop-out, and Canon makes it so easy to take this just that much further.
Read on to see how.

Easily Saving and Loading of Settings
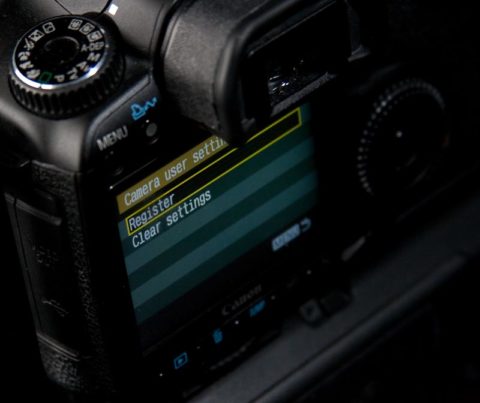
My second concern is all the other pesky settings; ISO, aperture, release mode, bracketing, etc. Canon provides such a nice solution on newer cameras that are above rebel class and many of their point and shoots with their Camera User Settings (Saving and Loading Camera Settings on the 1D series). (I’ve discussed in a previous Cool Camera Tricks as well.)
Unfortunately, Nikon users and Rebel series users are mostly out of luck here. Rebel users can’t save settings at all, and while Nikon users can save some of the settings (custom functions and shooting options), they can’t save everything. However, for those who do have these modes we can solder on to a slightly easier morning.
I use a multistage approach to setting my custom modes, the first pass is to have the camera set to the appropriate auto-exposure mode via the mode dial (M, Av, Tv, P or B), that has in turn I have set the camera to my baseline configuration.
Basically, everything is now set like it would be for every day shooting.
I store this in one of the C modes, giving me a place to start with a base configuration. Then I switch the camera to the C mode I just programmed and start changing settings to what I want from the base configuration. Finely when I’m done changing settings, I re-save the settings back to the C mode I’m working in.
Doing it this way doesn’t change your normal settings so you don’t have to change things back.
My Camera Settings
To me the key settings are ISO, aperture, auto focus settings, and bracketing. Here are the key settings I’m using in my sleepy morning landscape custom mode and why I choose them.
- ISO 100
- Aperture Priority
- Aperture to f/11
- +/- 1 stop AEB
- Pick a release mode
- One Shot AF
- Auto focus confirmation beep to on (Beep)
- Custom Fn. III-7 Mirror Lockup set to 1: Enable
- Custom Fn. IV-1: Shutter button/AF-ON button to 2: Metering start/Metering + AF Start
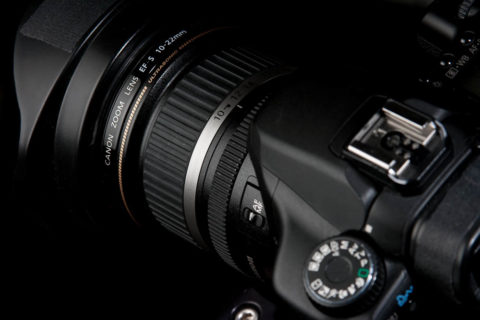
The first consideration is for the things that directly effect exposure and metering (points 1-3). These are solid starting points for landscapes in general. Keep in mind the aperture you want to choose may very depending on your lens and style. For my EF-S 10-22mm f/3.5-4.5 USM, I find that f/11 is a reasonable place to start and a safe place to be in the event I forget to change things, there’s both enough DoF for keeping most things in focus, and I’m not moving too far away from it’s sweet spot.
The second consideration, (point 4) is to address the bracketing so I can deal with the large inherent dynamic range. Often I’ll end up using 1-1/3 to 2 stops, but 1 is a safe starting point and again, I’m looking for default settings that are safe enough that if I forget to change something there’s still a good chance I’ll get a decent image.
Next, to address the release mode (point 5). This is a matter of preference to some degree. In single shot mode, the camera (EOS 40D in this case, will fire a single frame each time you press the release. With the camera set to continuous release (either high or low), the camera will fire the 3 shot bracket while the shutter release is held down then stop. With the camera in either of the timer modes, after the shutter release is pressed it will wait 2 or 10 seconds and then fire the 3 shot burst.
If you have a cable release any of the options work, but single shot or continuous give you more control over exactly when each frame is exposed. If you don’t have a cable release, it’s best to use one of the timer modes.
Most of this type of work will be done using exposures in the range where mirror-slap induced vibration can affect sharpness, though how much it will affect things is dependent on many factors. Just to be on the safe side though, I use mirror lockup and a sturdy tripod for this type of work (point 8).
Point 9 is the settings for using the AF-ON button; this is the key bit where I get around having to remember to switch the AF/MF switch on the lens constantly.
Before you save these settings, remember to change any other options that you find you use or might find useful. One thing that might be useful is to change the camera’s sleep timeout to something longer than you usually would use. The way Canon implemented Camare User Settings, the camera will restore the settings saved in the C mode when the camera wakes up after, because of this I keep my C modes programmed with long sleep timers so they don’t go resetting changes I made while shooting.
Incidentally in the time since I started writing this post, Moose Peterson has put up a video blog post on using Split ND grad filters both at the time of capture and in post processing. For further reading on using split ND filters (and a lot of other cool filters) also check out the Singh-Ray blog.
Edit: Corrected error about capabilities of EOS 1 series bodies.
Comments
Great article!
To my great dismay, I discovered that Nikon — in their infinite wisdom, made it impossible to use bracketing and multiple exposure concurrently on the D90. Other than that and the lack of an external mic jack, I love my D90.
I shoot with rear AF-ON on exclusively, except for when shooting video. In which case, the AE Lock is useful for locking in an exposure so that auto-exposure doesn’t change the brightness or darkness of a scene when the light changes.
We are very foruntate to have such amazing technology at our fingertips. What would Ansel Adams have been able to do, if he choose to use a DSLR or a digital back on a medium format camera? Its up to each of us to be the next Ansel Adams.
Thanks.
Dear Sir, I read your article and I am curious: Is it possible to shot three continous photos with 2 s time mode and mirror lockup enable on one single release? I have canon 80d and I am able to shot only one photo on one single release, with mirror lockup enable and 2 s time mode? What do I do wrong? Thanks
@Honza,
Sorry, no. What you’re trying to do won’t work the way you’er trying to do it. If you had a 1DX that supported, “Mirror Down w/ SET” you could, but that’s not available on the 80D.
As a work around, what you can do is use Live View as a replacement for Mirror Lockup. When you’re ready to shoot, hit the live view button, then trip the shutter release. Live view will cause the mirror to lock up, and in 2s drive mode, the camera will fire off all of the shots in the bracket automatically without dropping the mirror between them.